Game Consoles and Other Devices: Difference between revisions
No edit summary |
Added Echo directions |
||
| Line 18: | Line 18: | ||
== Finding the MAC Address of your Gaming or Other Device == | == Finding the MAC Address of your Gaming or Other Device == | ||
=== Amazon Echo === | === Amazon Echo === | ||
'''Note: You will need to register the MAC address of this device, which you will get during step 9, on the [http://mydevices.wpunj.edu My Devices Portal] before step 10 | '''Note: You will need to register the MAC address of this device, which you will get during step 9, on the [http://mydevices.wpunj.edu My Devices Portal] before continuing to step 10.''' | ||
To locate the MAC address of your Amazon Echo device: | To locate the MAC address of your Amazon Echo device: | ||
| Line 26: | Line 26: | ||
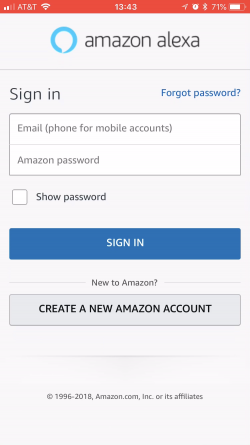
<LI> Open up your Amazon Alexa app and sign in if you haven't yet. | <LI> Open up your Amazon Alexa app and sign in if you haven't yet. | ||
<div class="toccolours mw-collapsible mw-collapsed" style="width:500px"> | <div class="toccolours mw-collapsible mw-collapsed" style="width:500px"> | ||
[[File:Echo settings 1.PNG|center| | [[File:Echo settings 1.PNG|center|250px]] | ||
</div> | </div> | ||
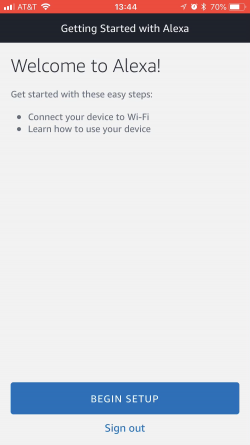
<LI> Once logged in select '''Begin Setup'''. | |||
<div class="toccolours mw-collapsible mw-collapsed" style="width:500px"> | |||
[[File:Echo settings 2.PNG|center|250px]] | |||
</div> | |||
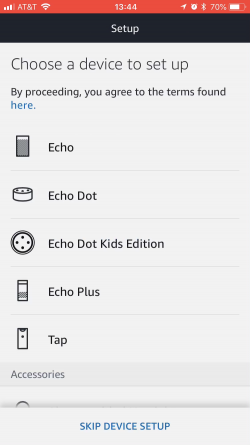
<LI> Choose the device you are trying to set up. | |||
<div class="toccolours mw-collapsible mw-collapsed" style="width:500px"> | |||
[[File:Echo settings 3.PNG|center|250px]] | |||
</div> | |||
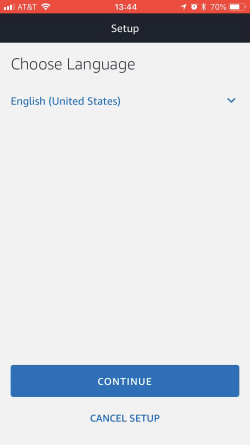
<LI> Select the language. | |||
<div class="toccolours mw-collapsible mw-collapsed" style="width:500px"> | |||
[[File:Echo settings 4.PNG|center|250px]] | |||
</div> | |||
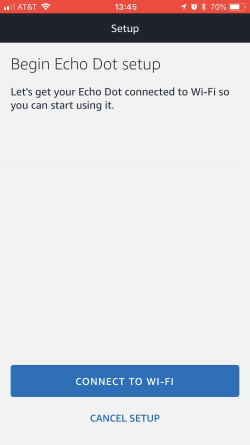
<LI> On the begin set up page, select '''Connect to Wi-Fi'''. | |||
<div class="toccolours mw-collapsible mw-collapsed" style="width:500px"> | |||
[[File:Echo settings 5.PNG|center|250px]] | |||
</div> | |||
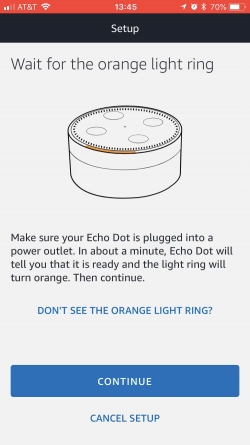
<LI> Follow the steps on the app to power on your Echo then hit '''Continue'''. | |||
<div class="toccolours mw-collapsible mw-collapsed" style="width:500px"> | |||
[[File:Echo settings 6.PNG|center|250px]] | |||
</div> | |||
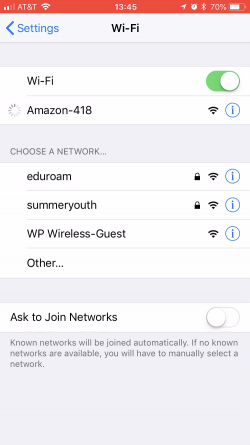
<LI> Connect to the Wi-Fi network of the Echo device. It should say Amazon or Echo in the name. | |||
<div class="toccolours mw-collapsible mw-collapsed" style="width:500px"> | |||
[[File:Echo settings 7.PNG|center|250px]] | |||
</div> | |||
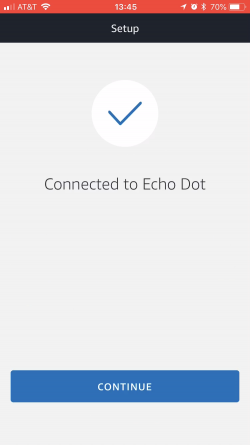
<LI> Once your connected to the Echo tap '''continue'''. | |||
<div class="toccolours mw-collapsible mw-collapsed" style="width:500px"> | |||
[[File:Echo settings 8.PNG|center|250px]] | |||
</div> | |||
<LI> '''On this step you will need to register the MAC address of this device, which is at the bottom of the screen (you may need to scroll down), on the [http://mydevices.wpunj.edu My Devices Portal] before continuing to step 10.'''. | |||
<div class="toccolours mw-collapsible mw-collapsed" style="width:500px"> | |||
[[File:Echo settings 9.PNG|center|250px]] | |||
</div> | |||
<div class="toccolours mw-collapsible mw-collapsed" style="width:500px"> | |||
[[File:Echo settings 9 part2.PNG|center|250px]] | |||
</div> | |||
<LI> After you've registered you MAC address and selected WP Wireless-Guest tap "connect". | |||
<div class="toccolours mw-collapsible mw-collapsed" style="width:500px"> | |||
[[File:Echo settings 10.PNG|center|250px]] | |||
</div> | |||
<LI> Your Echo will attempt to prepare it self. | |||
<div class="toccolours mw-collapsible mw-collapsed" style="width:500px"> | |||
[[File:Echo settings 11.PNG|center|250px]] | |||
</div> | |||
<LI> Once the preparation is complete your device is ready to use. | |||
<div class="toccolours mw-collapsible mw-collapsed" style="width:500px"> | |||
[[File:Echo settings 12.PNG|center|250px]] | |||
</div> | |||
</OL> | </OL> | ||
=== Amazon Fire === | === Amazon Fire === | ||
Revision as of 15:06, 20 August 2018
Once registration is complete, Gaming Consoles and other Devices can connect to either the wired network or the WP Wireless-Guest network.
Registering A Device
- Log in to My Devices using your William Paterson University credentials
- Click Add
- For "Device Name" enter the type of device you are registering. (Ex. Xbox One, Roku, Amazon Firestick, Etc.)
- For "Device ID" Enter either your wired or wireless MAC Address. (example - AA:BB:CC:11:22:33) See below for instructions on finding your MAC Address.
- For "Description" You can put whatever you'd like here, such as "Wired" or "Wireless".
- Click Submit. Your device should now say pending. (your device will still show "Pending" even after it is connected)
- Fully shutdown and restart your device. Make sure it did not just go into rest or sleep mode. You may need to disconnect from its power source to accomplish this.
- Once the device is back on, connect your device to the wired network or the wireless WP Wireless-Guest network
Finding the MAC Address of your Gaming or Other Device
Amazon Echo
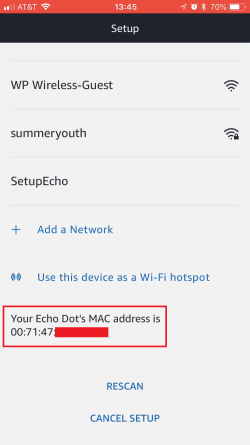
Note: You will need to register the MAC address of this device, which you will get during step 9, on the My Devices Portal before continuing to step 10.
To locate the MAC address of your Amazon Echo device:
- Open up your Amazon Alexa app and sign in if you haven't yet.
- Once logged in select Begin Setup.
- Choose the device you are trying to set up.
- Select the language.
- On the begin set up page, select Connect to Wi-Fi.
- Follow the steps on the app to power on your Echo then hit Continue.
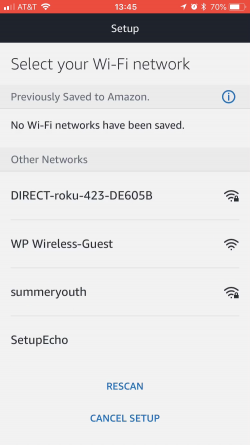
- Connect to the Wi-Fi network of the Echo device. It should say Amazon or Echo in the name.
- Once your connected to the Echo tap continue.
- On this step you will need to register the MAC address of this device, which is at the bottom of the screen (you may need to scroll down), on the My Devices Portal before continuing to step 10..
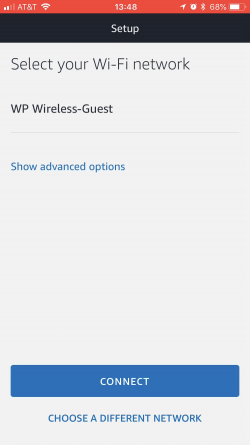
- After you've registered you MAC address and selected WP Wireless-Guest tap "connect".
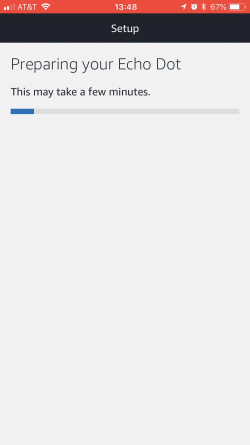
- Your Echo will attempt to prepare it self.
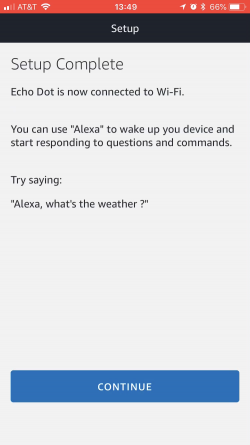
- Once the preparation is complete your device is ready to use.
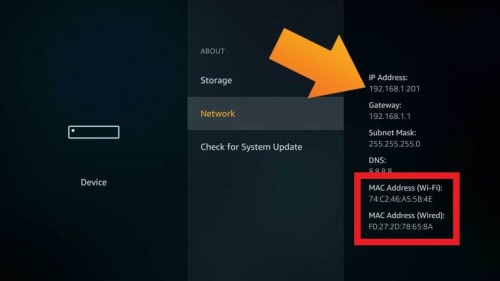
Amazon Fire
To locate the MAC address of your Amazon Fire Device:
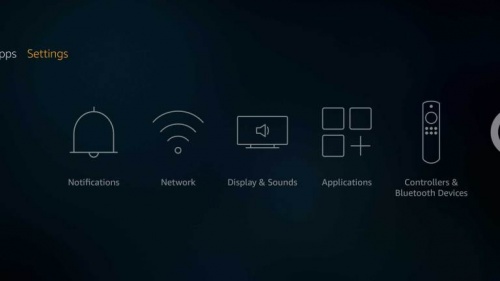
- Go the main menu on your Fire Device and select Settings.
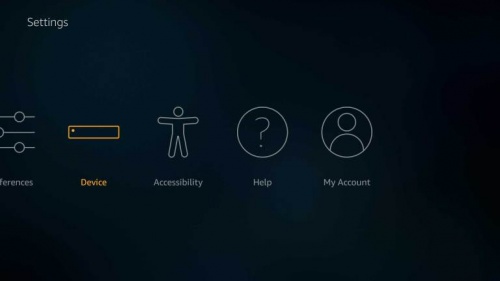
- Go to the right and select Device.
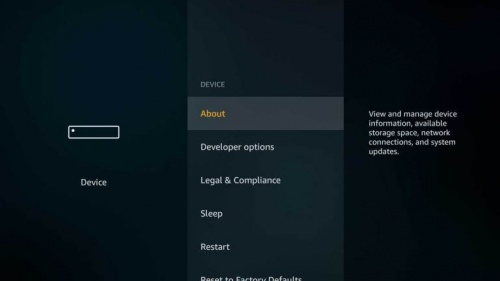
- Select About.
- Select Network and you will see the MAC address's of your device.
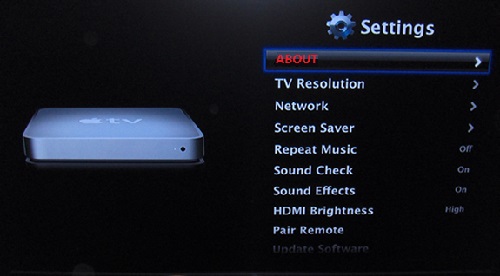
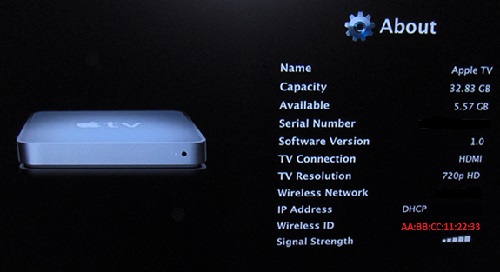
Apple TV
To locate the MAC address of your Apple TV:
- Go to the main menu on your Apple TV and then select Settings.
- Then click About.
- Here you can find the MAC Address, listed as either the Wireless ID or Ethernet ID (depending on the connection you are using).
Chromecast
- Only works for Gen 2 or later
To locate the MAC address of your Chromecast device:
- Go to the Google Home app on your Android or iOS device
- Tap on Devices
- Select your Chromecast
- Tap the '3 dot' icon for your device and select Device Settings.
- This is where you will find your mac address.
Nintendo 3DS
To obtain the MAC Address from a Nintendo DS, you must first insert a Nintendo Wi-Fi Connection compatible game and access the WFC Setup Utility.Please note that the exact steps to access the setup utility varies by game.However, the setup utility is a standard menu, included with all WFC-compatible games.
- After accessing the utility, tap "Options."
- Then tap "System Information."
The MAC Address and Nintendo WFC ID will be listed on the screen.Unless the game player has successfully connected with Nintendo Wi-Fi Connection, the WFC ID will be blank.
VideoService "youtubehd" not recognized.
Nintendo Wii U
To find the MAC address for your Nintendo Wii U follow the following three steps:
- Go to system settings
- Go to Internet
- Go to view MAC address
MAC address will be displayed in the middle of the screen:
Nintendo Wii
To locate the MAC address of wired and wireless cards on a Wii:
- Click on the Wii button in the bottom left of the main channel screen
- Click on Wii Settings
- Go to "Internet" on page 2
- Click on "Console Information"
The MAC address should be displayed above the LAN Adapter MAC address.
Here is a video with step by step instructions to find the MAC address on a Nintendo Wii:
VideoService "youtubehd" not recognized.
PlayStation 4
To find the MAC address of your Sony PlayStation 4, follow these steps:
- Navigate to the settings icon on the dashboard of your PS4
- Select the system icon from the list
- From the system page select System Information
- In System Information, you should see your PS4’s MAC address
Here is a video with step by step instructions to find the MAC address on a PS4:
VideoService "youtubehd" not recognized.
PlayStation 3
To find the MAC address of your Sony PlayStation 3, follow these steps:
- From the PS3 main menu screen
- Navigate to the Settings icon (located on the far left).
- Press the "X"button.
- Navigate up/down until you see the System Settings icon.
- Press the "X"button.
- Scroll up/down until you see System Information.
- Press the "X"button.
Here is a video with step by step instructions to find the MAC address on a PS3:
VideoService "youtubehd" not recognized.
PlayStation 2
Original
To find the MAC address of your Sony PlayStation 2 you will need the Network Adaptor connected to the PS2 and you will need the disc that came with the Network Adaptor. Then follow these steps:
- Power up the PlayStation2 and load the Network Adaptor Startup Disc, once it has loaded, select"ISP Setup" and press X on your controller.
- The ISP Setup will begin to load, and you will be presented with a license agreement. Select Agree and press X to continue.For connection type, choose "Local Area Network (LAN)" and press X to continue.
- Select "Automatic Configuration" and press X to continue.
- At the connection test screen, select "Advanced" and press X to continue.
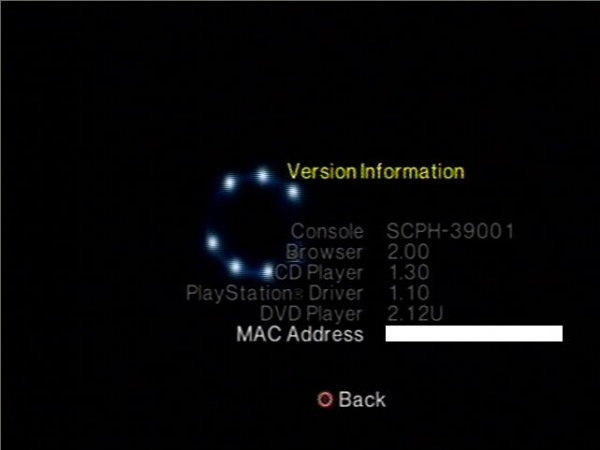
- At the "Advanced Broadband Settings" screen, make sure "Automatic" is selected.While you are at this screen, make note of the MAC address at the bottom.
Here is a visual of the screen in which you can locate the MAC address for your PS2; you can find your PS2’s MAC address where the white rectangle is located:
Slim Model
The process differs slightly with the slim version of the PS2.With the slim version one merely has to follow these three directions:
- Turn on the console without a game in the tray.
- Press the triangle to show the version information.
- MAC address should be displayed near the bottom.
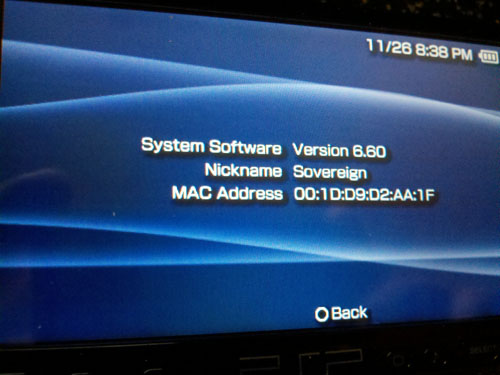
PSP
To find the MAC address of your PlayStation Portable (PSP):
- Navigate to "System Settings"
- Then navigate to"System Information," which is where the MAC address is listed.
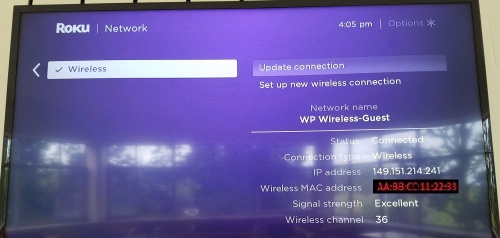
Roku Devices
To locate the MAC address of your Roku device:
1. Go to the main menu on your Roku and then select "Settings"
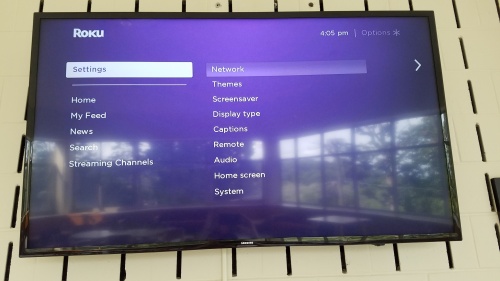
2. Then click “Network”
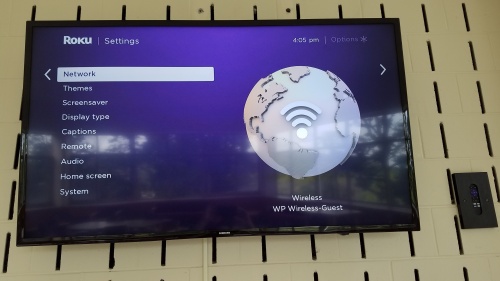
3. Here you can find the MAC Address, listed as either the "Wireless MAC Address" or "Ethernet MAC address" (depending on the connection you are using)
Xbox One
To find the MAC address of your Xbox One, follow these steps:
- Navigate to Settings icon on the dashboard of your Xbox One
- Once in Settings select the Network Settings
- From the Network page select Advanced Settings
- In the Advanced Settings page, you should see your Xbox One's Mac Address
Here is a video with step by step instructions to find the MAC address on a Xbox One:
Xbox 360
To locate the MAC address of your Xbox 360 console: Go to the System area of the Xbox Dashboard and select Network Settings. Select Edit Settings. From Additional Settings, select Advanced Settings. At the bottom of this screen you'll see a heading called Wired MAC Address.
VideoService "youtubehd" not recognized.
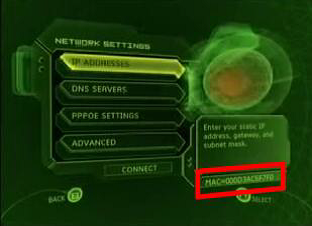
Xbox
To find the MAC address of your Xbox: Turn on your Xbox console with no game disc in the disc tray. From the Xbox Dashboard, choose Xbox Live. These steps assume you cannot connect to Xbox Live until you finish configuring your Xbox console to use your PC's MAC address. Therefore, you should receive the following message: "Could not connect to Xbox Live. Do you want to troubleshoot your network connection?"
- From the Connect Status screen, select Settings.
- The 12-digit number at the bottom-right corner of the Network Settings screens is the MAC address of your Xbox console.
Devices That Are Currently Not Compatible
Wireless Printer
Currently, Wireless Printers do not support 802.1x authentication. 802.1x is needed for the printer to communicate with your laptop or phone on our network. Once Wireless Printers support 802.1x authentication we will readdress these types of devices.
To use your printer you will need to connect to it via USB.
