VPN Remote Access: Difference between revisions
| Line 87: | Line 87: | ||
MS VPN is now located in your menu bar | MS VPN is now located in your menu bar | ||
[[File:MSVPN_Mac_1.png| | [[File:MSVPN_Mac_1.png|300px]] | ||
After selecting Connect you will be prompted for your WPUNJ password, once entered you will be sent an authentication to your primary [[Multifactor Authentication]] device. | After selecting Connect you will be prompted for your WPUNJ password, once entered you will be sent an authentication to your primary [[Multifactor Authentication]] device. | ||
| Line 95: | Line 95: | ||
Once you are finished using VPN please Disconnect from the same menu you utilized to connect. | Once you are finished using VPN please Disconnect from the same menu you utilized to connect. | ||
[[File:MSVPN_Mac_2.png| | [[File:MSVPN_Mac_2.png|300px]] | ||
=== Web VPN === | === Web VPN === | ||
Revision as of 08:29, 26 March 2020
Introduction
William Paterson University provides a VPN option for remote access into its computing and network environment. VPN access is available for faculty and staff only and must first be authorized by a Help Desk request.
VPN stands for Virtual Private Network. A VPN allows you to use the ISP (Internet Service Provider) of your choice and connect to WPUNJ using services normally restricted to campus usage, such as the K:\ and U:\ drives. It does this by providing a "Virtual" network connection to WPUNJ. That is, even though you are connected to your ISP, it appears that you are actually connecting from WPUNJ. Providing that you have a fast enough connection to the University's network through an Internet service provider you can access any data and applications the same way you do from your office at the University.
When should you use a VPN Connection?
The VPN connection should be used when you need to connect to a protected/firewalled WPUNJ network services. These include but are not limited to:
- Logging into the administrative systems
- Connecting remotely to some of the University's Library resources (WebVPN)
- Accessing University File Services
When connecting to unrestricted services, such as browsing the Web, you should use only your ISP connection and not the VPN connection. VPN is only required for access to protected services at WPUNJ.
VPN Multifactor Authentication
Multifactor Authentication is required for William Paterson University VPN Access. If you have not signed up for Two-Factor Authentication, please request access using the ticket type Account -> VPN Access.
For information on using Multi Factor Authentication, including use of the Duo App, please see our Multifactor Authentication article.
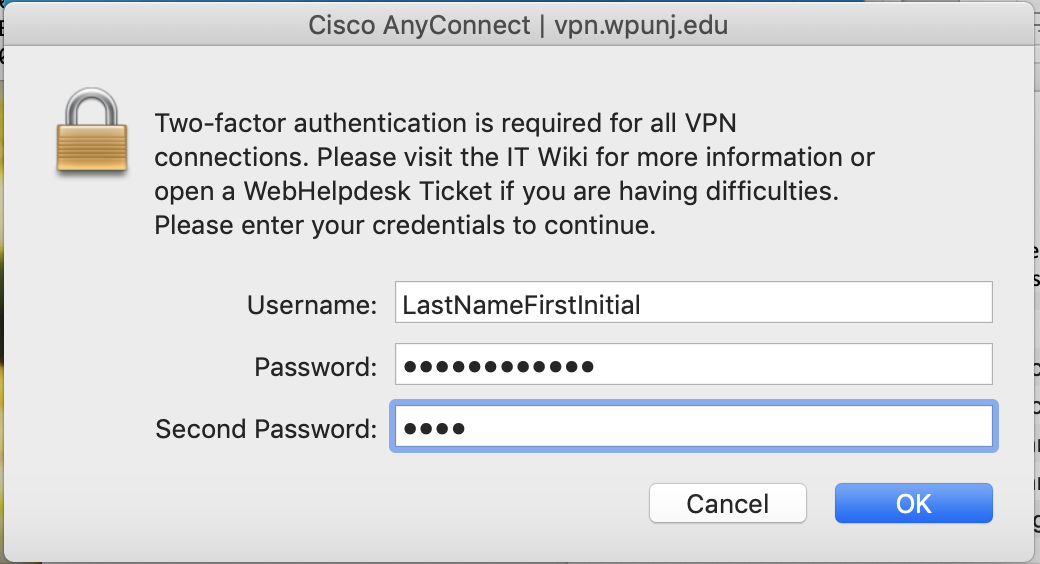
The secondary password field information can be found below, or on the Multifactor Authentication article, and include push, sms and phone.
Using VPN with Multifactor Authentication
- After you have set up your account, you will continue to use the Cisco AnyConnect client as you have in the past.
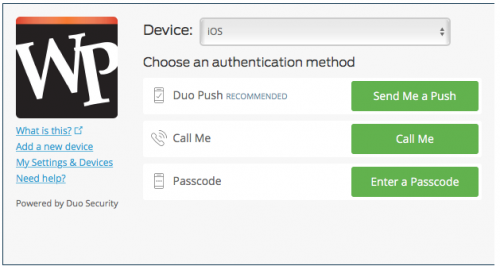
- When you provide your login credentials you will now be provided with a secondary authentication box. You can then either use an app on your android (or iphone) to generate a key OR type "push" in the secondary authentication box. Using "push" will send a notification to the app on your phone. (Using "sms" will initiate a text with an authentication key that will expire after one hour, or "phone" if you have signed up for a phone call.)
Second Password Field
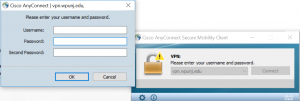
The following is utilized when using the Cisco Any Connect Client for VPN. The second password field is where you define the method of multifactor authentication you will be utilizing.
| Authentication Method | Second Password | ||
|---|---|---|---|
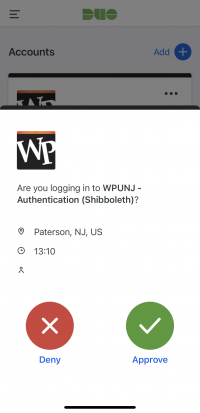
| Duo App Push Verification | push | (See image 1. below) | |
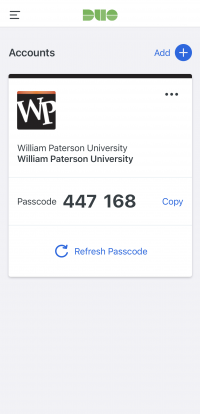
| Duo App to Generate Authentication Code | Enter Code displayed in App | (See image 2. below) | |
| Text Message | sms | (You will receive a text message with a key that will expire after one hour) | |
| Phone Call | phone | (If you have registered multiple phone numbers, enter phone1, phone2, as needed) |
| 1. Authorizing access through the Duo App | 2. Generating a Key in the Duo App |
VPN Services
The VPN server authenticates using WPU usernames and passwords ONLY. Faculty and staff users must have a valid WPUNJ account to use the VPN services. VPN Services are available as a web or client application.
Microsoft VPN (MS VPN) for University Imaged Machines
University Windows 10 Laptops
This video demonstrates how to login to the MS VPN once the connection appears on your laptop. Once connected, you will be able to access to your network drives as though you were on campus.
The K: drive will be available upon connection, though you may need to ‘map’ your U: drive manually (instructions on how to do so here.)
University Mac Laptops
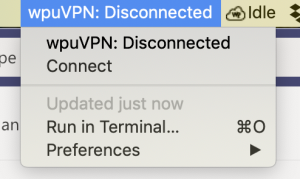
MS VPN is now located in your menu bar
After selecting Connect you will be prompted for your WPUNJ password, once entered you will be sent an authentication to your primary Multifactor Authentication device.
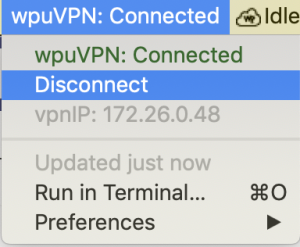
Once you are finished using VPN please Disconnect from the same menu you utilized to connect.
Web VPN
The steps to sign-on to WebVPN and use are as follows:
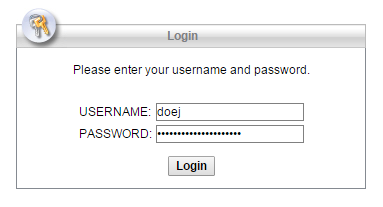
- Simply navigate to Web VPN and sign in with your university credentials.
- Click Login. Authenticate using your chosen two-factor authentication method.
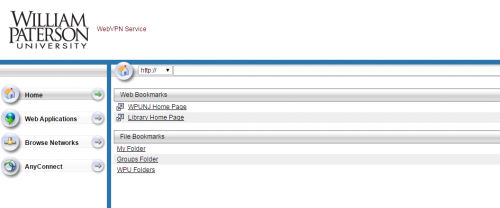
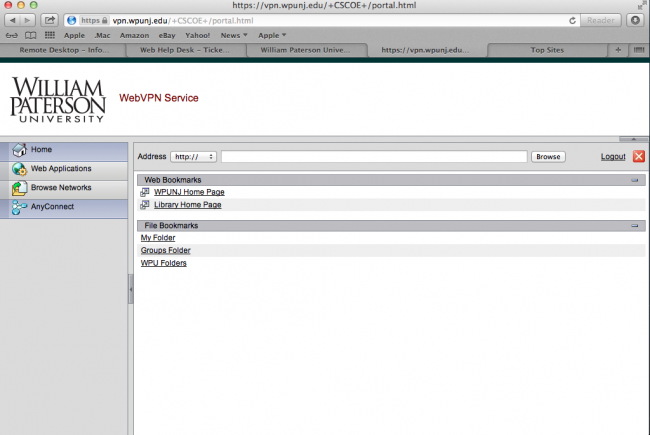
- Once your university credentials are verified, you will be taken to the new user interface for the VPN. The Home Tab will be the default view for your VPN session. From this home Tab, you will be able to view your U-Drive, K-Drive, as well as have direct links to both the university's home page and the Library's home page. Don't be alarmed if you don't see the words "U-drive" or "K-drive". They are simple named differently. Also, if you edit a file you will have to save it on your local drive and upload the way you would upload an e-mail attachment, drag and drop or direct saving to the network drive is not available.
- My Folder represents your User folder, or your U-Drive.
- WPU Folders represents the K-Drive.
- Don't forget to LOG OFF after you have completed your VPN session.
Client VPN Application
Download the required software through WP Connect from the "Employee" tab, and under the "Information Technology" window frame. The VPN does not replace your ISP connectivity, it is intended only so your can access secure resources.
Microsoft Windows
Microsoft Windows Cisco AnyConnect VPN Client Installation
Full time employees will be able to download the Windows VPN client from the WPCONNECT portal. From the "Employee" tab, and under the "Information Technology" window frame you will see a link named "Web VPN". Click on it.
Part Time employees should visit http://webvpn.wpunj.edu
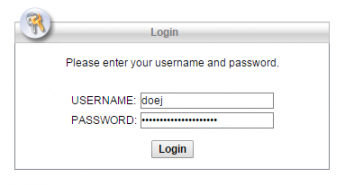
- Once the above link is selected a new web page will open up asking for your WPU user account and password.
Log in using University credentials
- Click on the "AnyConnect" link on the left hand column of the WEBVPN
- Install the AnyConnect VPN Client
- Once you enter this information the portal web page will automatically start the AnyConnect client installation. During the installation you may see a security alert popup bar (?) asking to run an add-on. At this point you can either click on the "skip" link as shown below or let the time counter time-out by itself and continue with the installation.
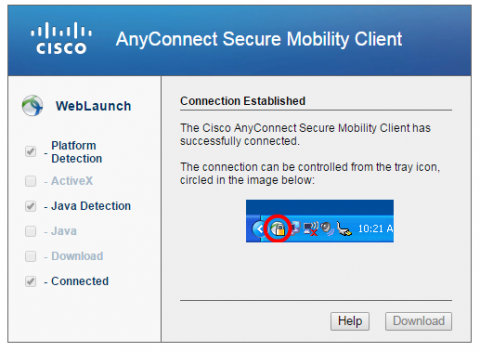
- At completion of the installation you will see a "Connection established" on your brrowser window as shown below. Now your VPN client is fully installed and running. Just close your browser.
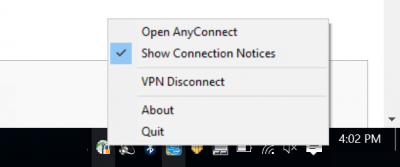
- To disconnect the VPN client simply right click on the VPN icon on the right side of your task bar (it looks like a lock) and click on the 'Disconnect" button.
- To reconnect click on the start windows button at the left bottom of your task bar and select "All Programs". There you will find a "Cisco" folder with the Anyconnect VPN program icon. Click on the icon to launch the AnyConnect VPN client.
Using the Windows Cisco AnyConnect VPN Client
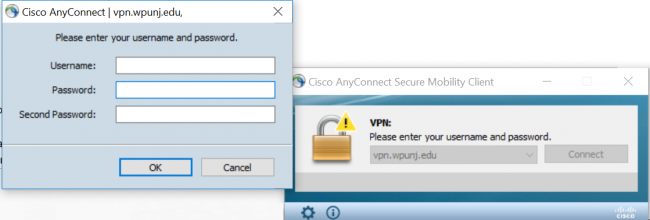
- Once launched you will be asked to enter your WPU user account and password. Please do so. If the "Connect to:" field is empty please enter vpn.wpunj.edu. That is the address of the VPN server. Now click on the "Connect' button to run the AnyConnect VPN client.
Note: The Cisco VPN Client will be minimized to the task bar, the icon looks like a lock. To disconnect, right click on the icon for the VPN client and select disconnect.
For Second Password directions please see the Two Factor section of this article. For technical support contact Help Desk Request
Mac OS X (10.7 or later)
If you are using a university supplied MacBook or MacBook Pro you should skip to step 6.
Installing
1) Log into WPConnect. Go to the Employee Tab and then select the "Information technology" link. Click on the "WebVPN" link.
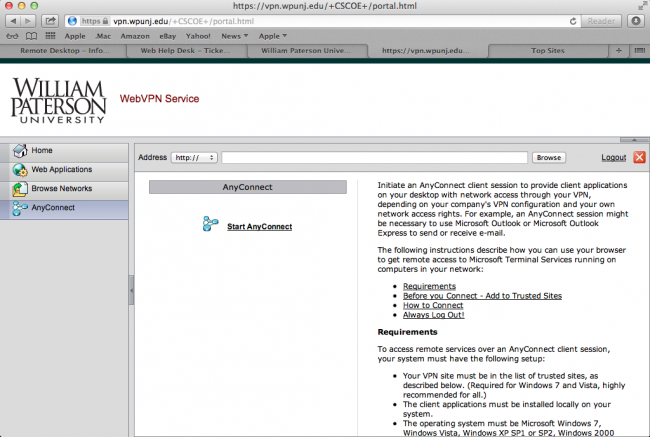
2) Once logged in click on the "any connect" button on the left of the page
3) Click on "start AnyConnect"
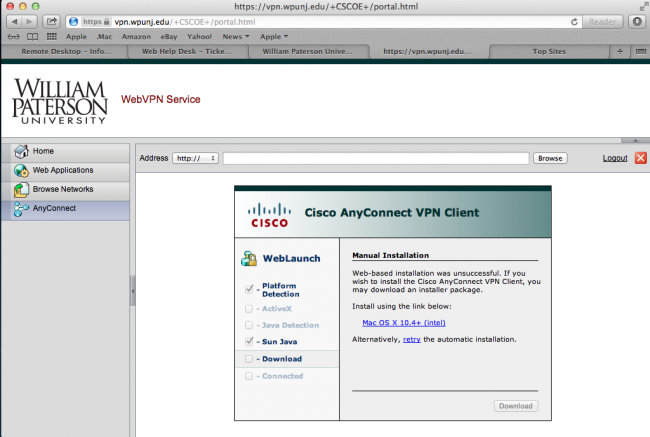
4) Wait for the installation to fail. When it does click on the "Mac OS X 10.8 +(intel)" link
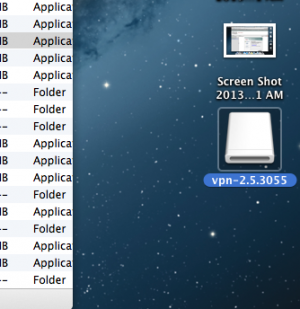
5) it will download a file to your designated download location. This is usually your downloads folder but you may have changed it to somewhere else. Locate the file "vpnsetup.dmg" and double click on it. It will mount a disk image on your desktop.
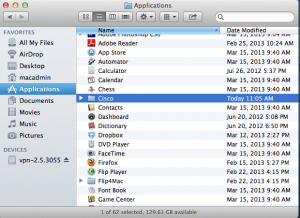
6) Before you can run the installer package, you should temporarily disable Gatekeeper (This only applies to non university laptops). Refer to these instructions. Once complete, run the installer in the disk image. It will create a folder in your Applications folder named "Cisco".
7) In that folder you will see an application named "Cisco Any Connect VPN Client". Double click on it.
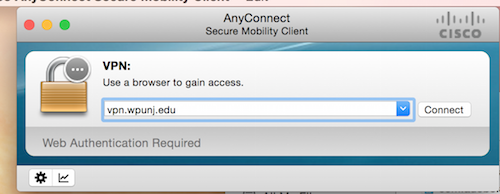
8) when the program launches you will see a connect window. In the space next to "Connect to" type "vpn.wpunj.edu" and click "connect"
9) If the software can reach the university authentication server you will be asked for your university login credentials. Enter them and click the "connect" button.
You are now connected to the university network.
Disclaimer:
William Paterson University is not responsible for any software/hardware failures due to the installation of the VPN software provided by Cisco.
Mobile Devices (iPad, iPhone, Android)
Mobile devices have the ability to connect to the on campus network via VPN. Some helpful tips:
- VPN connections are only possible from off campus
- Your device must be connected to the Internet via wi-fi or cellular data.
- The below screen captures were created on an iPhone. The client can also be used on Android devices.
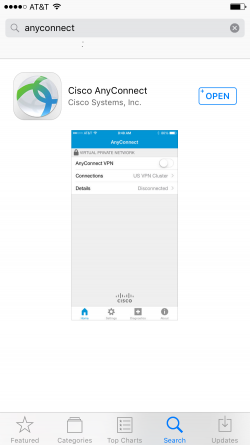
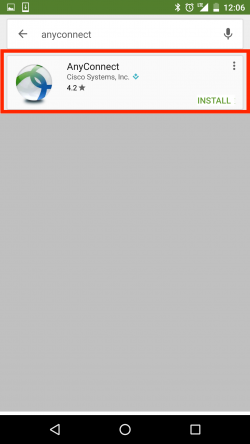
- Search for "cisco anyconnect" on the Apple App Store or Google PlayStore and download the app.
 |
 |
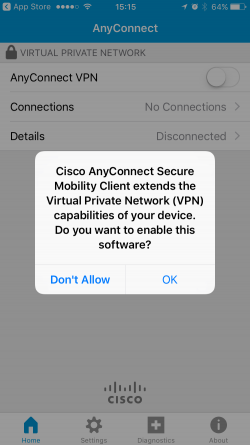
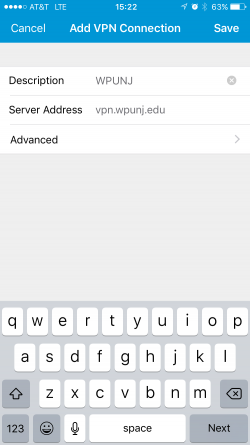
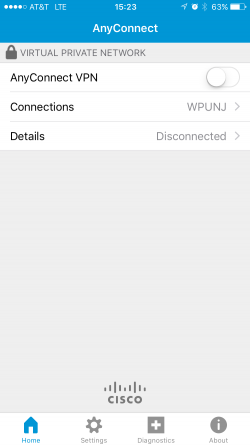
- When first launching the application, Cisco Anyconnect will display this prompt. Tap OK.
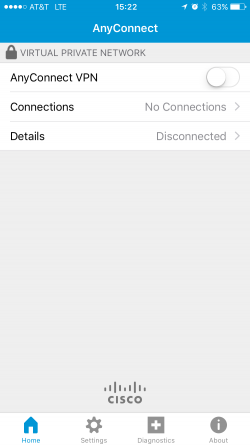
- Select "Connections"
- Enter
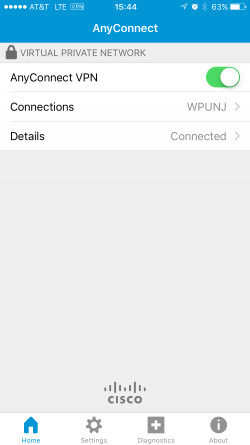
WPUNJas the description andvpn.wpunj.eduas the server address. Tap Save. - Tap the on/off switch to On to connect.
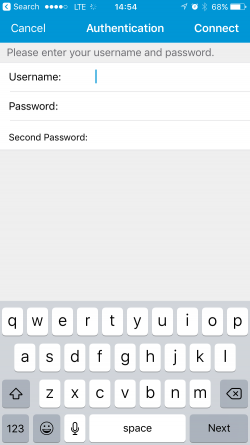
- You will be prompted to enter your WPUNJ username and password.
- To confirm that you are connected, the VPN icon will be visible on the top of the screen.
- The Cisco Anyconnect VPN app will run in the background on your iOS device until the VPN connection is terminated. To terminate the connection, return to the app and toggle the on/off switch to Off.
It is important to understand that accessing our network storage through the webvpn is a bit different than using your office PC or laptop. There is no "drag and drop." To access and/or edit a file, it must first be downloaded locally. If your file is edited or changed, you must UPLOAD it back to the folder it resided in. If you fail to do so, all changes you made will only exist on the computer you made the changes on.
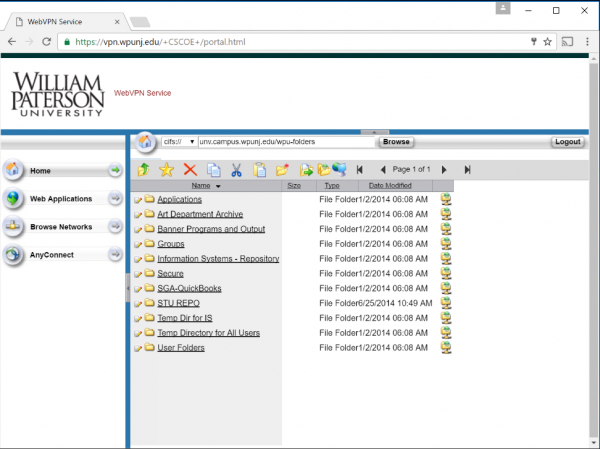
From the home tab, you must select the set of folders you wish to access. As mentioned above, folders do not show up as "K" or "U." Instead you see "My Folder," "Groups Folder" and "WPU Folders." See the circled area below:
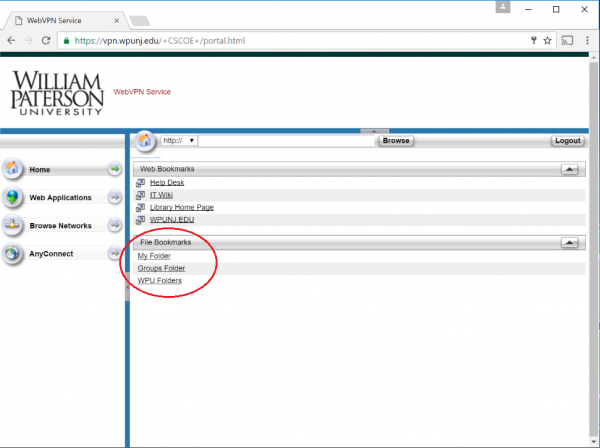
Once you have chosen which set of folders you want to use, click on the link to display the list. In the example below, I have clicked on "Groups."
Opening, Downloading & Editing Files
Once you've found the file you want to use, it's almost as simple as clicking on the file. In most browsers, this will prompt you to open or save the document. If you only need to read the file, it is OK to go ahead and click "open." This will save the document in your temporary internet files and allow you to read the document. BE CAREFUL If you decide to edit this document, clicking "save" might just save it in your temporary internet files only to be lost at some point. It's important that, if you are going to edit the file, you save it to your local computer and then open it from there.
Uploading Changed, Edited or New File
This step would apply to:

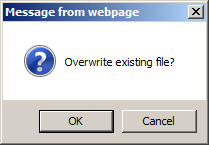
Click on "browse" and browse (on your local computer) to the location you saved your new or edited file. Once selected, click OK. If this file already exists on the server, it will warn you and as you if you wish to overwrite. If you are sure you want to upload the file, click OK:
You should now be able to browse to, download, edit and upload files through use of the WebVPN. The VPN software available on this page is for use in the United States and Canada ONLY. It is NOT to be placed on a computer system that will be subject to International Travel. Exporting this software is a Federal Crime.
