Apple Calendar with Exchange Accounts: Difference between revisions
No edit summary |
No edit summary |
||
| Line 18: | Line 18: | ||
[[File:Delegated_account.png]] | [[File:Delegated_account.png]] | ||
6) Click on the "+" button to add an account you have been given access to. Repeat for all other accounts you wish to use and have permissions for. The system will search for an account matching the name you have entered. It will not allow you to access accounts you do not have permissions for nor will it add non-valid accounts. '''Beware that the system will look at your local address book including non-WPU accounts. Be sure to add only WPU accounts'''. | 6) Click on the "+" button to add the name of an account you have been given access to ('''access permissions must be given FIRST'''). Repeat for all other accounts you wish to use and have permissions for. The system will search for an account matching the name you have entered. It will not allow you to access accounts you do not have permissions for nor will it add non-valid accounts. '''Beware that the system will look at your local address book including non-WPU accounts. Be sure to add only WPU accounts'''. | ||
7) Make sure you click on the "show" checkbox so that the calendar items for that account show up. | 7) Make sure you click on the "show" checkbox so that the calendar items for that account show up. | ||
Revision as of 08:30, 8 July 2014
If you have set up Apple Mail to use with your university Exchange account you may wish to use Apple's Mail client to access your calendar, tasks, reminders and notes. Here is how you do it.
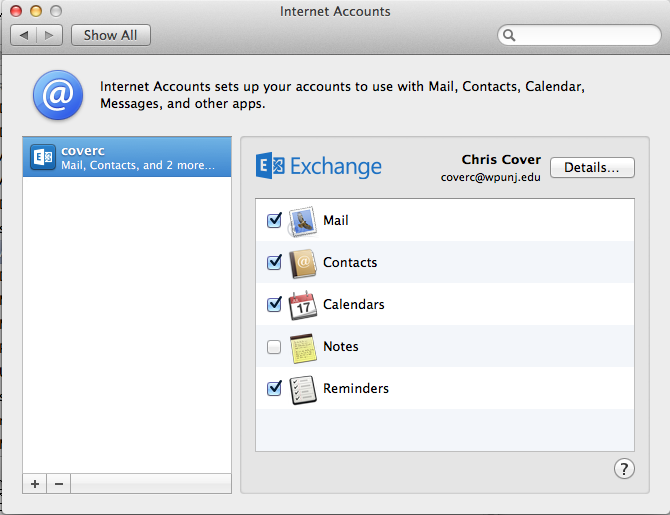
1) Make sure you have an Exchange account set up. This may be done in the "Internet Accounts" pane in System Preferences. For the purposes of this article, be sure to have "Calendars" selected.
2) Open the Calendar application.
3) Click on the "Calendar" menu and select Preferences.
4) Click on "accounts"
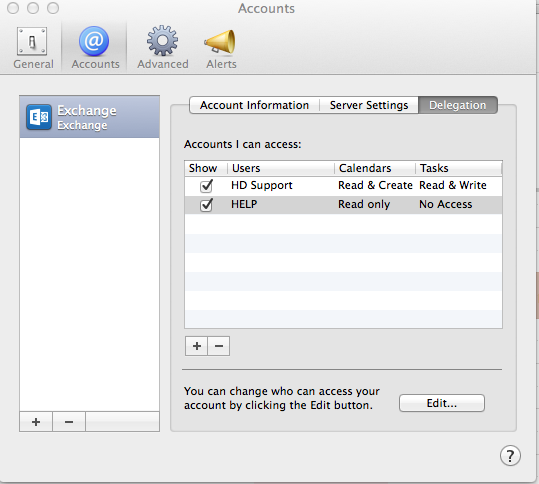
5) You will see your exchange account. Click on "Delegation".
6) Click on the "+" button to add the name of an account you have been given access to (access permissions must be given FIRST). Repeat for all other accounts you wish to use and have permissions for. The system will search for an account matching the name you have entered. It will not allow you to access accounts you do not have permissions for nor will it add non-valid accounts. Beware that the system will look at your local address book including non-WPU accounts. Be sure to add only WPU accounts.
7) Make sure you click on the "show" checkbox so that the calendar items for that account show up.
Granting Delegate Access:
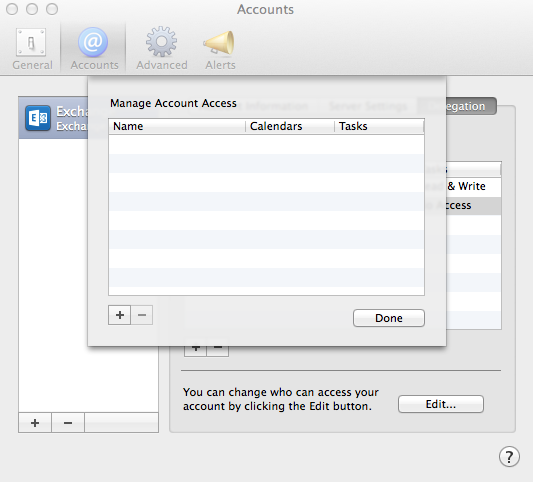
1) Click on the "edit" button at the bottom right portion of the screen.
2) Add an account. Beware that the system will look at your local address book including non-WPU accounts. Be sure to add only WPU accounts.
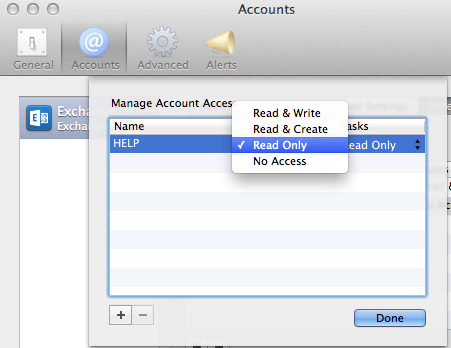
You can set the specific permissions that the user has for the Calendar and Tasks:
Congratulations! you have now set up your Apple Mail program to use your Exchange calendar.


