Cisco WebEx Room Kits: Difference between revisions
Jump to navigation
Jump to search
No edit summary |
|||
| (18 intermediate revisions by 5 users not shown) | |||
| Line 1: | Line 1: | ||
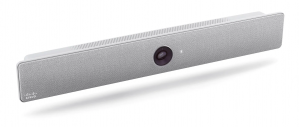
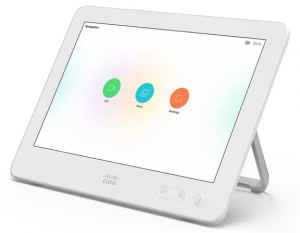
Cisco WebEx | Cisco WebEx Room Kits are teleconferencing devices that connect to a standard television or monitor. The room kit contains a high resolution camera, speakers and microphone. Connected to each room kit is a Cisco Touch 10 controller which provides a user interface for operating the room kit. {{#ev:youtube|NjeZkucTXhU|600|right}} | ||
[[File:Webexroomkit2.png|thumb| | [[File:Webexroomkit2.png|thumb|right|webex room kit]] | ||
[[File:Touch10.png|thumb| | [[File:Touch10.png|thumb|right|touch 10 control panel]] | ||
== | ==Campus Locations== | ||
Cisco WebEx Room Kits are currently setup in the following locations on campus: | |||
'''Atrium''' | |||
* Rm 127 | |||
'''College Hall''' | |||
* Rm 145 | |||
* Rm 202 (Board Room) | |||
* Rm 204 | |||
* Rm 212 | |||
'''Cheng Library''' | |||
* Rm 226 | |||
'''Morrison Hall''' | |||
* Admissions Conference Room | |||
* Registrars Conference Room | |||
'''Raubinger Hall''' | |||
* Rm 106 | |||
'''Shea Center''' | |||
* Rm 150 | |||
* Rm 151 | |||
'''1800 Valley Road''' | |||
<!--* Board Room--> | |||
* Rm 212 | |||
* Rm 222 | |||
* Rm 224 | |||
* Rm 247 | |||
==Hosting a Zoom Meeting on Cisco Webex Room Kit Devices== | ==Hosting a Zoom Meeting on Cisco Webex Room Kit Devices== | ||
You are able to host Zoom Meetings using our Cisco Webex | You are able to host Zoom Meetings using our Cisco Webex Room Kits. Please see our full Zoom wiki [[Zoom|here]]. | ||
===How to schedule the meeting:=== | ===How to schedule the meeting:=== | ||
#On either the Outlook client or Office 365 go to Calendar -> Schedule a new meeting. | #On either the Outlook client or Office 365 go to Calendar -> Schedule a new meeting. | ||
Latest revision as of 12:28, 25 June 2025
Cisco WebEx Room Kits are teleconferencing devices that connect to a standard television or monitor. The room kit contains a high resolution camera, speakers and microphone. Connected to each room kit is a Cisco Touch 10 controller which provides a user interface for operating the room kit.
Campus Locations
Cisco WebEx Room Kits are currently setup in the following locations on campus:
Atrium
- Rm 127
College Hall
- Rm 145
- Rm 202 (Board Room)
- Rm 204
- Rm 212
Cheng Library
- Rm 226
Morrison Hall
- Admissions Conference Room
- Registrars Conference Room
Raubinger Hall
- Rm 106
Shea Center
- Rm 150
- Rm 151
1800 Valley Road
- Rm 212
- Rm 222
- Rm 224
- Rm 247
Hosting a Zoom Meeting on Cisco Webex Room Kit Devices
You are able to host Zoom Meetings using our Cisco Webex Room Kits. Please see our full Zoom wiki here.
How to schedule the meeting:
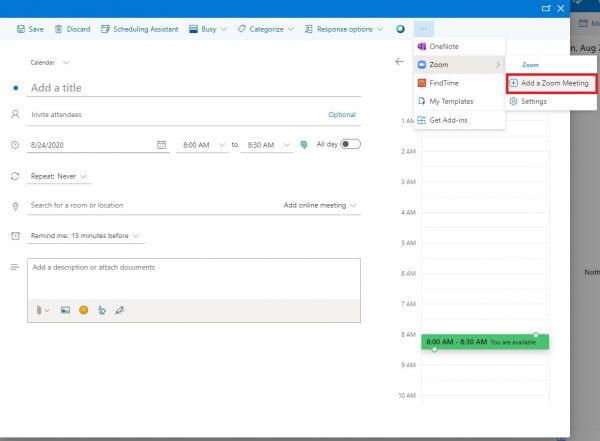
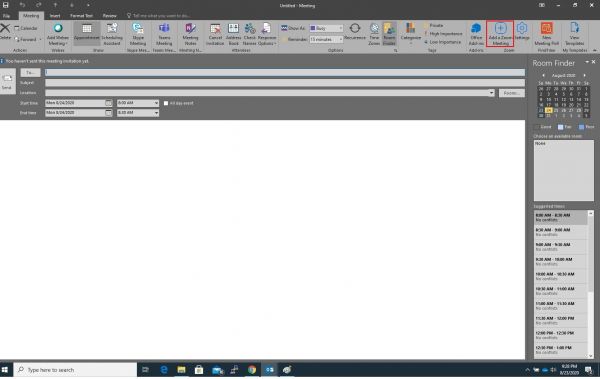
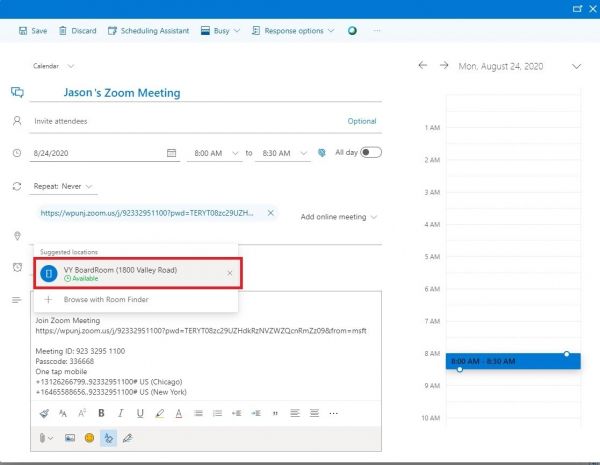
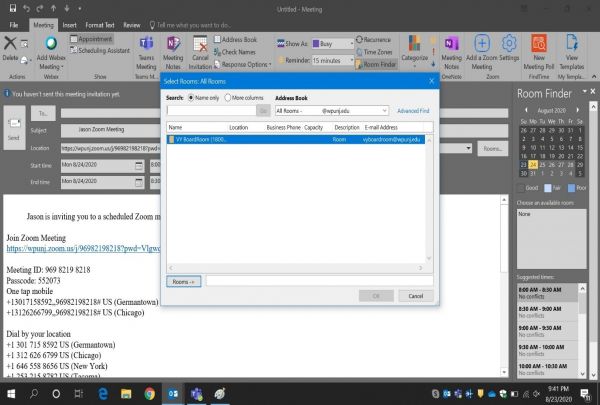
- On either the Outlook client or Office 365 go to Calendar -> Schedule a new meeting.
- Click on Add a Zoom meeting
| Office 365 | Outlook Desktop Client |
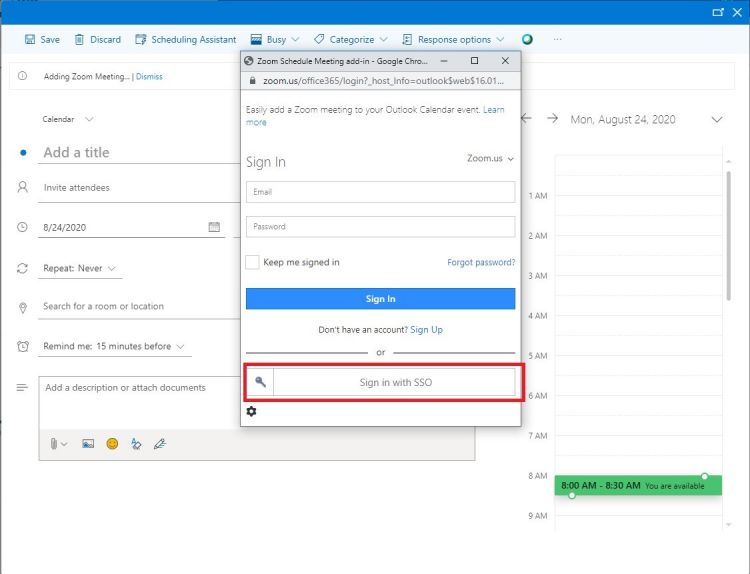
The first time scheduling a Zoom meeting, you may be asked to sign into your Zoom account.
- Enter your full e-mail address: username@wpunj.edu
- There is no need to enter a password.
- Click on Sign in with SSO
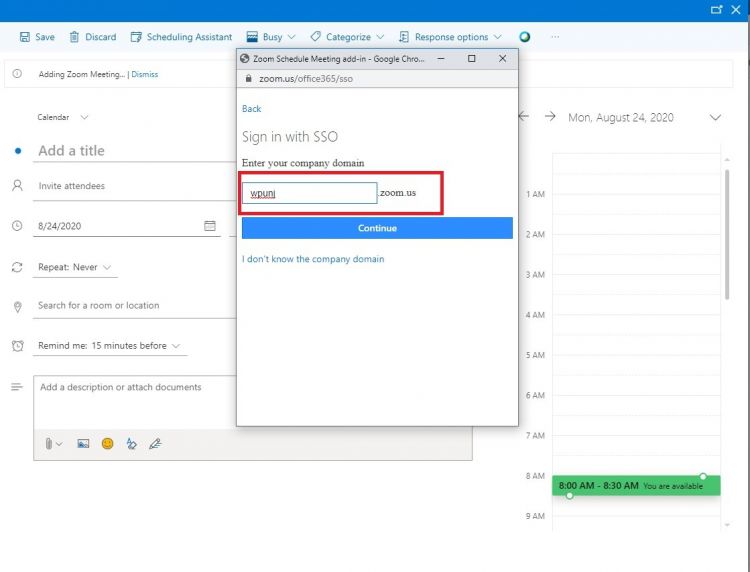
- Enter wpunj in the domain box.
- Follow the University Single Sign On.
- Under Location select the room you would like to use - ex: VY Boardroom.
- In the To field (or Invite Attendees for Office 365) add the users you would like to invite.
- Click Send in the Outlook app or Save in Office 365.
| Office 365 location selection | Outlook Desktop Client location selection |
How to start the meeting in the room
- On the room control panel on the podium, select WebEx to turn on the display screen and control the table microphones.
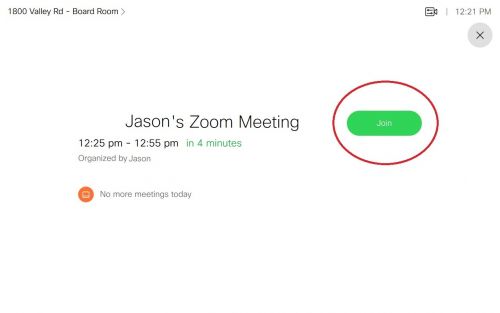
- 5 minutes prior to the scheduled meeting time, a green Join meeting button will appear on the Webex touch panel with the meeting info.
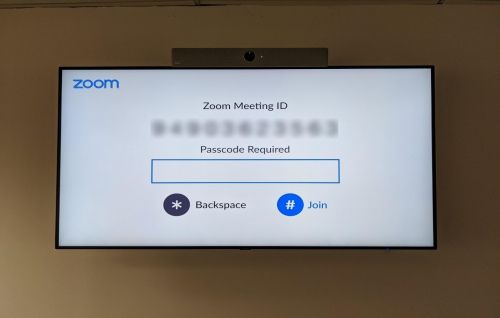
- You will be prompted to enter the Meeting ID (found in the invitation sent out)
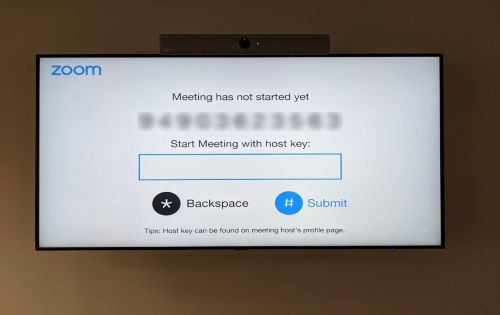
- You will then be prompted to enter the Host Key (it never changes and is found on your Zoom user page profile (link)
As participants enter the meeting, you will be notified on the screen. To admit participants:
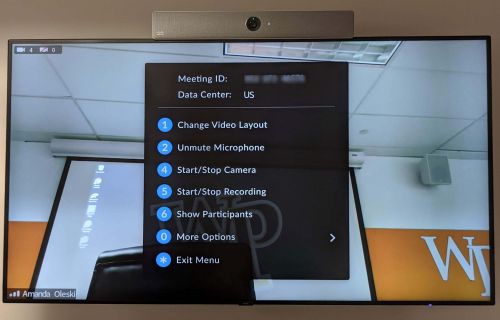
- Press 1 on the Touch10 keypad – this will bring up a menu. (link)
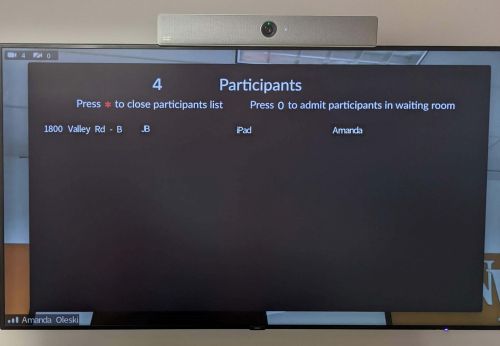
- Press 6 on the Touch10 keypad to show participants.
- Press 0 on the Touch10 keypad to admit all participants in the waiting room. When done, press * (asterisk) on the keypad to close list, then * again to exit menu.
