Microsoft PowerPoint: Difference between revisions
No edit summary |
No edit summary |
||
| (7 intermediate revisions by 3 users not shown) | |||
| Line 1: | Line 1: | ||
[[image:Powerpoint_logo.png|right|300px]] | [[image:Powerpoint_logo.png|right|300px]] | ||
PowerPoint is a part of the Microsoft Office suite which encompasses [[Microsoft Office 365 | PowerPoint is a part of the Microsoft Office suite which encompasses [[Microsoft Office 365]]. This article focuses on information related to the [http://www.pcmag.com/encyclopedia/term/47651/native-application native application]. | ||
==Resources== | ==Resources== | ||
* [https://www.youtube.com/watch?v=sbeyPahs-ng YouTube PowerPoint Tutorial for Beginners] | * [https://www.youtube.com/watch?v=sbeyPahs-ng YouTube PowerPoint Tutorial for Beginners] | ||
How to convert a PowerPoint to a movie file: | == How to convert a PowerPoint to a movie file: == | ||
How to create a video from PowerPoint 2016: | How to create a video from PowerPoint 2016: | ||
You can create a full-fidelity video from your presentation in PowerPoint 2016 in MPEG-4 (.mp4) or Windows Media Video (.wmv) format. In just | You can create a full-fidelity video from your presentation in PowerPoint 2016 in MPEG-4 (.mp4) or Windows Media Video (.wmv) format. In just a few steps, you can turn your presentation into a video you can share and distribute on Facebook, YouTube, burn to DVD or via email. Here’s how you go about it: | ||
Steps: | |||
1. Before you began to create a video from PowerPoint presentation, click on '''File menu''' and select '''Save''', so that you can make sure that your work is saved in PowerPoint presentation format (.pptx). | |||
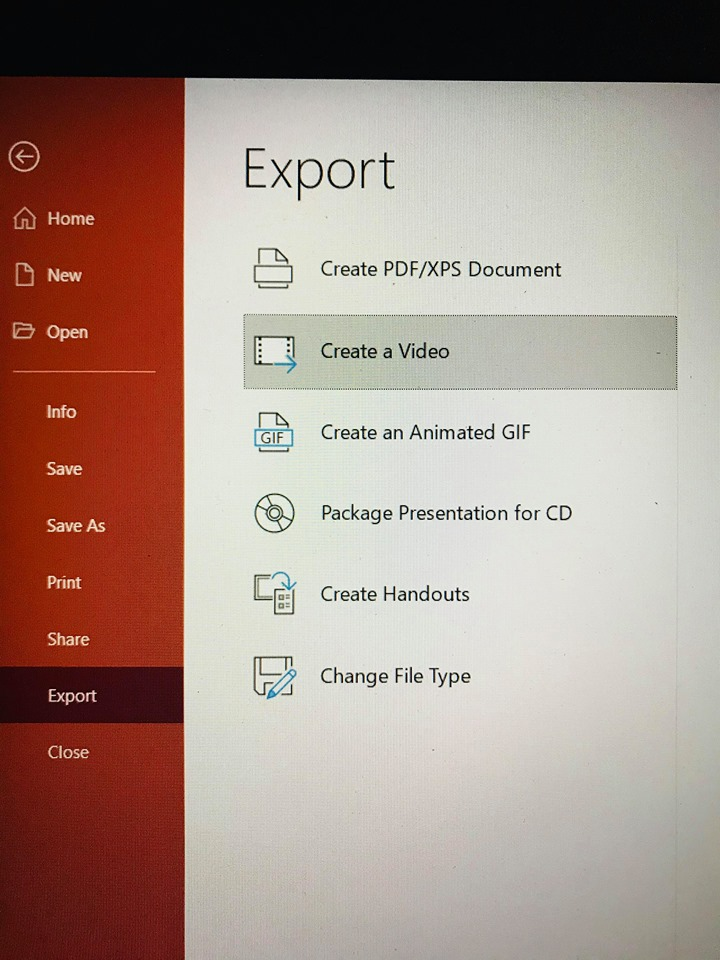
2. Click on '''File''', scroll down and select '''Export''' and under it '''Create a Video'''. | |||
[[File:Pp1.png]] | |||
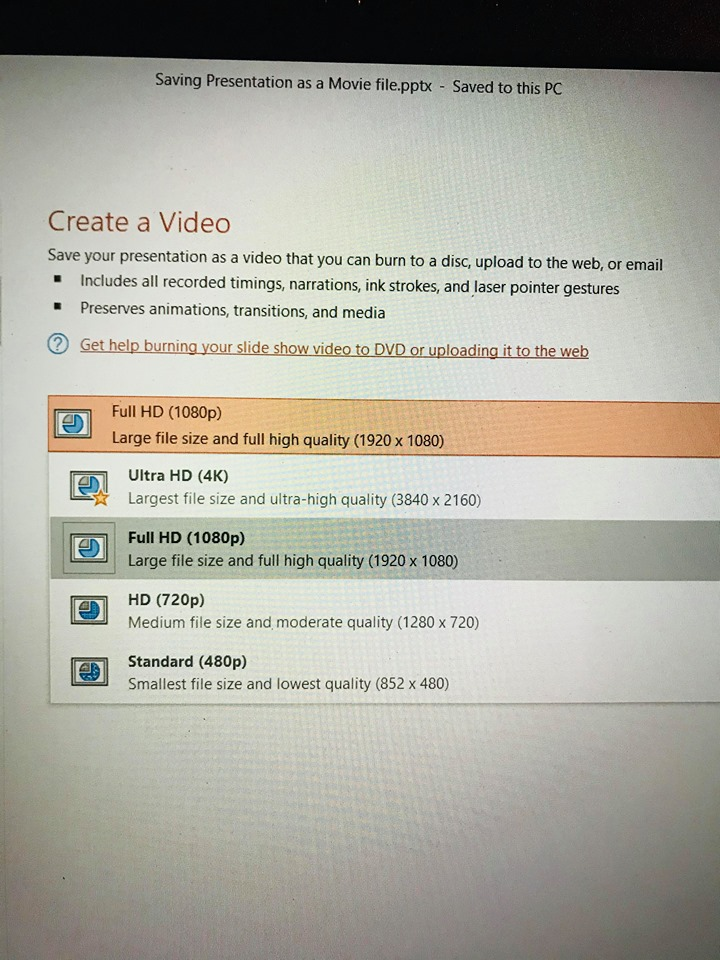
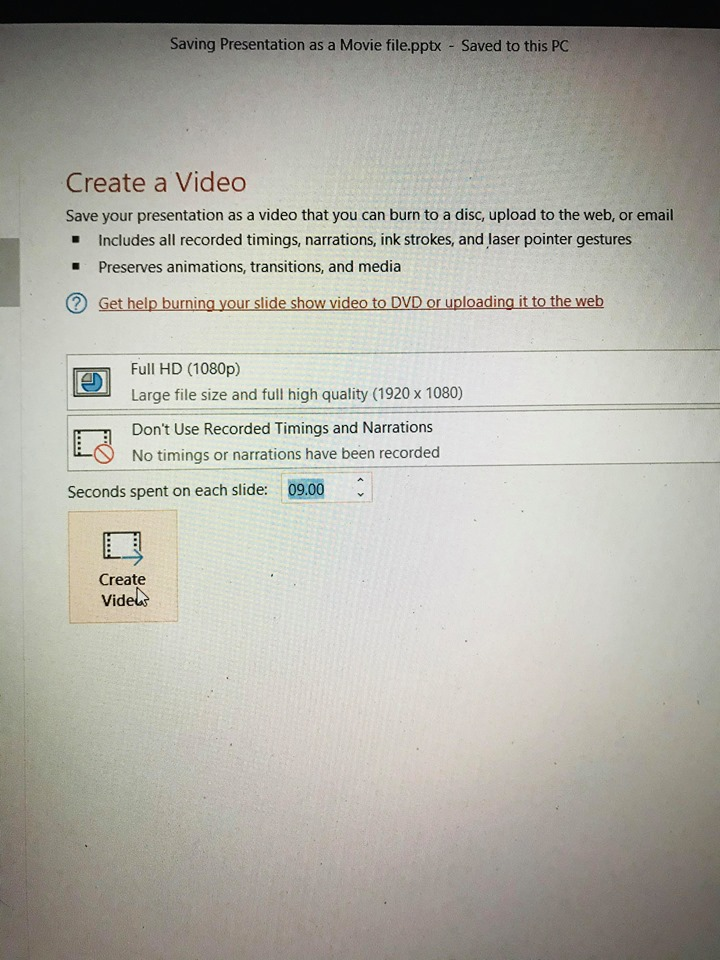
3. In the drop-down box under '''Create a Video''', select the video quality based on your preference, which relates to the resolution of the finished video. | |||
[[File:Pp2.png]] | |||
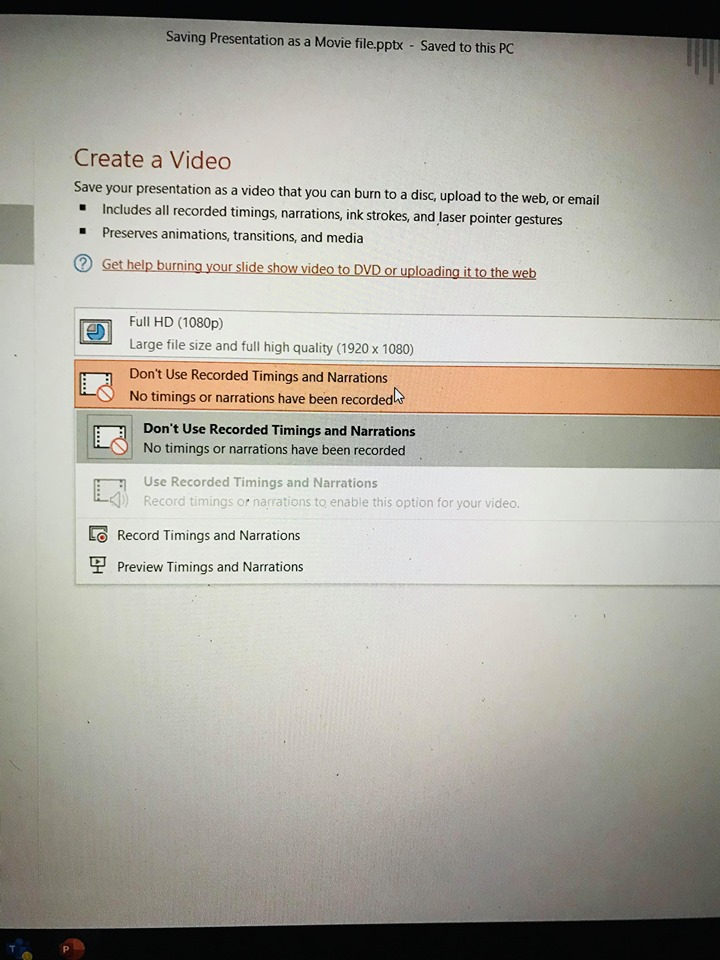
4. Select the second drop-down box under '''Create a Video''', and select if your presentation includes '''narration''' and '''timings'''. | |||
[[File:Pp3.png]] | |||
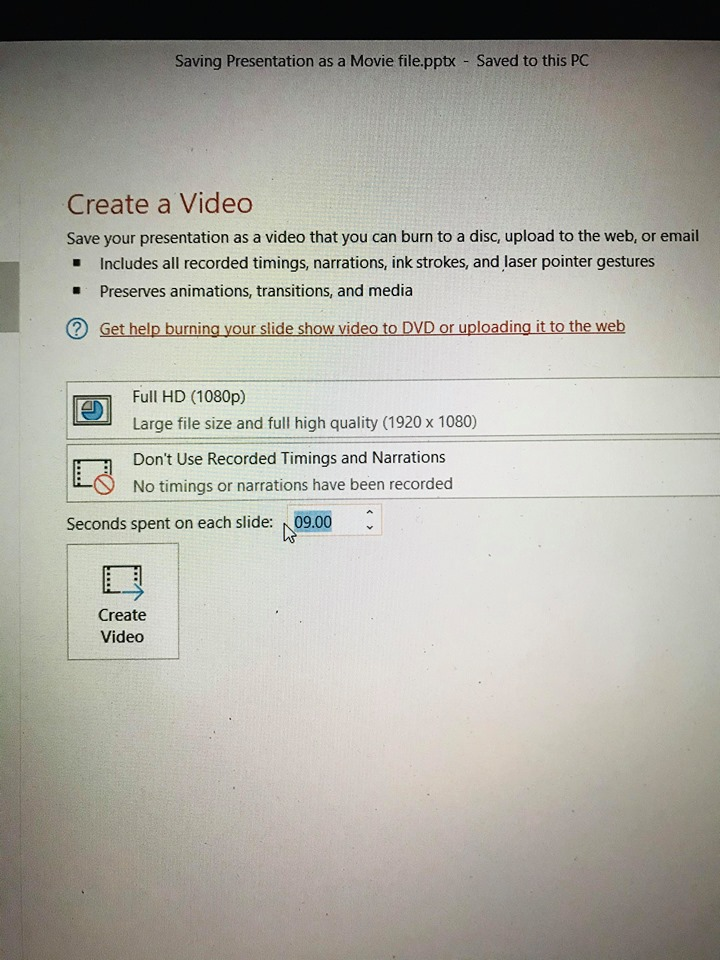
5. If you have longer recorded timed narrations then timing can be changed in the '''Seconds spent on each slide box''' (The default time spent on each slide is 5 seconds). | |||
[[File:Pp4.png]] | |||
6. Once you are done adjusting the time and video quality, click on '''Create Video'''. | |||
[[File:Pp5.png]] | |||
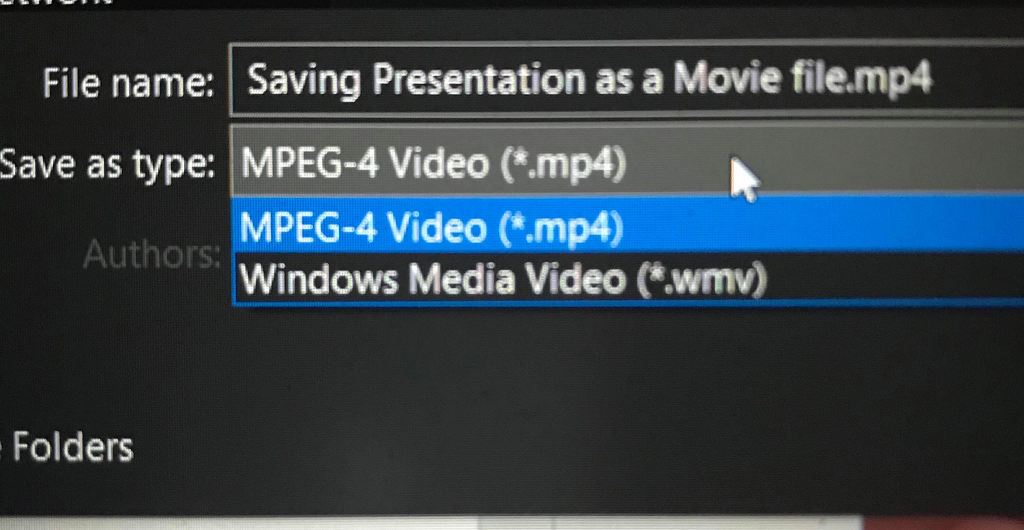
7. Once you click on '''Create a Video''', then in the '''Save as a type box''', choose whether you want to save it as '''MPEG-4 Video (*mp4) or Windows Media Video (*.wmv)'''. | |||
[[File:Pp7.png|none]] | |||
[[ | |||
8. Once your done with all these steps, go to the designated folder location, and then double click to open the file and play the video. | |||
Latest revision as of 10:45, 28 August 2024

PowerPoint is a part of the Microsoft Office suite which encompasses Microsoft Office 365. This article focuses on information related to the native application.
Resources
How to convert a PowerPoint to a movie file:
How to create a video from PowerPoint 2016: You can create a full-fidelity video from your presentation in PowerPoint 2016 in MPEG-4 (.mp4) or Windows Media Video (.wmv) format. In just a few steps, you can turn your presentation into a video you can share and distribute on Facebook, YouTube, burn to DVD or via email. Here’s how you go about it:
Steps:
1. Before you began to create a video from PowerPoint presentation, click on File menu and select Save, so that you can make sure that your work is saved in PowerPoint presentation format (.pptx).
2. Click on File, scroll down and select Export and under it Create a Video.
3. In the drop-down box under Create a Video, select the video quality based on your preference, which relates to the resolution of the finished video.
4. Select the second drop-down box under Create a Video, and select if your presentation includes narration and timings.
5. If you have longer recorded timed narrations then timing can be changed in the Seconds spent on each slide box (The default time spent on each slide is 5 seconds).
6. Once you are done adjusting the time and video quality, click on Create Video.
7. Once you click on Create a Video, then in the Save as a type box, choose whether you want to save it as MPEG-4 Video (*mp4) or Windows Media Video (*.wmv).
8. Once your done with all these steps, go to the designated folder location, and then double click to open the file and play the video.
