YuJa: Difference between revisions
| Line 97: | Line 97: | ||
* '''Thumbnails''' - you may change the thumbnail that is displayed to viewers by clicking any of the thumbnail options presented here and then "Save Thumbnails," or you may upload your own by clicking "Upload Custom Thumbnail" --> select your video --> "Add to Thumbnails" --> "Save Thumbnails"<br> | * '''Thumbnails''' - you may change the thumbnail that is displayed to viewers by clicking any of the thumbnail options presented here and then "Save Thumbnails," or you may upload your own by clicking "Upload Custom Thumbnail" --> select your video --> "Add to Thumbnails" --> "Save Thumbnails"<br> | ||
* '''Links''' - the "Direct Link" is the link you should use if wish to send someone a link to this media item (e.g. if you want to email a link to your video); "Embed this Video" is the embed code to use when [[#Using Embed Code|embedding the item into a webpage]] | * '''Links''' - the "Direct Link" is the link you should use if wish to send someone a link to this media item (e.g. if you want to email a link to your video); "Embed this Video" is the embed code to use when [[#Using Embed Code|embedding the item into a webpage or Blackboard]] | ||
Clicking the "Security Settings" button within the Links section will allow you to assign access restrictions to your uploaded content. Content that you upload is made "public" by default, so anybody with a link to it will be able to view it. To password protect it, under Additional Restrictions, select "Password or Authentication Restriction" --> "Platform Authentication" to force viewers to have to sign in with their WPU username and password to access the content; or select "Simple Password" to enter your own custom password that viewers must enter to view the content. There are additional access restrictions available to you in this section as well. <br> | Clicking the "Security Settings" button within the Links section will allow you to assign access restrictions to your uploaded content. Content that you upload is made "public" by default, so anybody with a link to it will be able to view it. To password protect it, under Additional Restrictions, select "Password or Authentication Restriction" --> "Platform Authentication" to force viewers to have to sign in with their WPU username and password to access the content; or select "Simple Password" to enter your own custom password that viewers must enter to view the content. There are additional access restrictions available to you in this section as well. <br> | ||
* '''Downloads''' - under "Allow viewers to download," select "Enable" if you wish users (e.g. students) to be able to download your media item; otherwise, click "Disable"<br> | * '''Downloads''' - under "Allow viewers to download," select "Enable" if you wish users (e.g. students) to be able to download your media item; otherwise, click "Disable," which is the default selection<br> | ||
* '''Accessibility''' - here you may upload captions or a transcript if you have | * '''Accessibility''' - here you may upload captions or a transcript if you have either, or request to have captions and a transcript created if you do not. You may upload captions in .srt, .xml, or .webvtt formats, and you may upload a transcript in plain text (.txt) or .pdf formats. In this section, you will also see a list of any Accessibility items that have already been created for your video, which you may download or delete from YuJa. See [[#Captioning Your Videos|Captioning Your Videos]] for more information on creating and editing captions. | ||
==Captioning Your Videos== | ==Captioning Your Videos== | ||
Revision as of 10:38, 13 August 2020
YuJa [1] (YuJa) is an enterprise media platform that facilitates online hosting, playback, and user management of digital media, as well as lecture capture, live streaming, social learning, video conferencing, and video test proctoring solutions. It encompasses a front-end website, referred to colloquially as WPU's YuJa zone, which displays media that has been made available to WPU faculty and students for pedagogical purposes, and back-end account capabilities through which WPU members may upload and manage user-specific media content after signing in.
William Paterson University began using YuJa at the end of April 2020 to replace Illumira (formerly known as NJVid).
Overview
Signing into Your YuJa Account
All William Paterson University faculty and staff members have a YuJa account. You may access your YuJa account either through Blackboard or through WPU's YuJa zone. If you are a WPU instructor who is signing into YuJa for the first time, we recommend you do so via Blackboard so that YuJa will recognize you as an instructor.
Signing in Through Blackboard
1. Sign into Blackboard and navigate to the course in which you intend to use YuJa.
2. Click “Tools” from the left-hand menu.
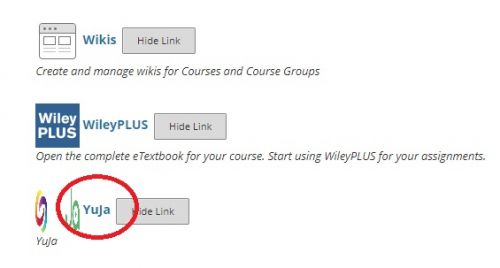
3. Click on “YuJa.”
4. If this is your first time accessing YuJa via Blackboard, you might receive an automated email that confirms your account or course has been created.
Signing in Through WPconnect or WPU's YuJa Zone
1. Go to WPconnect, logon, and search for the YuJa link or click on the YuJa icon under the Apps display.
2. You may also go directly to www.wpunj.edu/yuja and enter your William Paterson username and password.
Uploading Content to YuJa
There are two ways to upload content to YuJa: 1) via Blackboard and 2) via WPU's YuJa zone. Both provide the same features and capabilities, and the procedures for both are similar. Please note that by default only you have access to the media you upload, but you are free to share it with other users and/or embed it or email link(s) to it to your students.
Uploading via Blackboard
1. Sign into your YuJa account through Blackboard.
2. Along the left-hand menu, click on “My Media” if you are not already there. My Media is the location where you will upload media such as video, audio, and text files. You can organize your content into file folders by using the “New Folder” menu option at the top to create folders and then renaming them by clicking on the gear icon that appears when you mouse over a folder. Only you and those with whom you share access will be able to access the content in your My Media section.
3. Navigate to the area or folder within My Media where you want to upload your media, and click “Upload” from the top menu.
4. Select your media type (the default selection is “video”) and click the “Browse” button. Select a file to upload and click “Open.”
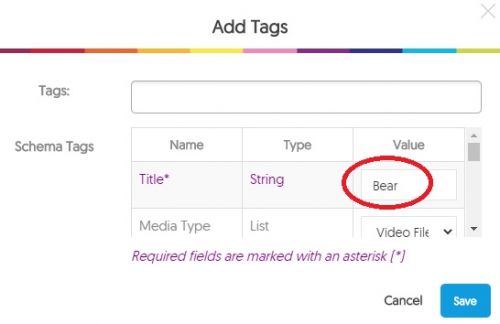
5. Click on “Add Tags” underneath the Browse button. Add a title for your media using the text box corresponding to the “Title” row and “Value” column. The other data fields are optional. Click Save.
6. Click “Start Upload.” You will see a graphic indicating that your media is uploading and another when it begins processing. When complete, your media will appear in your My Media. Mouse over your media and select an option to make adjustments. Select “More” to alter the metadata, thumbnail, etc. To select your media, hold "Control" on a PC ("Command" on a Mac) and select your media. Selections will display an orange border. You can make more than one selection.
Uploading via WPU's YuJa Zone
1. Go to WPU's YuJa zone (wpunj.yuja.com) and sign in.
2. Follow the same steps as those listed to upload via Blackboard, beginning with step 2.
Settings and Options
You can adjust various settings to the media that you upload and/or those which have been fully shared with you. Wherever your media is located in your account (e.g. My Media), simply mouse over a thumbnail and click an option.
- Play - plays your media
- Share - allows you to share this particular media with other YuJa accounts (colleagues, students, et al.). Click in the "Share With" box, select the individual with whom you want to share (you may successively select more than one person), select the level of access, then click the "Share" button and "Save." "Full Access" gives the full set of access permissions to the person with whom you are sharing, including the ability to delete your video. "Edit Access" allows the individual to edit the video and embed it into Blackboard. "Read Only" allows the recipient only to watch the video in his/her account.
- Publish - allows you to make this particular media item visible to others. To publish media to your students, select "All Channels," search and find your course and select it. Then click "Select" to save. Now when your students log into their YuJa accounts, they will be able to access your published media when they click on your course channel.
- Delete - deletes your media
- Edit - launches the media editor, with which you can make simple trims and edits to your media
- More - launches a window with the full suite of settings adjustment options (see next section)
More Settings and Options
These are brief descriptions of some of the most important additional settings available to you when mousing over a video and clicking "More."
- General - adjust the Title, Description, add metatags, etc.
- Thumbnails - you may change the thumbnail that is displayed to viewers by clicking any of the thumbnail options presented here and then "Save Thumbnails," or you may upload your own by clicking "Upload Custom Thumbnail" --> select your video --> "Add to Thumbnails" --> "Save Thumbnails"
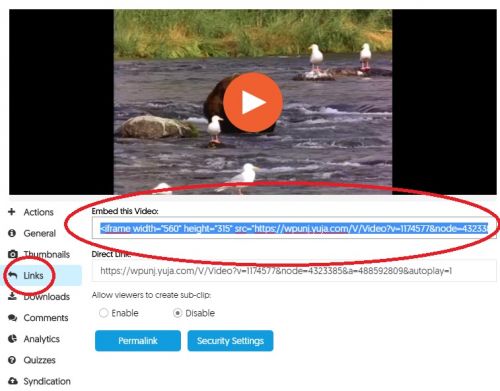
- Links - the "Direct Link" is the link you should use if wish to send someone a link to this media item (e.g. if you want to email a link to your video); "Embed this Video" is the embed code to use when embedding the item into a webpage or Blackboard
Clicking the "Security Settings" button within the Links section will allow you to assign access restrictions to your uploaded content. Content that you upload is made "public" by default, so anybody with a link to it will be able to view it. To password protect it, under Additional Restrictions, select "Password or Authentication Restriction" --> "Platform Authentication" to force viewers to have to sign in with their WPU username and password to access the content; or select "Simple Password" to enter your own custom password that viewers must enter to view the content. There are additional access restrictions available to you in this section as well.
- Downloads - under "Allow viewers to download," select "Enable" if you wish users (e.g. students) to be able to download your media item; otherwise, click "Disable," which is the default selection
- Accessibility - here you may upload captions or a transcript if you have either, or request to have captions and a transcript created if you do not. You may upload captions in .srt, .xml, or .webvtt formats, and you may upload a transcript in plain text (.txt) or .pdf formats. In this section, you will also see a list of any Accessibility items that have already been created for your video, which you may download or delete from YuJa. See Captioning Your Videos for more information on creating and editing captions.
Captioning Your Videos
YuJa will automatically add captions to videos that you upload with approximately 70% speech-to-text accuracy. You will receive an email notifying you when captions have been added to your video.
Manually Adjusting Captions
You can manually correct and adjust automated captions.
1. Sign into your YuJa account and in My Media, mouse over your video and click "Edit." You will be taken to the Media Editor.
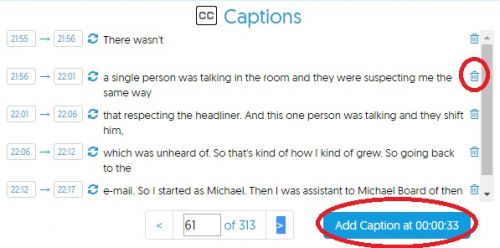
2. Click on the "CC" icon at the right of the screen.
3. Click on the text of a caption you would like to alter and enter your correction. To add an altogether new caption, use the blue "Add Caption" button. To outright delete a particular caption, click on the trash icon.
4. When complete, click Save from the top menu.
Embedding into Blackboard
Faculty may simply link to YuJa videos in Blackboard or follow the instructions below to embed videos into their course shells. Embedding lets students watch videos directly within Blackboard without having to click on a link and exit out to the YuJa website.
Instructions
1. Copy the video's URL.
2. Go to your course shell in Blackboard and navigate to the content area where you would like to embed a video.
3. Add a name for your video and from the top menu, mouse over "Build Content" and click "Item" under the Create heading.
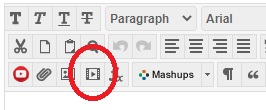
4. In the text editor, click the "Insert/Edit Embedded Media" icon.
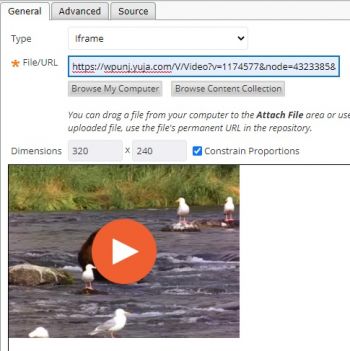
5. A new window will open. Switch Type from "Flash" to "Iframe," and in File/URL, paste the URL of the video that you copied in step 1.
6. Click "Insert" at the bottom right and then "Submit" at the bottom right.
7. You might notice that your video's aspect ratio is wrong or that you cannot play the video full screen. To ameliorate these compromises, consider pasting the URL (i.e. web address) to the video underneath the video player you embedded in step #6 so that your students will have a way to watch the video without these issues.
Instructions to Embed Without a URL
Follow these instructions to embed a YuJa video into Blackboard when you do not know its URL.
1. Go to your course shell in Blackboard and navigate to the content area where you would like to embed a media asset, such as a video.
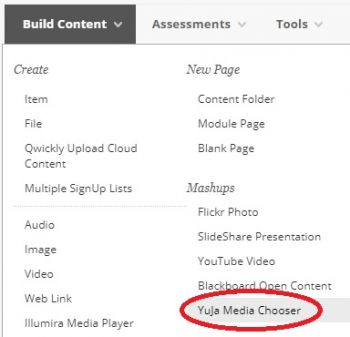
2. Mouse over “Build Content” from the top menu and select “YuJa Media Chooser.”
3. Scroll down until you see the text box reading, “Search title or description term.” Here, either search by title to find the video you want to embed, or scroll further down and select the video from the list.
4. Click “Insert Videos” at the bottom right-hand corner.
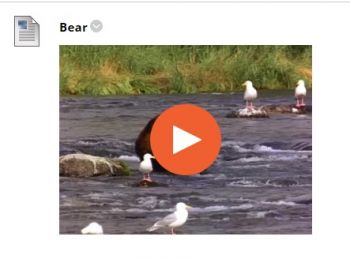
5. You will now see your video embedded at the bottom of your content area. Consider switching to student preview mode and playing the video to confirm that it will play back properly for your students.
Using Embed Code
As a faculty member, you have access to embed code for all of the videos that you upload to YuJa. You can use this code to embed your videos into your Blackboard course shells with the correct aspect ratio and full screen playback capability.
1. Mouse over a video in your YuJa account and click "More" from the menu selections at the right.
2. In the ensuing pop-up window, click "Links" from the left-hand menu and copy everything in the "Embed this Video" text box.
3. Go to your course shell in Blackboard and navigate to the content area where you would like to embed this video.
4. Add a name for your video and from the top menu, mouse over "Build Content" and click "Item" under the Create heading.
5. In the text editor, click the "Insert/Edit Embedded Media" icon.
6. A new window will open. Click into the Source tab from the top menu and paste the embed code that you copied in step 2.
7. Click into the General tab from the top menu and click "Insert" at the bottom right. The window will close.
8. Click "Submit" at the bottom right.


