Webex
What is Webex?
Webex is Cisco’s video and phone conferencing platform. It allows individuals to make, receive, and schedule phone calls, video calls, and conferences from any device. Webex meetings are highly immersive, providing HD video, wireless content sharing and much more. Webex Meetings and Events can have up to 1000 participants. Webex meeting would be more collaborative whereas Webex events are more ideal for presentations and a larger audience.
Changes to Webex - 2021
Important information about changes to Webex at WPUNJ:
A Unified WebEx App
By years end, the current WebEx Teams app and WebEx Meetings app will be fully replaced by a single app simply called WebEx.
For now, WebEx Meetings will stay in place and anyone with Web Teams should automatically be upgraded to WebEx.
WebEx Calling in Trial
We are currently testing WebEx calling in limited trial testing. WebEx calling turns the WebEx application into a fully featured phone experience, using your WPU extension either on or off campus.
For specific information about the calling testing, or if you have questions and concerns, please contact the HelpDesk.
Using the Webex App (Desktop)
Installation
The full application is available through the Software Center on University imaged machines.
For personal machines, go to https://www.webex.com/downloads.html to install full application for your platform.
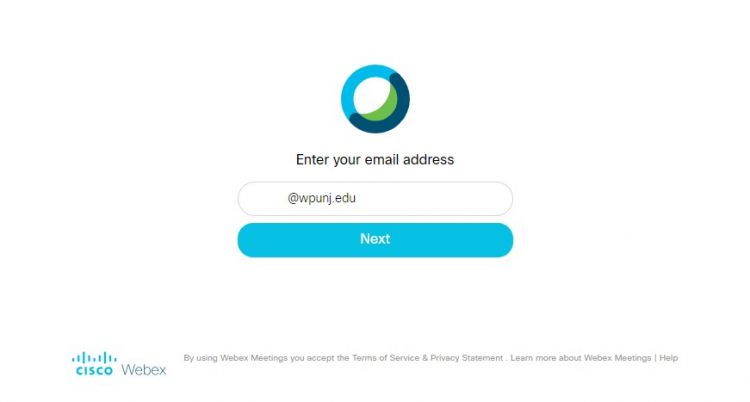
After installing, you will need to sign in to the application:
- Select Sign in
- Enter your full WPU email address
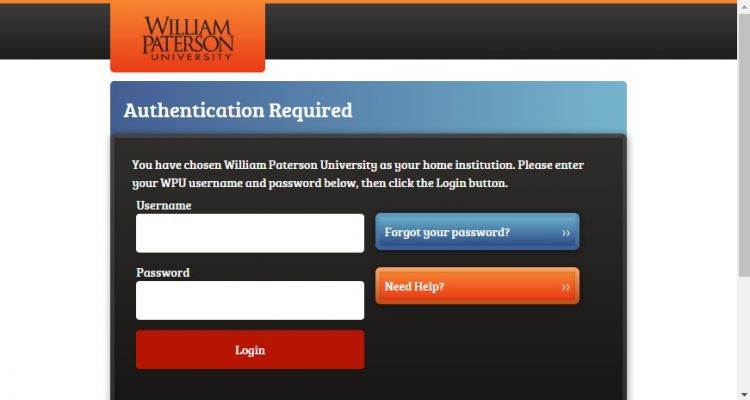
- Sign in again with WPU login and Duo authentication.
Upon initial login, you may encounter ‘Phone service disconnected’ message – to resolve click the message, then click ‘New Session’.

Interface Overview

Help
Spaces
Navigation Menu
Profile and Preferences
Status
Search
Filters
Start a Conversation, Make a Call, or Add a Contact
Devices
Activities
Messages — Messages are where you chat with colleagues. We keep these messages secure so you can feel confident sharing your work ideas in Webex.
People — see who's in the space, or if you're a moderator you can add people to the space.
Content — find and see all your shared files, photos, links and whiteboard content.
Schedule — create a meeting from the space or get a list of meetings already scheduled for the space.
Call/Meet
Video — make a video call to a person or to people in a Space.
Audio Calling
Place an Audio Call
To place an audio call, navigate to the calling tab:

From here you can dial a number or search directory to make call.
You can view your call history in the left pane.
Answer an Audio Call
When receiving a call, you will receive a desktop notification in the lower right hand corner of the screen with buttons that give you options to answer, decline, or send a message to the caller:

The application will also ring. Ring settings can be adjusted under Audio Preferences, located under your account menu in the upper left hand corner of the application and clicking "Settings" > "Audio."

Audio Call Settings
To view and manage call settings, click on “Call Settings” bottom left of UI, dialog box will open (see below).

Helpful settings available here include:
- Forward Calls to Voicemail or another registered number (see next section on adding numbers)
- Select a registered phone for “Single Number Reach” - this will allow incoming calls to ring on both your desktop app and the selected phone
Audio Call Preferences
Call preferences can be located under your account menu in the upper left hand corner of the application and clicking "Settings" -> "Calling":

- Choose whether to start calls with your video enabled
- Choose whether to forward calls to VM or another number, add forwarding numbers
- Add phone number for Single Number Reach, and enable/disable for numbers
Voicemail
Setting Voicemail Pin
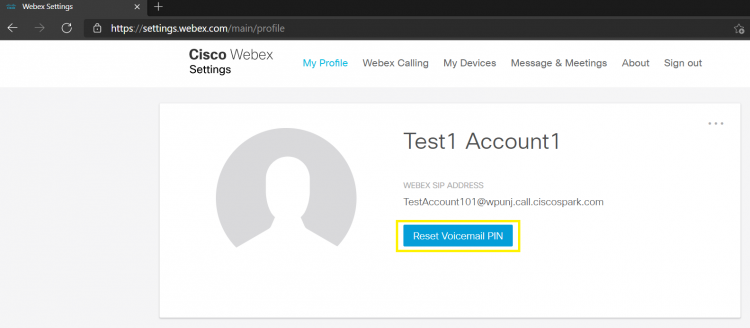
A voicemail pin will be required to access voicemail and change voicemail settings. The pin must be set by the user. To set your voicemail pin:
- Sign in to https://settings.webex.com with you University credentials.
- Select Reset Pin:

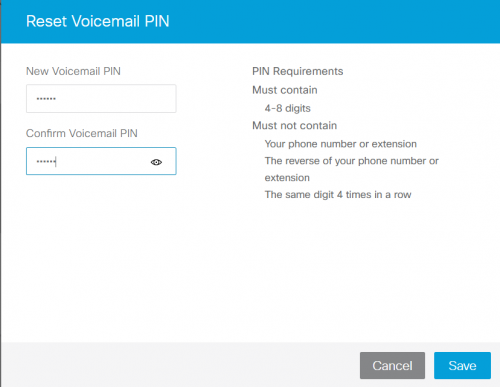
- Change using the guidelines in the prompt:

Voicemail Settings
Default Settings
Some voicemail settings are only available through the Settings Portal. This portal can be accessed here: https://settings.webex.com by signing in with you University credentials.
The default voicemail settings are as follows. These settings can be changed if desired:
- When busy, send calls to voicemail.
- Answer after 3 rings.
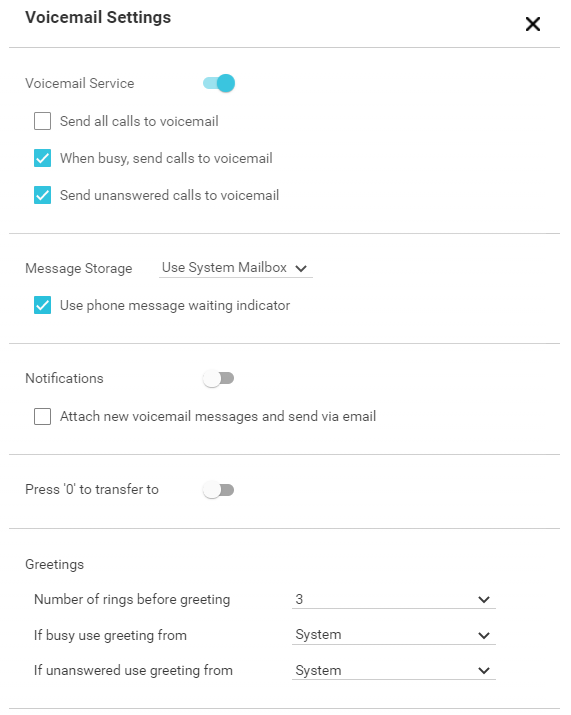 Default Voicemail Settings

Additional Settings
Voicemail to Email
Users can choose to have voice messages sent to email by entering their email address in the Settings Portal.
Voicemail Text Notification
Users can choose to have voice message notifications sent by text by entering their phone number and selecting their provider in the Settings Portal

For further information on voicemail settings see Voicemail Guide
Voicemail Phone Access
Voicemail can be access through the Voice Portal by dialing: 973-720-3451. You will be prompted to enter:
- Mailbox ID (last 4 digits of extension and # symbol)
- Voicemail Pin and # symbol (set through the web portal, see Setting Voicemail Pin section above.
Webex Mobile Apps
Installing the Webex Mobile App allows for your mobile device to be notified when someone calls you through Webex. Calls made to Webex extensions will ring the Webex App and notify you with a "ring" that can be answered on your device. The Webex App also allows you to place calls from your mobile device and can be downloaded from either the Apple App Store or Google Play Store.
iOS
The Cisco Webex mobile app is available in the Apple App Store. This is not to be confused with the Cisco Webex Meetings app that will be depreciated moving forward.

Login with your University credentials after install.
Android
The Cisco Webex mobile app is available in the Google Play Store. This is not to be confused with the Cisco Webex Meetings app that will be depreciated moving forward.

Login with your University credentials after install.
Webex Meetings
The Cisco Webex Meetings application will no longer be used within the next year. The below information is legacy info relating to the use of the previous Webex Meetings app.
Starting and/or Joining a Meeting
A short video tutorial as well as additional information can be found on the Article about Joining a Webex Meeting.'
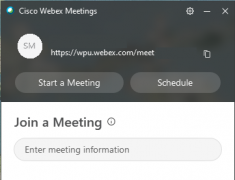
- If you are using the desktop application you can use the Join a Meeting option to join from the application.
- If you are using an WP imaged machine, you will be able to see your calendar, and be able to start or join a meeting from the desktop application as well.
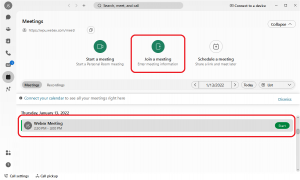

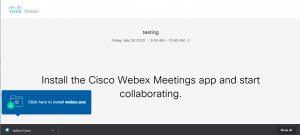
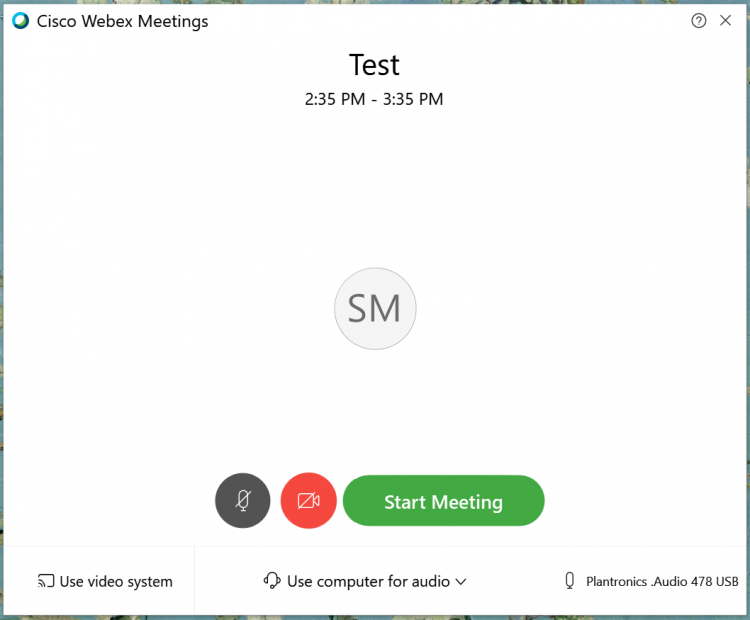
- Click Start a Meeting or Join a Meeting and follow prompt to install or open the webex app.
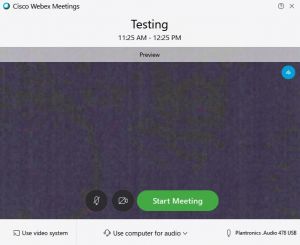
- Click Start Meeting or Join Meeting when you are ready.
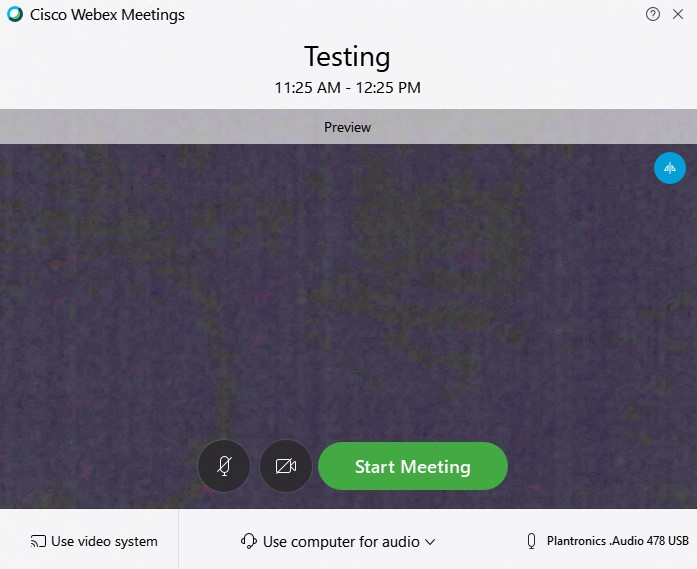
- Once you start the meeting, others will be able to join.

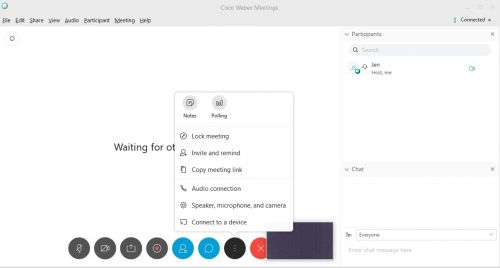
- As a host, If you click Participant at the top, you can edit settings for participants.

- In the middle of the window, you can turn your mic or camera on/off, share your screen, view participants, and more.


Using the Web Version
From your web browser, Webex is available at www.wpunj.edu/webex.
- Select Sign in
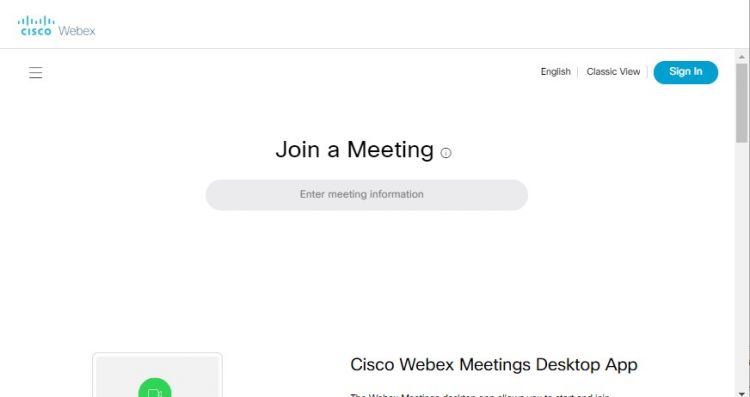
- Enter your full WPU email address
- Sign in again with WPU login and Duo authentication.


Scheduling a Meeting from the Web
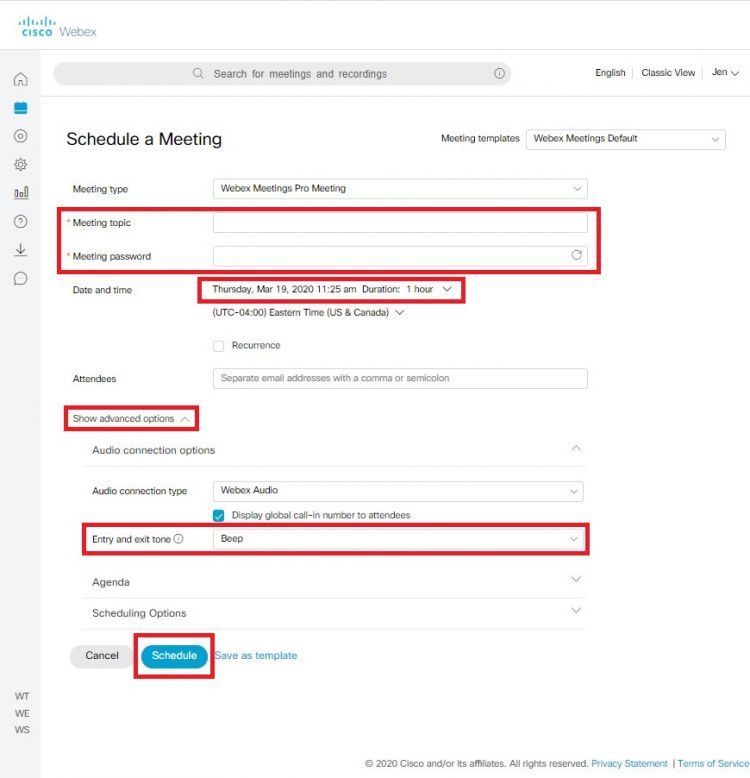
- Click Schedule.
- Fill required sections.
- If you are creating the meeting for someone else, you can make another user the alternate host. Add everyone as attendees and then select the alternate host icon next to the user you would like to make the host.


Starting and/or Joining a Meeting from the Web
A short video tutorial as well as additional information can be found on the Article about Joining a Webex Meeting.
Whoever creates the Meeting will be able to "start" the meeting. Once the meeting is started, attendees can "join."
- Once you have created a meeting or have been invited to a meeting, you can start or join the meeting from the Web. (Additionally, if sent a calendar invitation, the link to join or start the meeting can be found on your Outlook calendar.) We suggest utilizing the Desktop App over the Web App when available
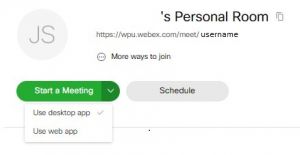
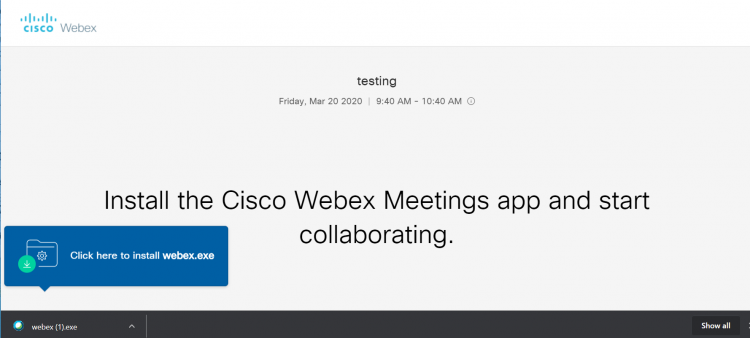
- Click Start a Meeting or Join a Meeting and follow prompt to install webex.exe.
- Click Start Meeting or Join Meeting when you are ready.
- Once you start the meeting, others will be able to join.

- As a host, If you click Participant at the top, you can edit settings for participants.
- In the middle of the window, you can turn your mic or camera on/off, share your screen, view participants, and more.

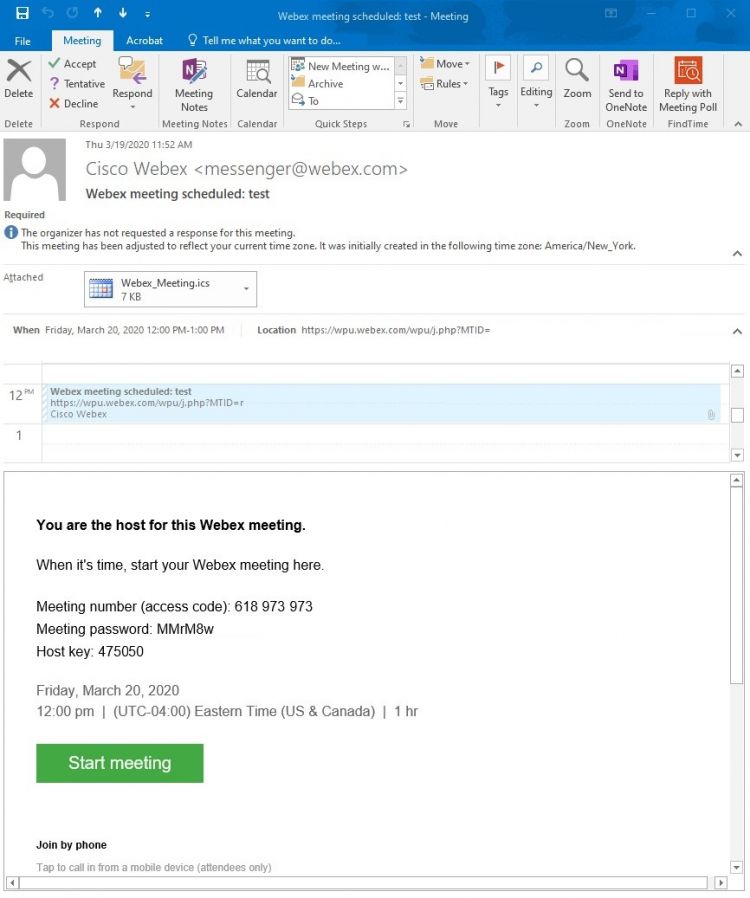
Starting and/or Joining a Meeting from Outlook
A short video tutorial as well as additional information can be found on the Article about Joining a Webex Meeting.
- Once a meeting is scheduled, it will appear on your Outlook calendar.
- You can start the meeting from the calendar event.
- Click Start a Meeting or Join a Meeting and follow prompt to install or open the webex app.
- Click Start Meeting or Join Meeting when you are ready.
- Once you start the meeting, others will be able to join.
- As a host, If you click Participant at the top, you can edit settings for participants.
- In the middle of the window, you can turn your mic or camera on/off, share your screen, view participants, and more.

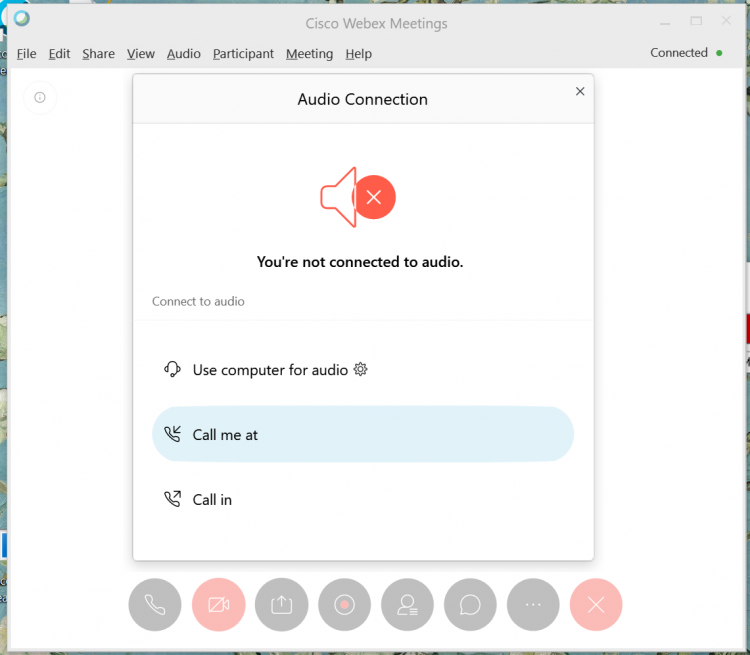
Audio Settings
The default audio setting is to use your computer/headset. If you want to use your phone for audio, it is best to change before Joining or Starting a meeting.
For information on how to choose your audio and video settings before you join a meeting, visit https://help.webex.com/en-us/ibcbx/Webex-Teams-Choose-Your-Audio-and-Video-Settings-Before-You-Join-a-Meeting.
- To change the audio to your phone, notice the audio button at the bottom of the Start/Join page.
- Select the Call in option.

- Call the phone number listed and follow telephone prompts to enter the Access Code and Attendee ID.
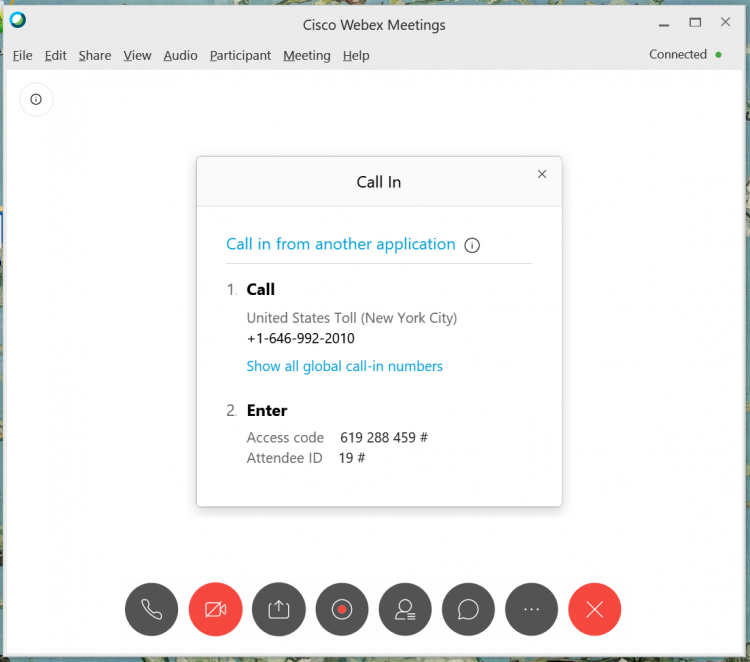
- You can also use the Call me at option and enter your phone number and follow telephone prompts.


Webex Events
Webex Events work well for larger audiences where most participants are there to see a presentation. https://help.webex.com/en-us/ngd4k6q/Get-Started-with-Cisco-Webex-Events
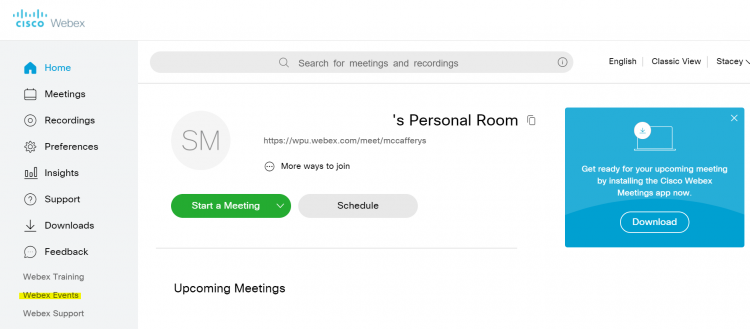
- Log into wpunj.edu/webex
- Find Webex Events on the bottom left of the page.
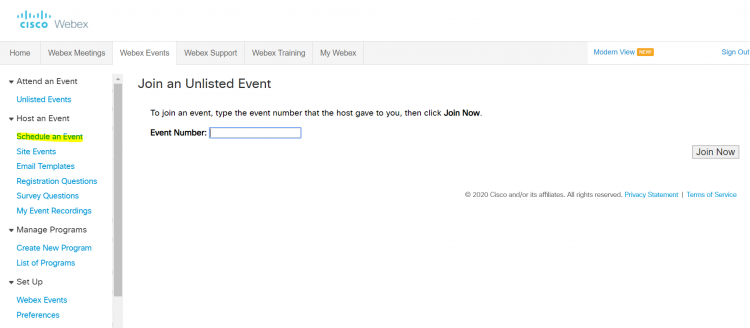
- Click Schedule an Event in the Host an Event section. Note that whoever is hosting the event should schedule the event.
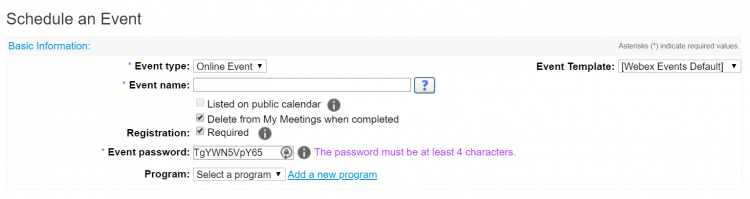
- Fill out all required sections.
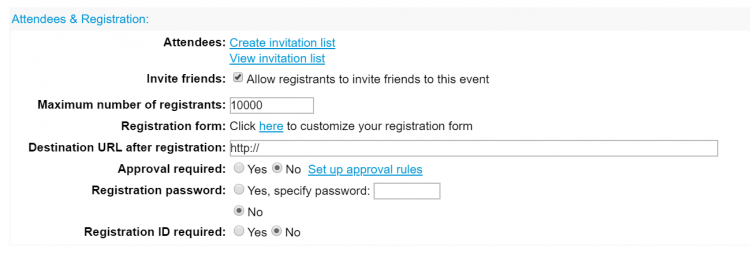
- Under Attendees & Registration click Create an invitation list to invite attendees. This group would be the audience.
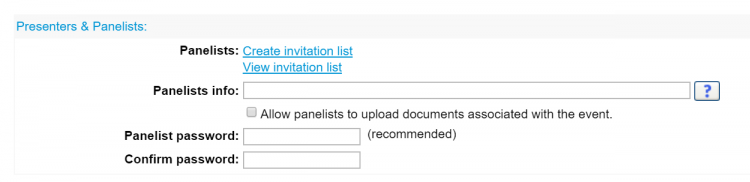
- Under Presenters & Presentations, click Create invitation list for Presenters and Panelists.
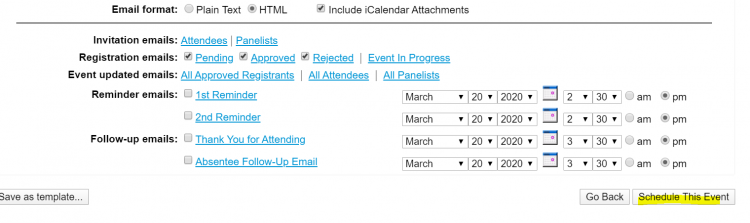
- Once everything is correct, click Schedule This Event.
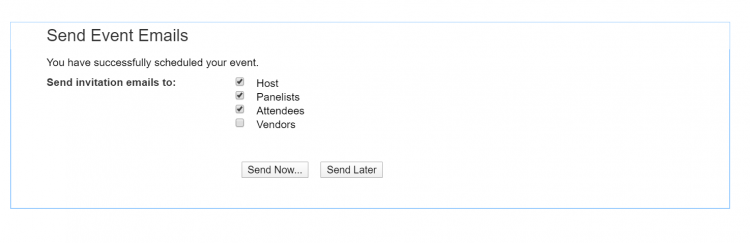
- Send email invitations and they will now show up in Outlook Calendars.


Webex Extension for Office 365
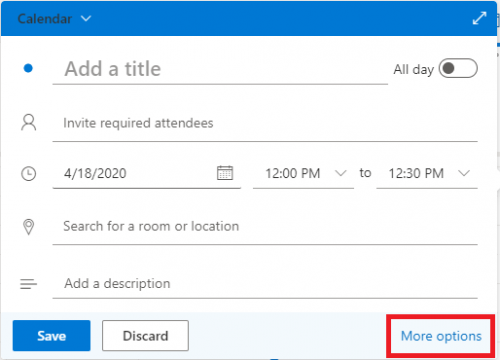
- From your Calendar on Office 365 create a new calendar event and select More options in the lower right hand corner.
- Within the more options calender event screen, select the three dots
 in the upper right hand corner and select Get Add-ins
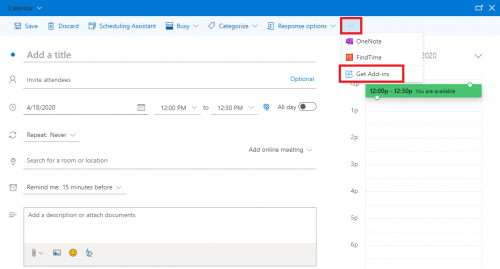
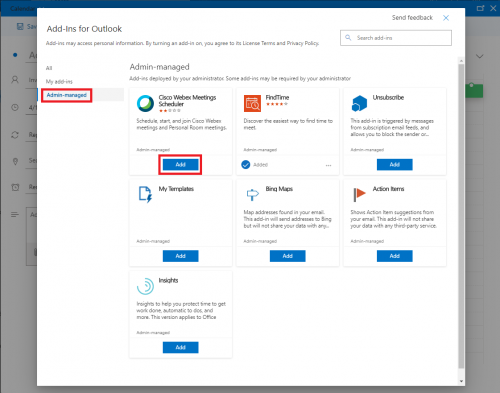
- This will take you to the Add-Ins for Outlook. Select Admin-managed and select the add button under the Cisco Webex Meeting Scheduler extension.
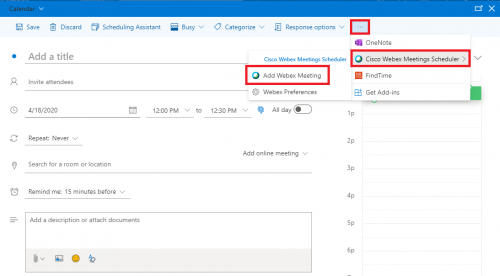
- When you return back to the Outlook Calendar, you can now select the three dots and select Cisco Webex Meeting Scheduler > Add Webex Meeting.
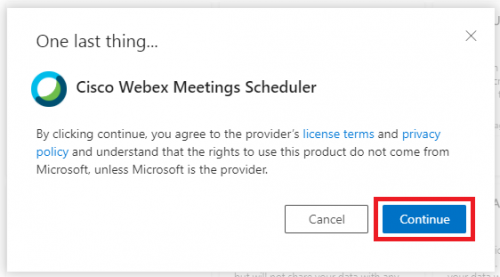
- The first time you utilize this add-in you will be prompted to log in. Please use your full WPUNJ email address on the first login screen. On the following login page use your username and password on the WPUNJ login page. After logging in to to the WPUNJ page you will be prompted for Duo Authentication.
- The WebEx Meeting information will be automatically added to description field of the Calendar event.


Webex Add-in for the Outlook Desktop Application
The Webex add-in for Outlook can be installed thru the Software Center and the Managed Software Center on WPU imaged machines.
Webex Meetings Application
Additionally, Webex has the Outlook add-in available for download, from their website for other machines. www.wpunj.edu/webex, you can find the Webex desktop application as well as the outlook add-in on the Downloads page.
- Open Outlook Desktop Client.
- You can utilize the Webex Add-in from the Home tab of Outlook within the Mail or Calendar sections of Outlook, or within scheduled or new appointments or meetings.
- From a new or existing appointment, select Add Webex Meeting and select Add Webex Meeting from the drop down
- Outlook will connect to Webex to generate a meeting invitation
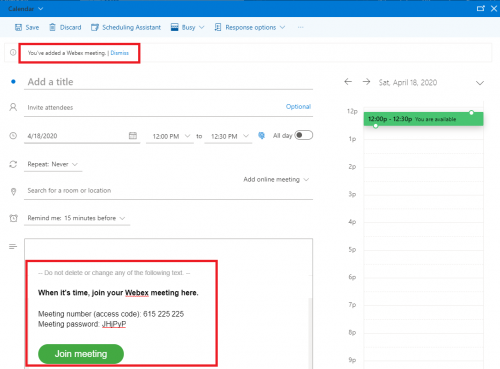
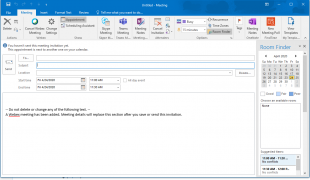
- You will see text added to the meeting invite, but will not see the meeting information until the appointment is saved
- You can start your Webex from the Join meeting button in the meeting appointment a few minutes before your meeting is scheduled to begin.
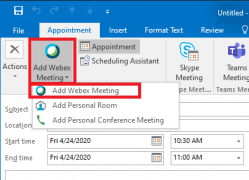
Webex Add-in in Outlook Appointment
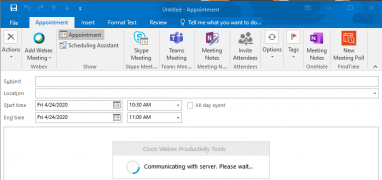
Webex meeting being generated
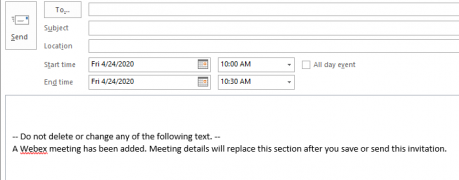
Webex information added to appointment

Webex Meeting information within the appointment


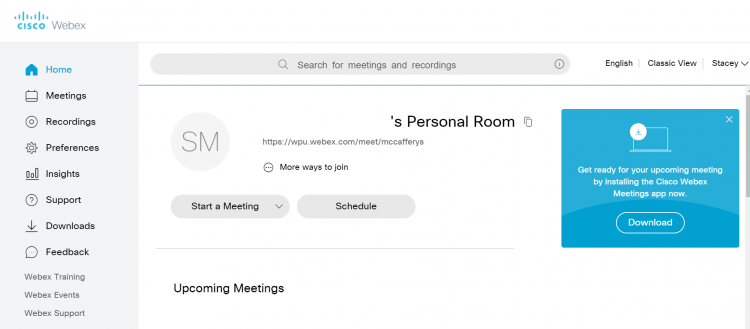
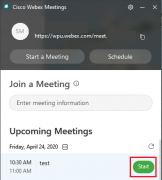
You can schedule and start meetings right from the Webex Application.
- Click Schedule and you can fill out the Outlook Meeting Invitation.
- Click Start to Start an upcoming meeting.
Webex Application
Webex Schedule Meeting
Webex Start Meeting


Useful tools
We recommend testing Webex meetings and events if you have never used it before. Please see this Webex Help Center. https://help.webex.com/en-us/
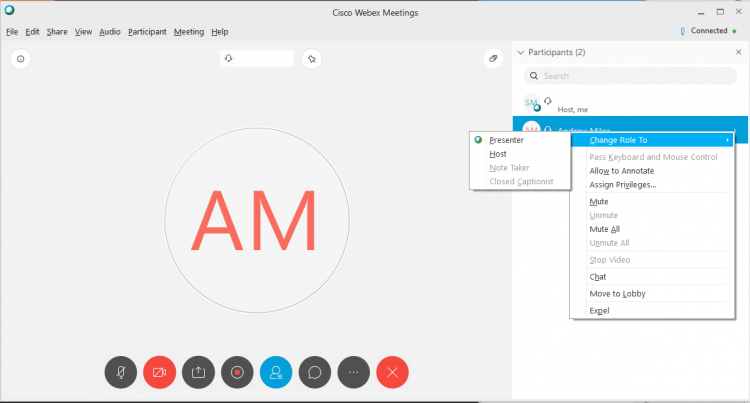
- By default, whoever creates the meeting is the Host. You can change role by right-clicking on the participant.
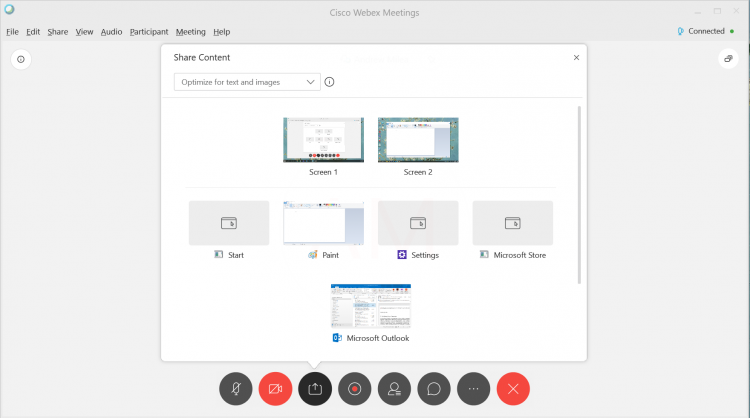
- Screen sharing can be done by clicking the share button.
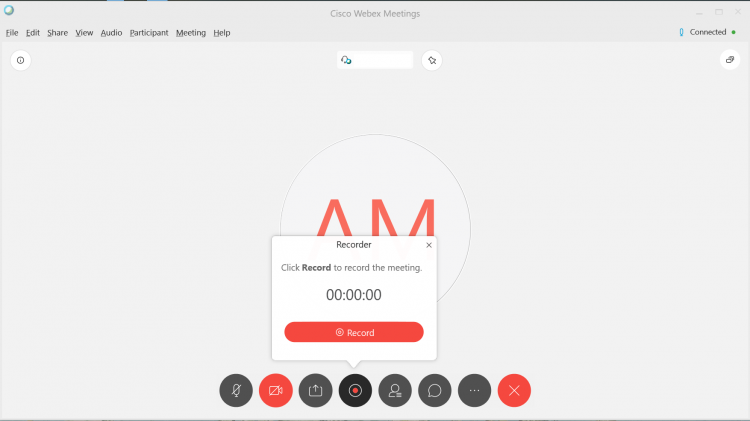
- Record your meeting using the record button.
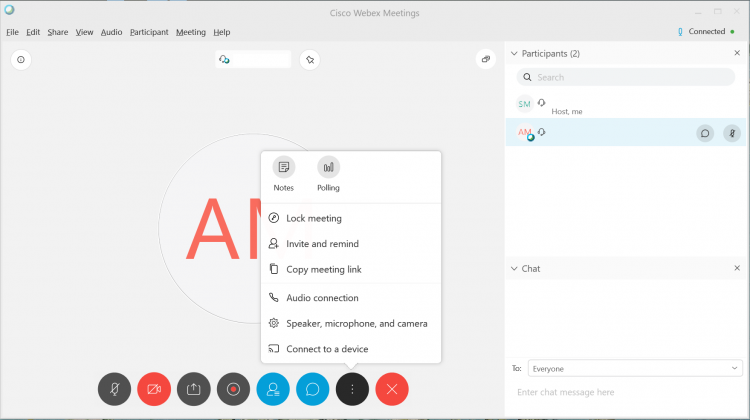
- Invite more attendees and other options by clicking the 3 vertical dots.
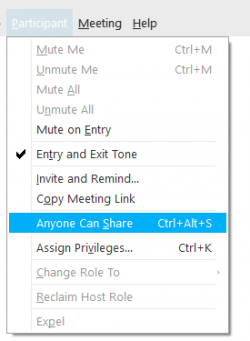
- Ensure participants are on mute as soon as they enter the meeting so that the main presenter can be uninterrupted upfront. If necessary, the user can unmute themselves at a later time or the meeting host can unmute them.
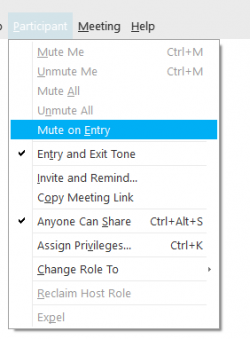
- Avoid unauthorized screen/application sharing by unchecking “Anyone can share”. If necessary, the host can designate specific users as presenters in the course of the meeting.
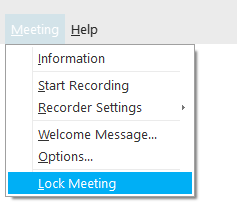
- Once all the participants are in the meeting, the host can lock the meeting. Anyone trying to join after the meeting room has been locked will be placed in the lobby and will require authorization to enter the meeting.
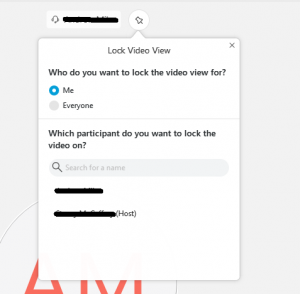
- To avoid users being distracted by other participants, pin the video of the presenter for everyone in the meeting.
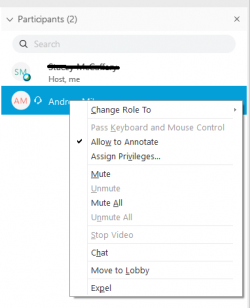
- In the event a participant is disruptive there are several actions the host can take. These are available by right clicking on the user in the participant panel. The key ones are Mute, Stop Video, and in extreme cases Expel the participant. If the room is locked, the user will not be able to return, unless authorized by the host.


Webex Meetings Mobile App
You can download the Cisco Webex Meetings App on your Phone. Please note these screencaps are on an iPhone and will be slightly different for other phones and operating systems.

- Search for WebEx in the App Store.
- Select GET
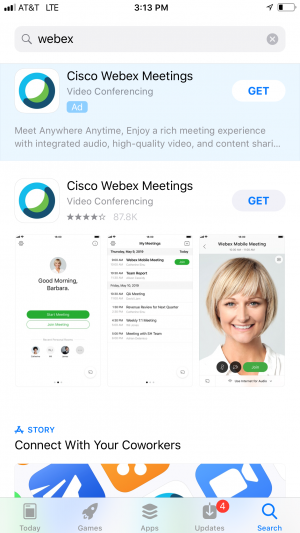
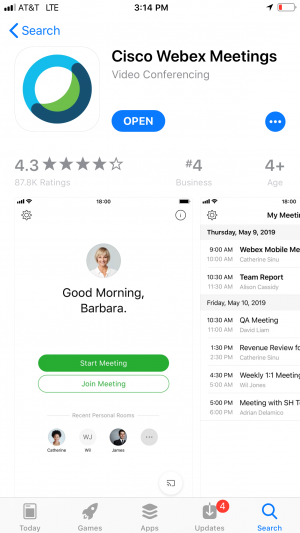
- Select GET again to download the app.
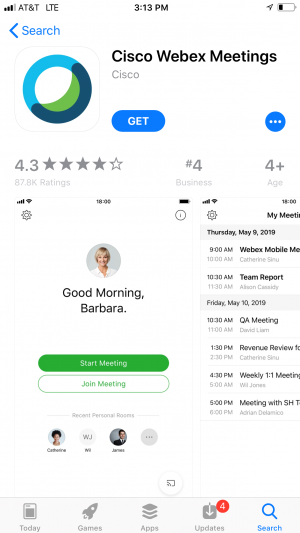
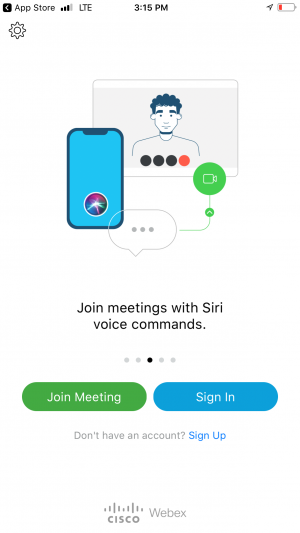
- Open App.
- Select I Accept
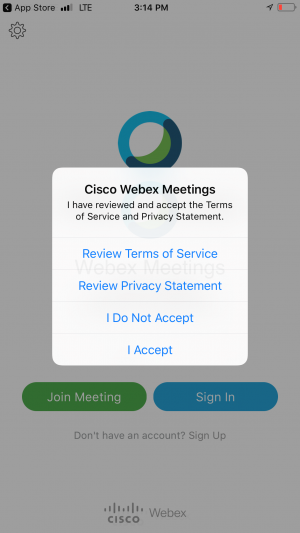
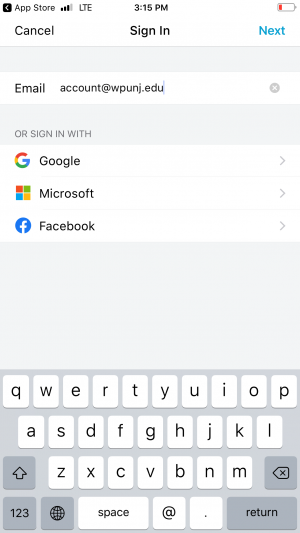
- Select Sign in
- Sign in with your full email address.
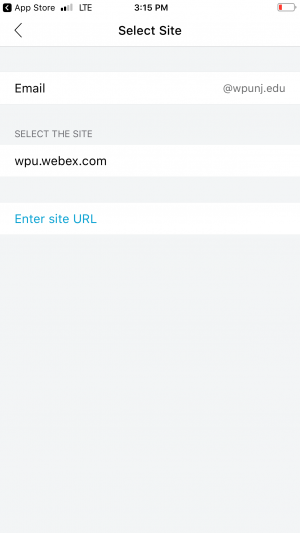
- Enter Site URL.
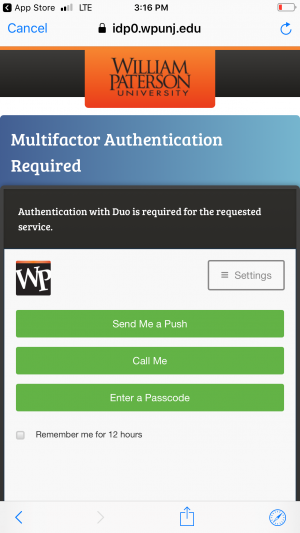
- Login with WPU Credentials.
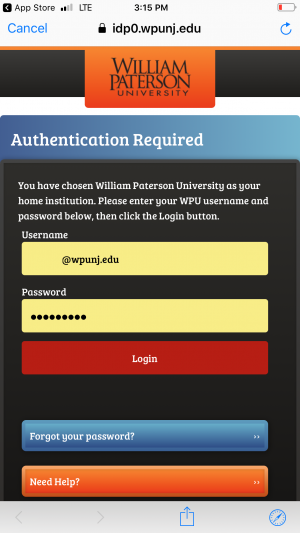
- Authenticate with Duo.
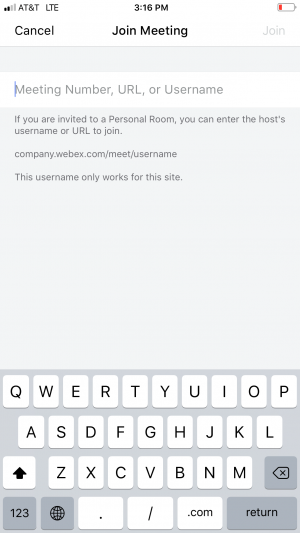
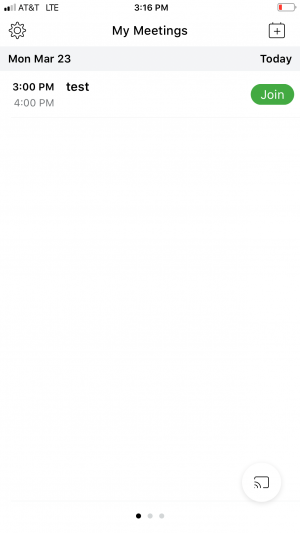
- If you have a meeting already set, you can select Join.
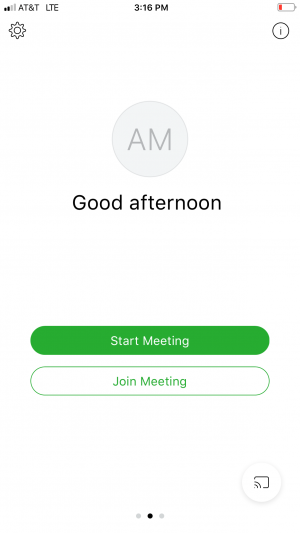
- Select Join Meeting.
- Enter Meeting Number which can be found in your email.