VirtualBox Campus Image Creator: Difference between revisions
Jump to navigation
Jump to search
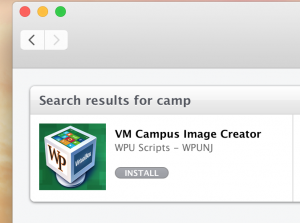
Select the Campus Image Install item.
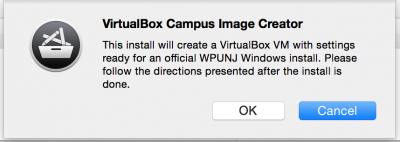
Pre-install directions.
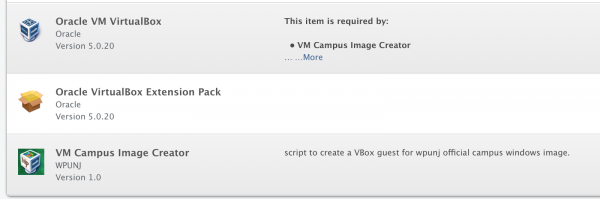
This install will include VirtualBox and the needed Extensions. Those items do not need to be selected separately.
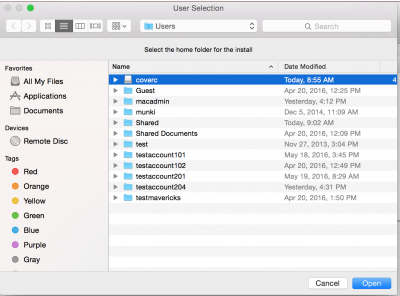
Select the home folder of the user to have the image installed.
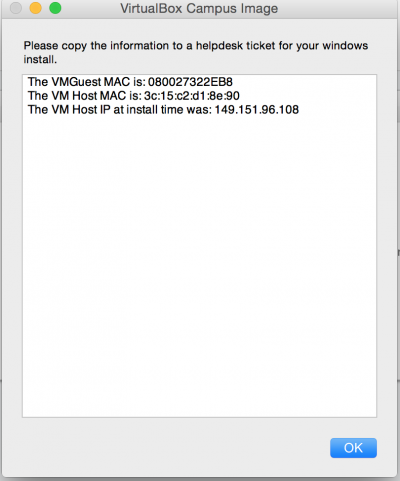
If the install is successful you will be presented with this dialog. If any information is missing, then there was a failure. Copy this information to a Helpdesk ticket.
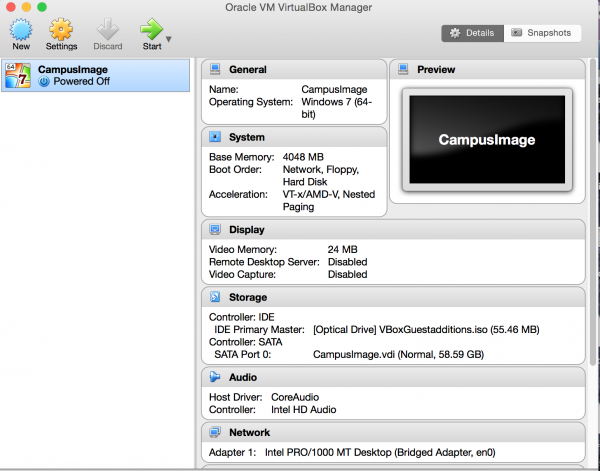
When you open VirtualBox (/Applications/VirtualBox.app) you will see a Campus Image guest with all the settings needed for imaging.
No edit summary |
No edit summary |
||
| Line 5: | Line 5: | ||
<div class="toccolours mw-collapsible " style="width:300px"> | <div class="toccolours mw-collapsible " style="width:300px"> | ||
[[Image:VMCIC_install_Item.png |center|300px]]<br> | [[Image:VMCIC_install_Item.png |center|300px]]<br> | ||
Select the Campus Image Install item.< | Select the Campus Image Install item.</div><br><br> | ||
<div class="toccolours mw-collapsible " style="width:400px"> | <div class="toccolours mw-collapsible " style="width:400px"> | ||
[[Image:VMCIC-Preinstall warning.png |center|400px]]<br> | [[Image:VMCIC-Preinstall warning.png |center|400px]]<br> | ||
Pre-install directions.< | Pre-install directions.</div><br><br> | ||
<div class="toccolours mw-collapsible " style="width:600px"> | <div class="toccolours mw-collapsible " style="width:600px"> | ||
[[Image:VMCIC Items to install.png |center|600px]]<br> | [[Image:VMCIC Items to install.png |center|600px]]<br> | ||
This install will include VirtualBox and the needed Extensions. Those items do not need to be selected separately.< | This install will include VirtualBox and the needed Extensions. Those items do not need to be selected separately.</div><br><br> | ||
<div class="toccolours mw-collapsible " style="width:400px"> | <div class="toccolours mw-collapsible " style="width:400px"> | ||
[[Image:VMCIC Select Home Folder For Install.png |center|400px]]<br> | [[Image:VMCIC Select Home Folder For Install.png |center|400px]]<br> | ||
Select the '''home folder''' of the user to have the image installed. </div>< | Select the '''home folder''' of the user to have the image installed. </div><br><br> | ||
<div class="toccolours mw-collapsible " style="width:400px"> | <div class="toccolours mw-collapsible " style="width:400px"> | ||
[[Image:VMCIC Info For Ticket.png |center|400px]]<br> | [[Image:VMCIC Info For Ticket.png |center|400px]]<br> | ||
If the install is successful you will be presented with this dialog. If any information is missing, then there was a failure. Copy this information to a Helpdesk ticket.</div> | If the install is successful you will be presented with this dialog. If any information is missing, then there was a failure. Copy this information to a Helpdesk ticket.</div><br><br> | ||
<div class="toccolours mw-collapsible " style="width:600px"> | <div class="toccolours mw-collapsible " style="width:600px"> | ||
[[Image:VMCIC VB Ready For Imaging.png |center|600px]]<br> | [[Image:VMCIC VB Ready For Imaging.png |center|600px]]<br> | ||
When you open VirtualBox (/Applications/VirtualBox.app) you will see a Campus Image guest with all the settings needed for imaging.</div> | When you open VirtualBox (/Applications/VirtualBox.app) you will see a Campus Image guest with all the settings needed for imaging.</div> | ||
Revision as of 09:54, 24 May 2016
This Install, available in Managed Software Center will install VirtualBox and create a Guest ready for an install of an official WPUNJ Campus Image windows installation.
Steps:

Select the Campus Image Install item.

Pre-install directions.

This install will include VirtualBox and the needed Extensions. Those items do not need to be selected separately.

Select the home folder of the user to have the image installed.

If the install is successful you will be presented with this dialog. If any information is missing, then there was a failure. Copy this information to a Helpdesk ticket.

When you open VirtualBox (/Applications/VirtualBox.app) you will see a Campus Image guest with all the settings needed for imaging.