25Live: Difference between revisions
No edit summary |
No edit summary |
||
| Line 7: | Line 7: | ||
1) If the initial screen is in Calendar mode, click the tab on the right for Dashboard or the tab for Event Wizard next to the Home tab. | 1) If the initial screen is in Calendar mode, click the tab on the right for Dashboard or the tab for Event Wizard next to the Home tab. | ||
[[File:25LiveEvent1.jpg|none]] | [[File:25LiveEvent1.jpg|none]] | ||
<br> | |||
2) Click the “Create an Event” button on the home dashboard. This will bring you to the Event Wizard which is 25Live’s built-in event scheduling request form. | 2) Click the “Create an Event” button on the home dashboard. This will bring you to the Event Wizard which is 25Live’s built-in event scheduling request form. | ||
<BR> | <BR> | ||
Revision as of 10:43, 15 July 2015
Creating an Event Request
Recommended browsers for 25Live are Google Chrome and Mozilla Firefox. “Sign In” will automatically refer you to WPConnect for your normal login and password.
1) If the initial screen is in Calendar mode, click the tab on the right for Dashboard or the tab for Event Wizard next to the Home tab.

2) Click the “Create an Event” button on the home dashboard. This will bring you to the Event Wizard which is 25Live’s built-in event scheduling request form.
- Note: If you change the view from Dashboard to Calendar (upper right tabs) and exit 25Live, you will need to reselect the dashboard tab or select the Event Wizard tab (upper left tabs) upon next sign-in to access “Create an Event”. 25Live pages are “sticky”, meaning when the view is changed 25Live remembers that as a preference and will open that page the same way next time.
3) Enter the Event Information - * are required fields
Event Name – EX: New Scholars History Conference
- Note: Event Title only applies if there is a different name advertising the event. EX: History on Trial, Rethinking the Discipline, Rethinking the Past
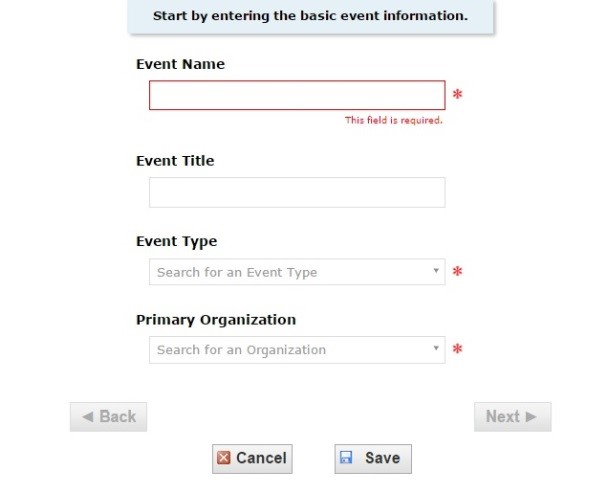
- Type of Event - Use the drop down to select (i.e. – meeting, conference, workshop)
- Primary Organization – type in the first few letters of organization to pull a dropdown selection (i.e. stud)
- Note: On the left side of the screen your entries will populate along with a progress bar. If there are any conflicts with your request they will appear in red in this box with an *.
4) Enter the maximum number of people expected to attend the event
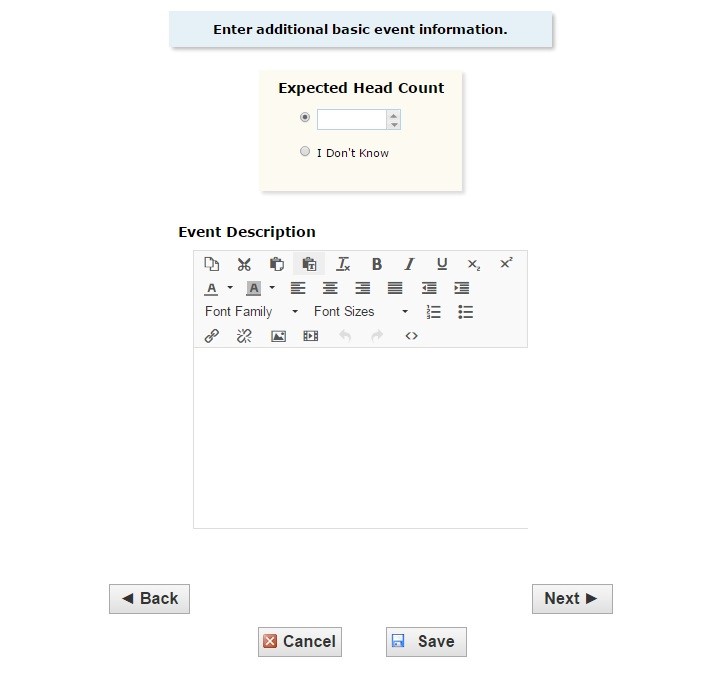
- “Event Description” – This field is intended to capture details about your event. The information will be visible to those that may wish to know more about your event. These details will also assist in the review of the requirements for the request.
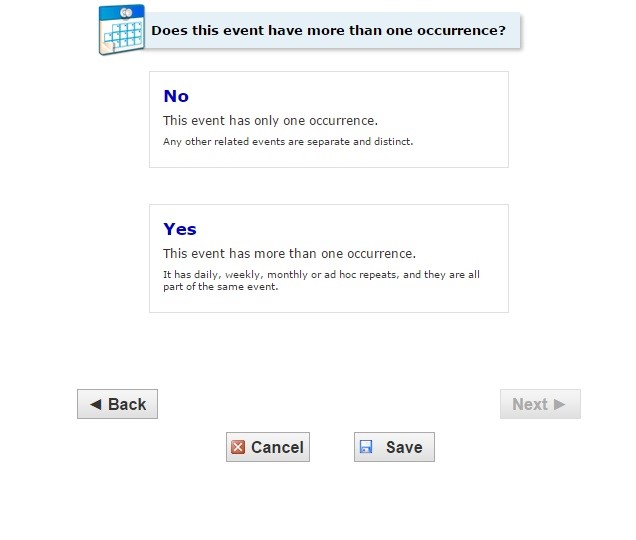
5) Event Occurrence– Select NO for one occurrence or YES for multiple occurrences
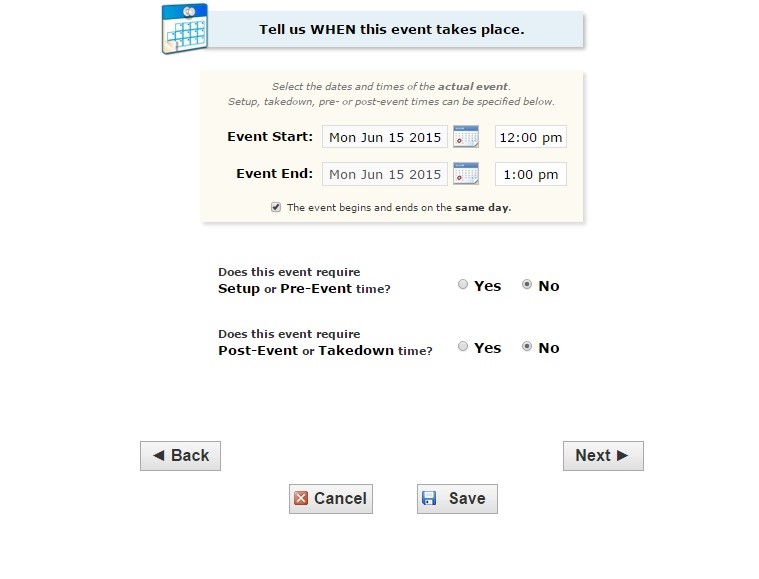
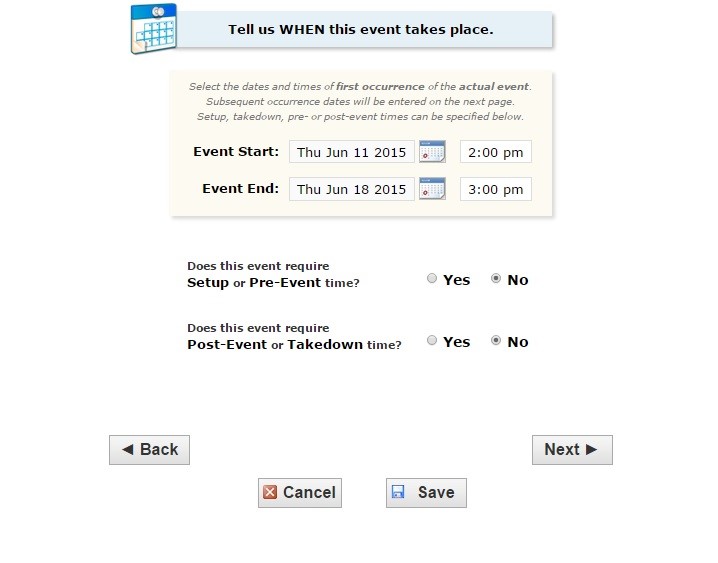
6) Enter the Event Date and Start and End Time. Select a date by clicking the calendar icon. Then type the start and end times in the corresponding fields. Note the check box for begins and ends on the same day is automatically checked.
- Note:Setup and Takedown time is required when the event includes movement of existing room furniture, audio visual or food service. This information will be entered by the Scheduler during the review of the request.
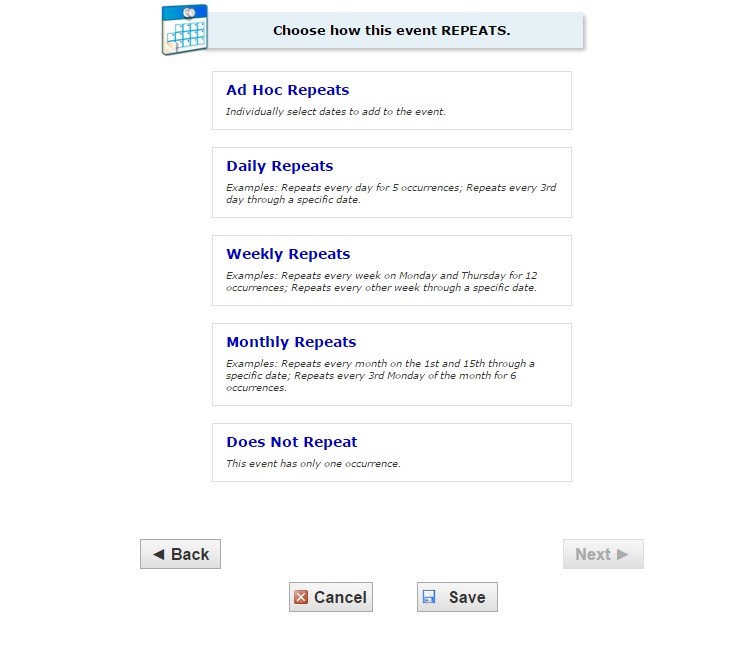
7) Select the appropriate type of repeat and fill in the requested information on frequency, day, length of repeat to occur.
8) Find and Select Location. NOTE: Entire Campus automatically populates and a listing of all locations populates on the right hand side of the screen to assist with the correct abbreviations for buildings.
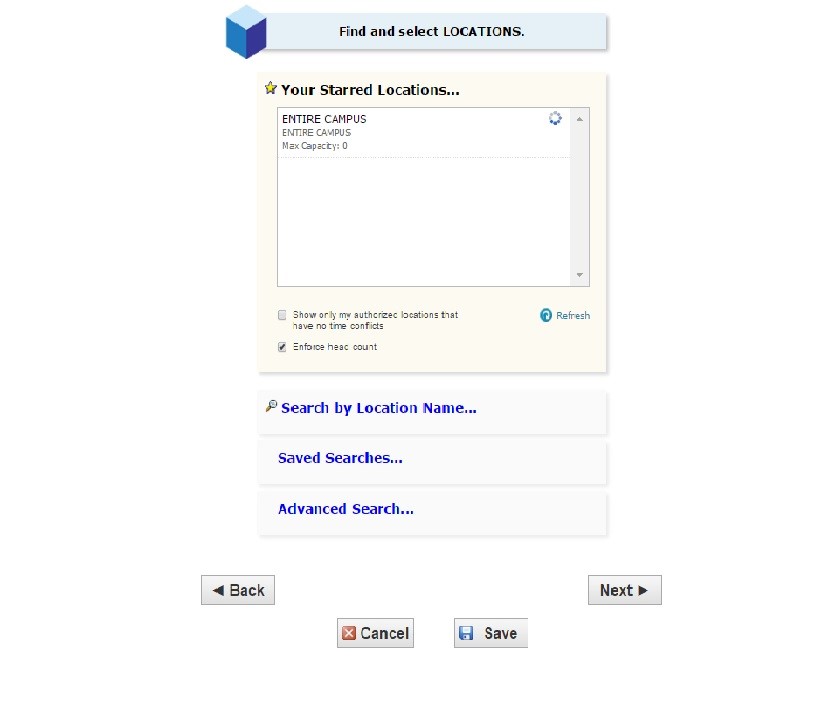
- Use Search by Location Name. Type into the search field the building/room selected and click enter. The search field is not case sensitive. Clicking on the room in the search box will populate the selected location field to the left.
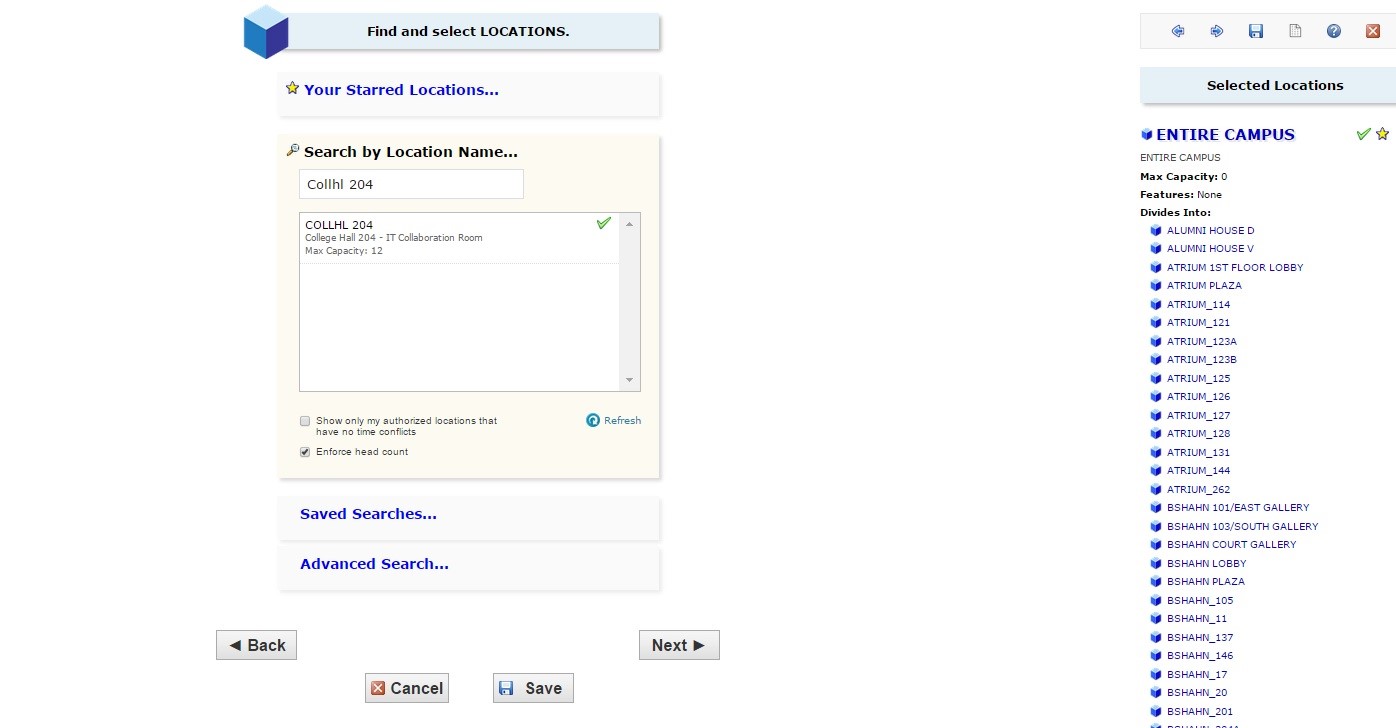
- Note: Available locations will be accompanied with a green check mark. Locations with conflicts will be accompanied by a red triangle. Only select an available location. However, this selection does not guarantee the room is available as there may be a prior request in queue for the same space. Location can only be confirmed by Events and Conference Services.
9) Find and Select Resources. Resources are items that need to be brought into the space for your event such as tables, podium, or you require an AV technician. If you require a resource, search by typing in the first few letters to provide a list of available resources or the name of the resource. The search field is not case sensitive. Clicking on the resource in search box will populate the selected resource field to the right. Note that some resources are limited to specific buildings and spaces.
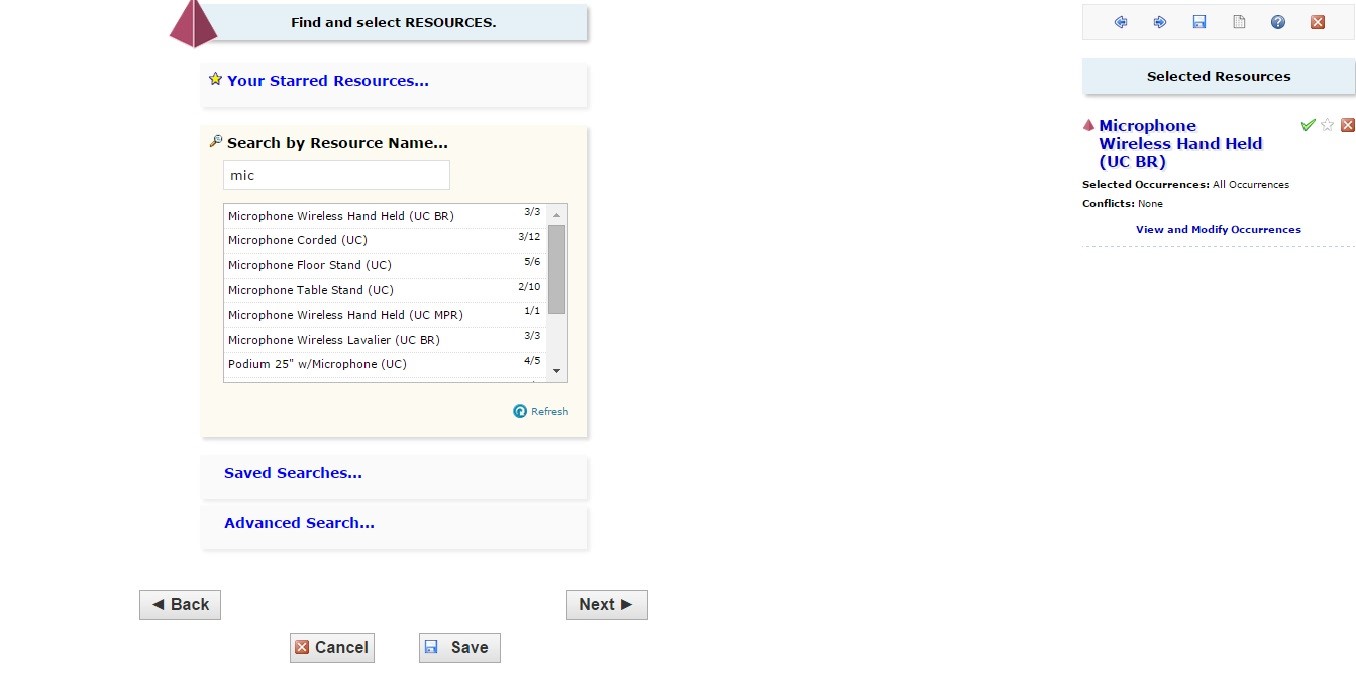
10) If a resource is not required- Click NEXT
11) Custom Attributes- If you are requesting on behalf of someone, please enter the information for the person responsible for the event. If you are the person responsible for the event, these fields do not need to be filled out as the information has already been captured from your log-in.

12) Add Comments if needed
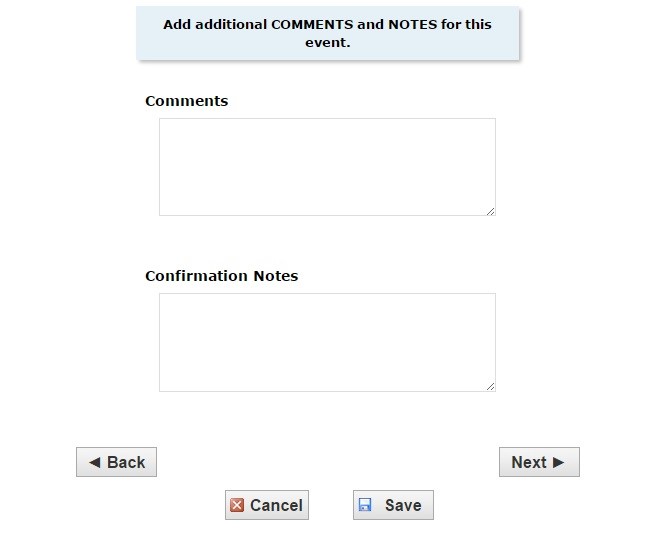
13) Event State will appear as "Draft"

Your request is complete. An Events & Conference Scheduler will notify you if there are any questions regarding your event and/or will confirm the event.