IOS Email Settings: Difference between revisions
Jump to navigation
Jump to search
| Line 20: | Line 20: | ||
'''Setting up WP Email on an iPhone''' | '''Setting up WP Email on an iPhone''' | ||
#Tap '''Settings'''<p><!--[[File:IPhone-Settings-icon.PNG|200px]]--></p> | #Tap '''Settings'''<p><!--[[File:IPhone-Settings-icon.PNG|200px]]--></p> | ||
#Tap '''Accounts | #Tap '''Mail''', '''Accounts''' then Add Account. <p>[[File:IPhone-MailContactsCalendars2.PNG|200px]]</p> | ||
#Choose '''Exchange''' as the account type <p>[[File:Ios-8-email-acct-type.PNG|200px]]</p> | #Choose '''Exchange''' as the account type <p>[[File:Ios-8-email-acct-type.PNG|200px]]</p> | ||
#Email: Enter your '''full WPUNJ email address''' | #Email: Enter your '''full WPUNJ email address''' | ||
Revision as of 10:41, 24 May 2022
This article details how to configure WPUNJ email on iPhone and iPad.
iOS Email Settings
iOS users can utilize either the native mail application or the Microsoft Outlook Application, available from the iTunes App Store.
Setting up WP Email on an iPhone
- Tap Settings
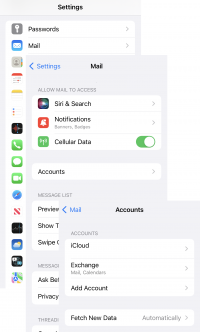
- Tap Mail, Accounts then Add Account.
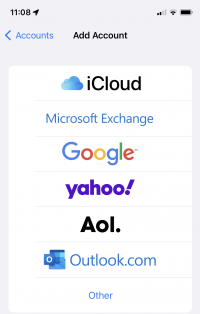
- Choose Exchange as the account type
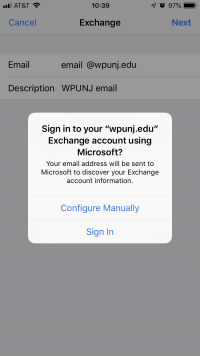
- Email: Enter your full WPUNJ email address
- Password: Enter your account's password
- User name is your full WPUNJ email address (last name,first initial@wpunj.edu e.g., smithj@wpunj.edu)
- Description - WPUNJ. Tap Next.
- When prompted to configure, select Sign In
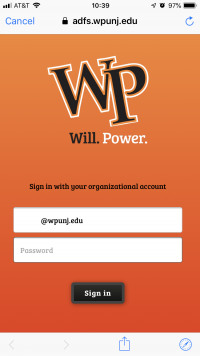
- When adding your account you will be prompted to authenticate again. Ensure you use your full WPUNJ email address.
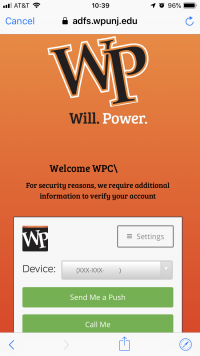
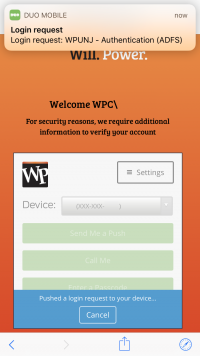
Multifactor Authentication for Email on iOS Devices
- Follow the instructions above to add your email account to your iOS device
- When you're asked how to sign in, click sign in. Do not click configure manually.
- Select the method of Multifactor Authentication you wish to use
- Authorize the login, return to the Settings screen, and click Allow.
- Choose the options (Mail, Contacts, Calendar, etc.) that you would like to sync and click Done. Your account is ready for use
