Manually Connect to Wired Network: Difference between revisions
Jump to navigation
Jump to search
Was missing a line of instruction in additional settings where the student was to click save credentials to input credentials. Swapped order of "settings" and "additional settings" for clarity and flow |
No edit summary |
||
| Line 55: | Line 55: | ||
<li>Enter in the following servers, exactly as specified: | <li>Enter in the following servers, exactly as specified: | ||
<pre>ise.wpunj.edu</pre> | <pre>ise.wpunj.edu</pre> | ||
<li>Check Any '''DigiCert High Assurance EV Root CA''' Certificates | <li>Check Any '''DigiCert High Assurance EV Root CA''' Certificates. On Windows 11 computers, it may ask for DigiCert Global G2 certificates. | ||
<div class="toccolours mw-collapsible mw-collapsed" style="width:450px"> | <div class="toccolours mw-collapsible mw-collapsed" style="width:450px"> | ||
[[Image:ENS-ISE-LocalAreaConnection-Peap.PNG|center|450px]] | [[Image:ENS-ISE-LocalAreaConnection-Peap.PNG|center|450px]] | ||
Latest revision as of 09:30, 14 April 2025
Manually Connect to Wired Network
It may be necessary to use these instructions if your browser or computer do not allow you to execute the Cisco Network Setup Assistant.
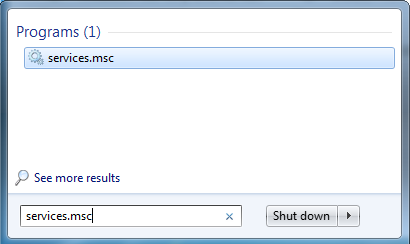
- Click on Start > Run and type in services.msc and press enter
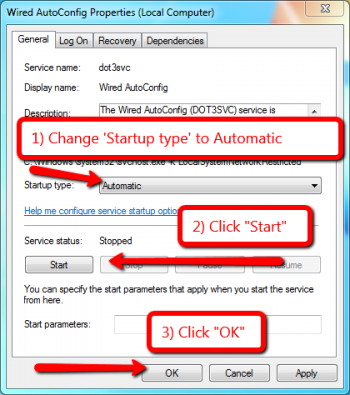
- Right click on Wired AutoConfig and left click on Properties.

- Make the following changes:
- Change Startup type to Automatic.
- Click Start to start the service
- Click OK to save changes
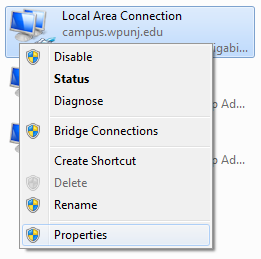
- Access your Network Interfaces via Control Panel. (Start > Control Panel > Network and Sharing Center > Change adapter settings)
- Right Click on your Local Area Connection (Ethernet), left click on properties.
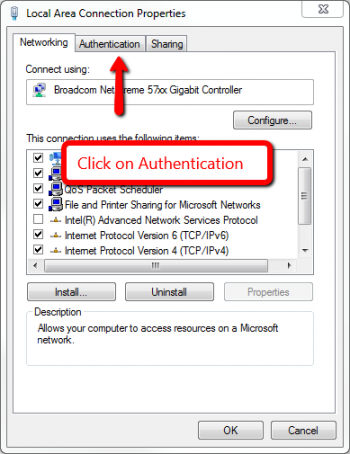
- Left Click on Authentication Tab
- Make Sure that the following items are checked
- Enable IEEE 802.1x authentication
- Remember my Credentials for this connection each time I'm logged in
- Fallback to unauthorized network access
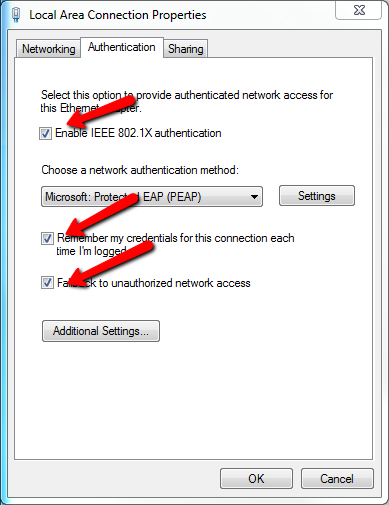
- Make sure that Authentication Method is Microsoft: Protected Eap (PEAP)
- Left Click on Settings and make the following changes:
- Check Validate Server Credentials
- Check Connect to these servers:
- Enter in the following servers, exactly as specified:
ise.wpunj.edu
- Check Any DigiCert High Assurance EV Root CA Certificates. On Windows 11 computers, it may ask for DigiCert Global G2 certificates.
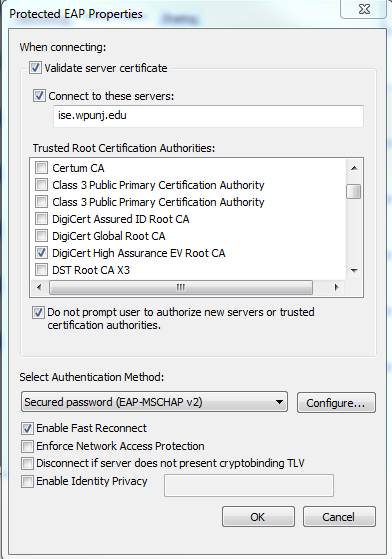
- Check Do Not prompt user to authorize new servers or trusted certification authorities
- Change Select Authentication Method to Secured password (EAP-MSCHAP v2)
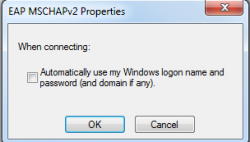
- Click Configure and uncheck Automatically use my Windows logon name and password (and domain if any) and click OK.
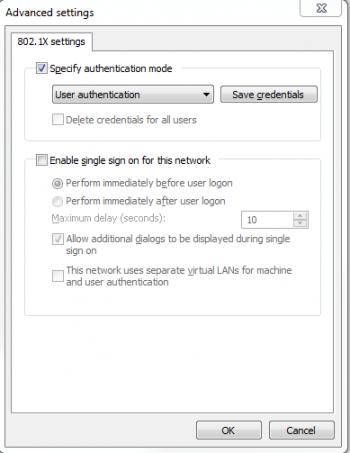
- Left Click on Additional Settings and make the following configuration changes:
- Check Specify Authentication Mode
- Select User Authentication
- Left Click Save Credentials and enter your WP Connect log in information
- Left Click OK to save settings and return to the Authentication Tab of Local Area Connection Properties
- Click OK on all open dialog boxes in order to save settings and apply.
- You may need to un-plug and re-plug your device for the settings for the connection to take. You should now have full access to the WPUNJNet. Network Services


