Webex: Difference between revisions
Mccafferys (talk | contribs) |
Mccafferys (talk | contribs) |
||
| Line 55: | Line 55: | ||
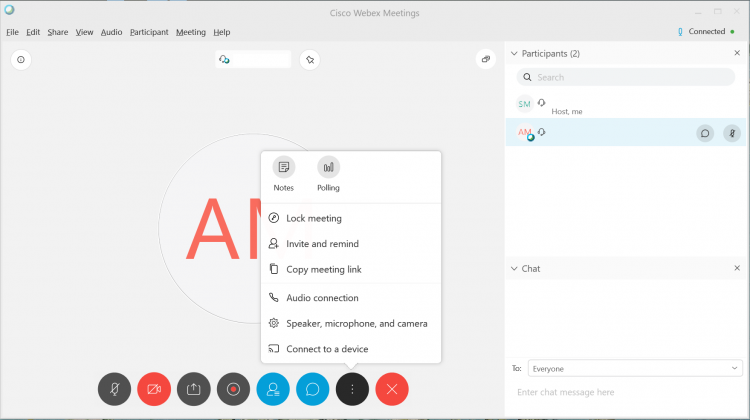
#Invite more attendees and other options by clicking the 3 vertical dots. <div class="toccolours mw-collapsible mw-collapsed" style="width:300px">[[File:webex16.png | 750px]]</div> | #Invite more attendees and other options by clicking the 3 vertical dots. <div class="toccolours mw-collapsible mw-collapsed" style="width:300px">[[File:webex16.png | 750px]]</div> | ||
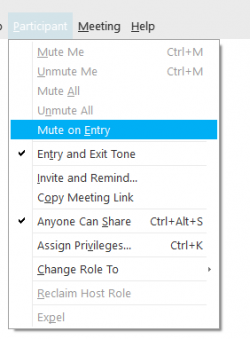
#Ensure participants are on mute as soon as they enter the meeting so that the main presenter can be uninterrupted upfront. If necessary, the user can unmute themselves at a later time or the meeting host can unmute them. <div class="toccolours mw-collapsible mw-collapsed" style="width:300px">[[File:webex38.PNG | 250px]]</div> | #Ensure participants are on mute as soon as they enter the meeting so that the main presenter can be uninterrupted upfront. If necessary, the user can unmute themselves at a later time or the meeting host can unmute them. <div class="toccolours mw-collapsible mw-collapsed" style="width:300px">[[File:webex38.PNG | 250px]]</div> | ||
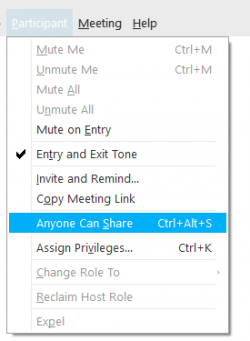
#Avoid unauthorized screen/application sharing by unchecking “Anyone can share”. If necessary, the host can designate specific users as presenters in the course of the meeting. | #Avoid unauthorized screen/application sharing by unchecking “Anyone can share”. If necessary, the host can designate specific users as presenters in the course of the meeting. <div class="toccolours mw-collapsible mw-collapsed" style="width:300px">[[File:webex42.PNG | 250px]]</div> | ||
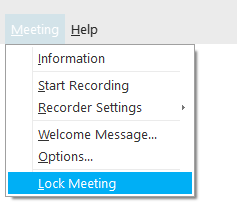
#Once all the participants are in the meeting, the host can lock the meeting. Anyone trying to join after the meeting room has been locked will be placed in the lobby and will require authorization to enter the meeting. <div class="toccolours mw-collapsible mw-collapsed" style="width:300px">[[File:webex39.PNG | 250px]]</div> | #Once all the participants are in the meeting, the host can lock the meeting. Anyone trying to join after the meeting room has been locked will be placed in the lobby and will require authorization to enter the meeting. <div class="toccolours mw-collapsible mw-collapsed" style="width:300px">[[File:webex39.PNG | 250px]]</div> | ||
#To avoid users being distracted by other participants, pin the video of the presenter for everyone in the meeting.<div class="toccolours mw-collapsible mw-collapsed" style="width:300px">[[File:webex40.PNG | 250px]]</div> | #To avoid users being distracted by other participants, pin the video of the presenter for everyone in the meeting.<div class="toccolours mw-collapsible mw-collapsed" style="width:300px">[[File:webex40.PNG | 250px]]</div> | ||
Revision as of 09:36, 7 April 2020
What is Webex?
Webex is Cisco’s video conferencing platform. It allows individuals to make, receive, and schedule video calls and conferences from any device. Webex meetings are highly immersive, providing HD video, wireless content sharing and much more. Webex Meetings can have up to 25 participants and Webex Events can have up to 300. Webex meeting would be more collaborative whereas Webex events are more ideal for presentations and a larger audience.
Using the Full Application
The full application is available through the Software Center on University imaged machines. For personal machines, go to https://www.webex.com/downloads.html to install full application. Please note it is useful to have the full application installed but not required. It is best to schedule meetings through the web version.
Using the Web Version
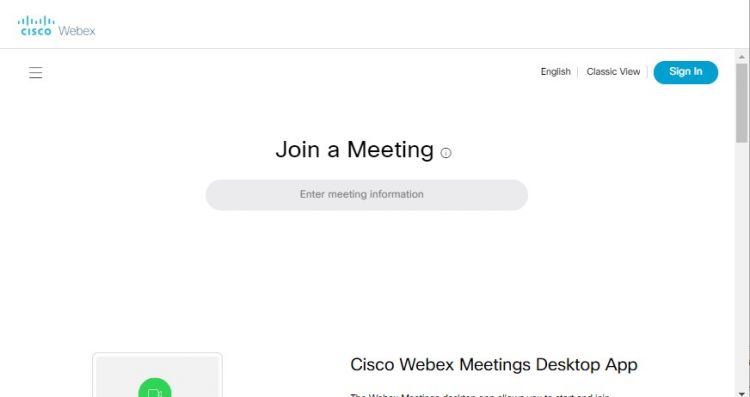
From your web browser, Webex is available at www.wpunj.edu/webex.
- Click Sign in
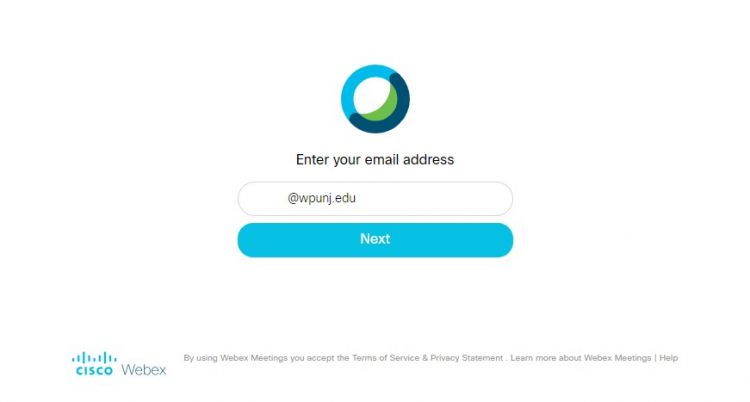
- Enter your full WPU email address
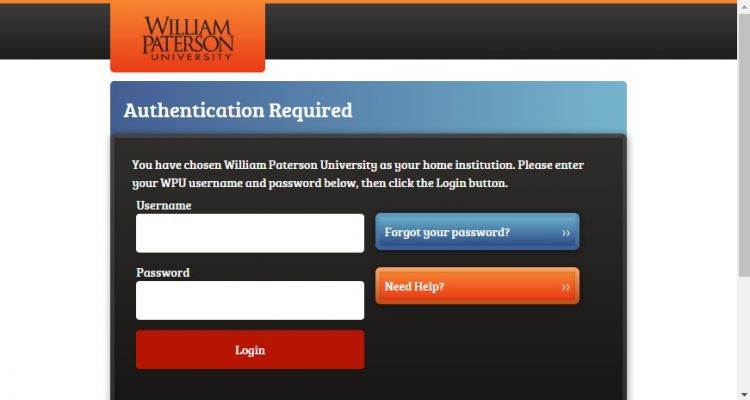
- Sign in again with WPU login and Duo authentication.
Scheduling a Meeting from the Web
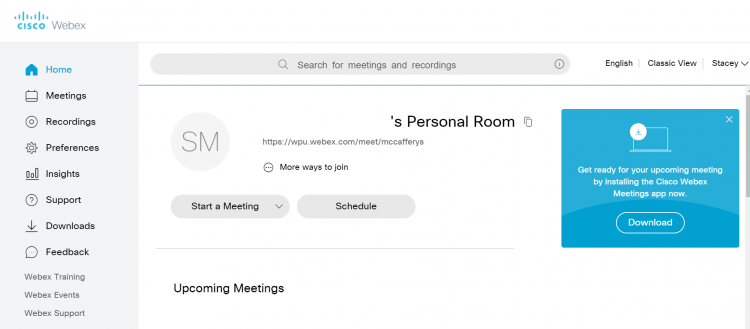
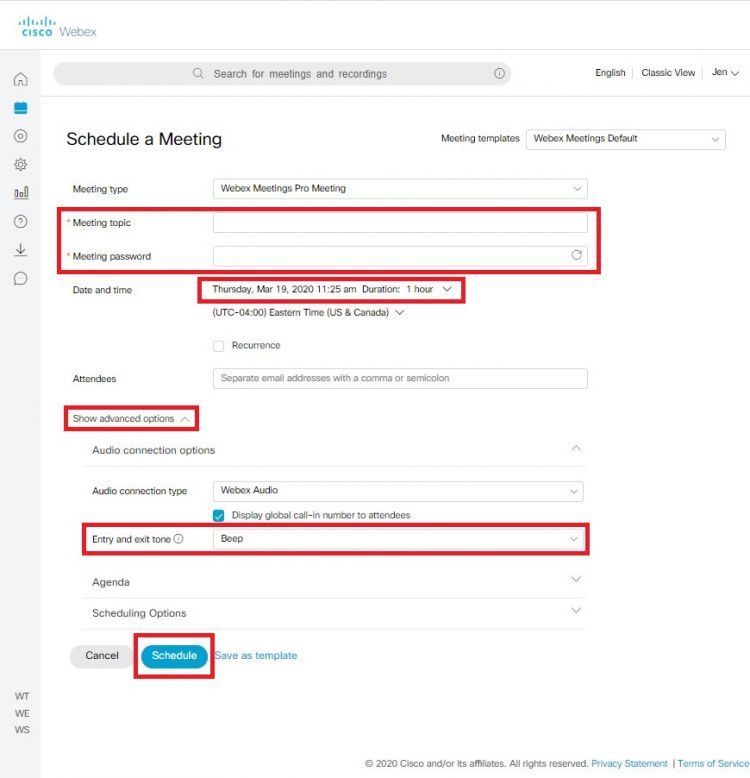
- Click "Schedule."
- Fill required sections.
Starting a Meeting from the Web
Whoever creates the Meeting will be able to "start" the meeting. Once the meeting is started, attendees can "join."
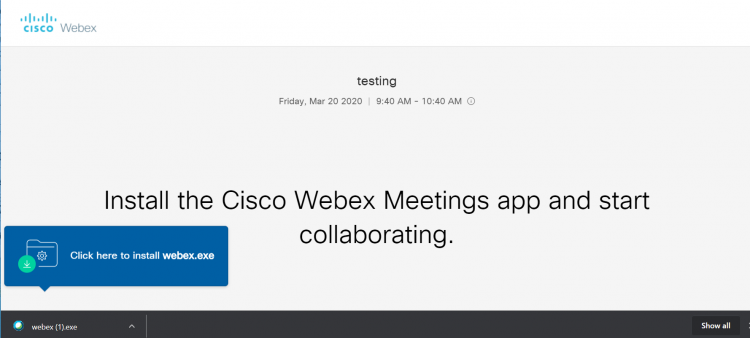
- Click "Start a Meeting" and follow prompt to install webex.exe.
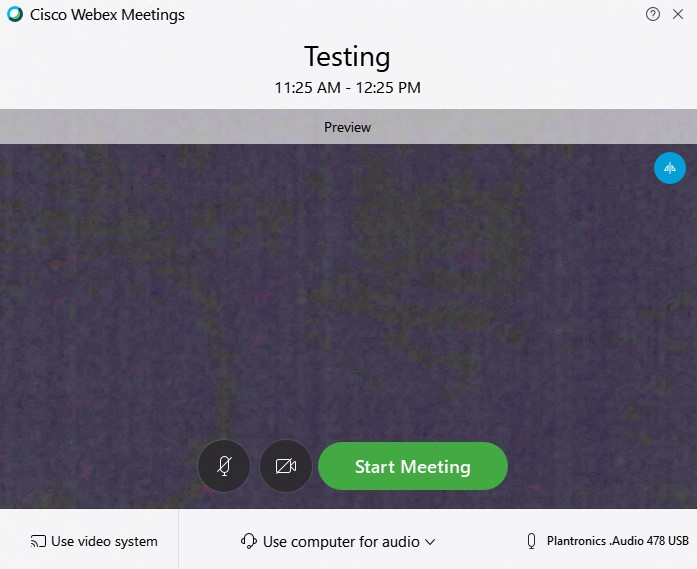
- Click "Start Meeting" when you are ready.
- Once you start the meeting, others will be able to join.
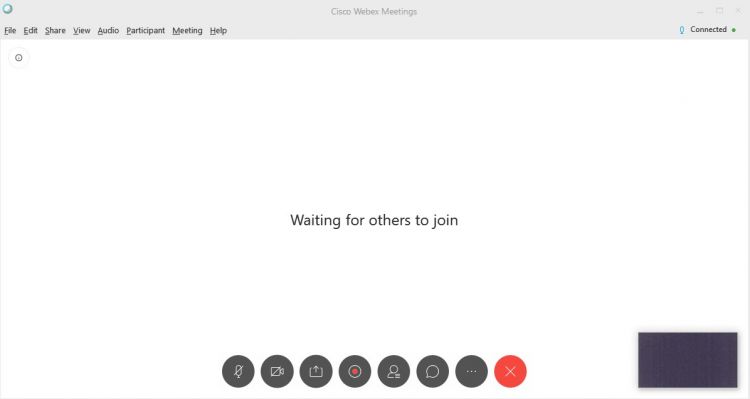
- If you click "Participant" at the top, you can edit settings for participants.
- In the middle of the window, you can turn your mic or camera on/off, share your screen, view participants, and more.
Audio Settings
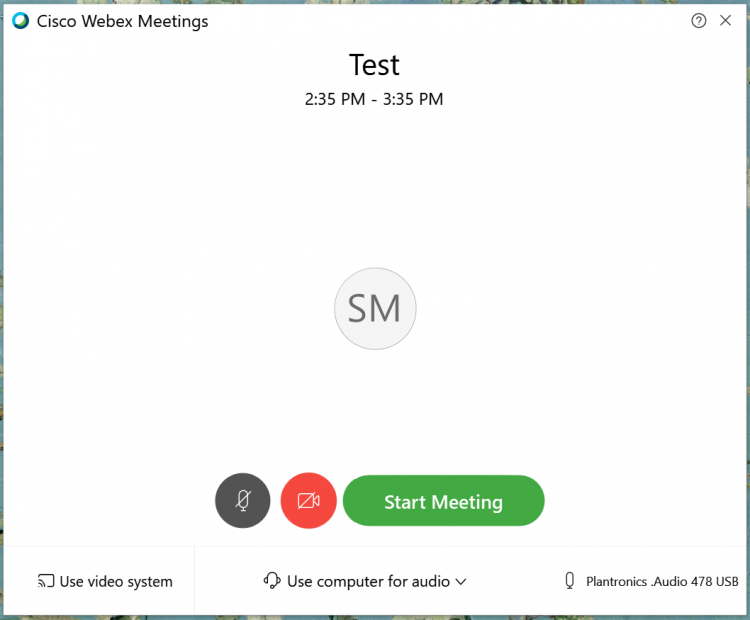
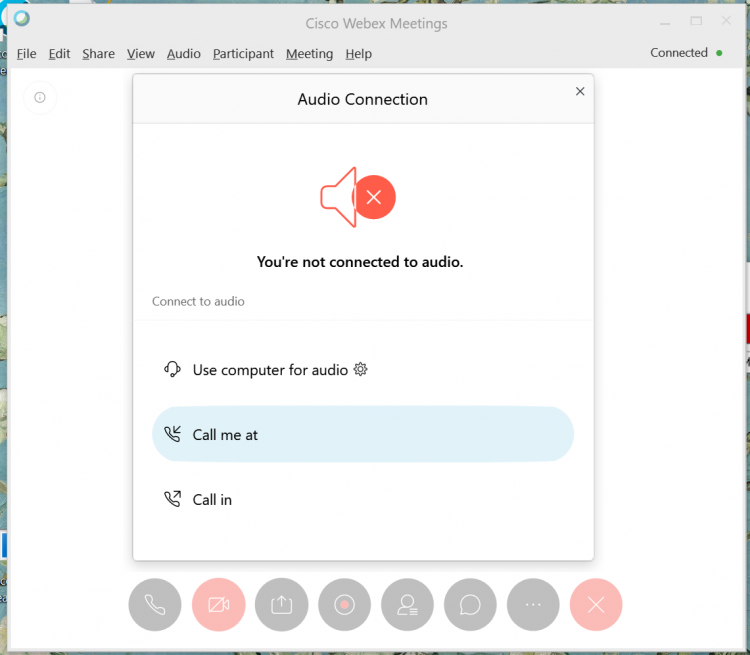
The default audio setting is to use your computer/headset. If you want to use your phone for audio, it is best to change before Joining or Starting a meeting.
For information on how to choose your audio and video settings before you join a meeting, visit https://help.webex.com/en-us/ibcbx/Webex-Teams-Choose-Your-Audio-and-Video-Settings-Before-You-Join-a-Meeting.
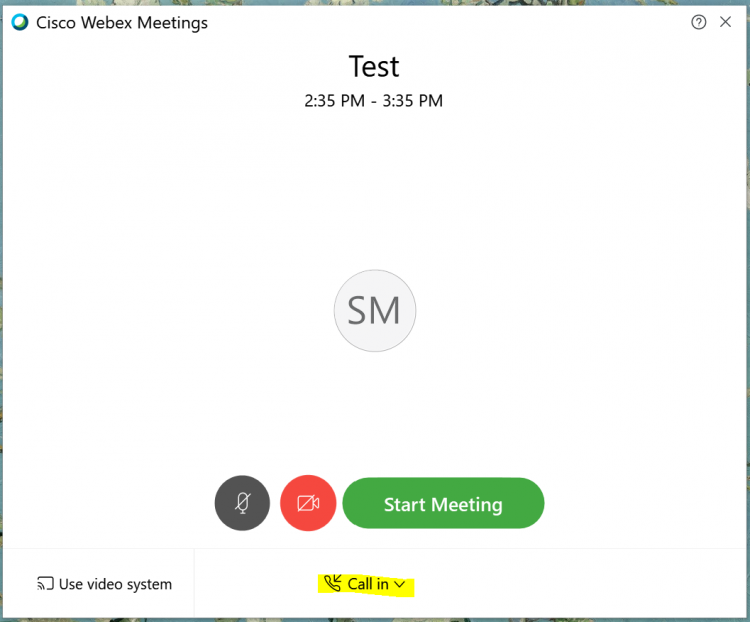
- To change the audio to your phone, notice the audio button at the bottom of the Start/Join page.
- Select the "Call in" option.
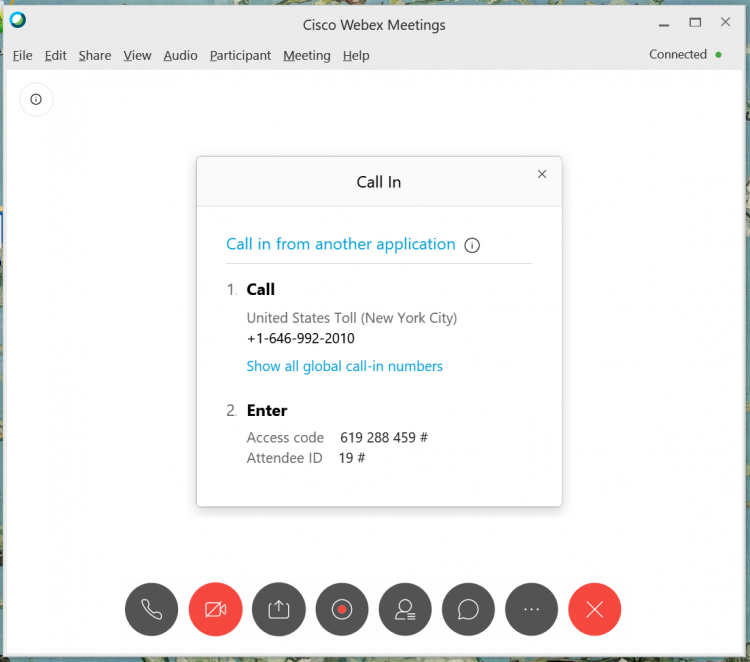
- Call the phone number listed and follow telephone prompts to enter the Access Code and Attendee ID.
- You can also use the "Call me at" option and enter your phone number and follow telephone prompts.
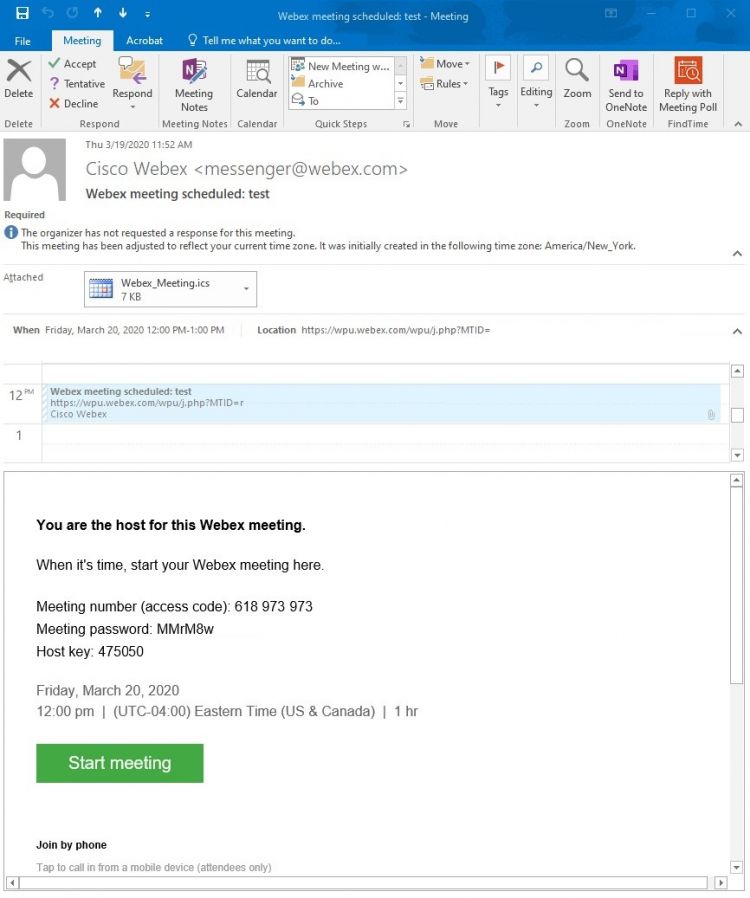
Starting a Meeting from Outlook
- Once a meeting is scheduled, it will appear on your Outlook calendar.
- You can start the meeting from the calendar event.
Webex Event
Webex Events work well for larger audiences where most participants are there to see a presentation. https://help.webex.com/en-us/ngd4k6q/Get-Started-with-Cisco-Webex-Events
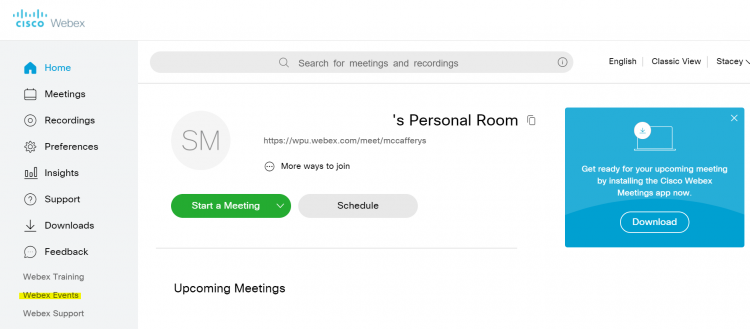
- Log into wpunj.edu/webex
- Find "Webex Events" towards the bottom of the page.
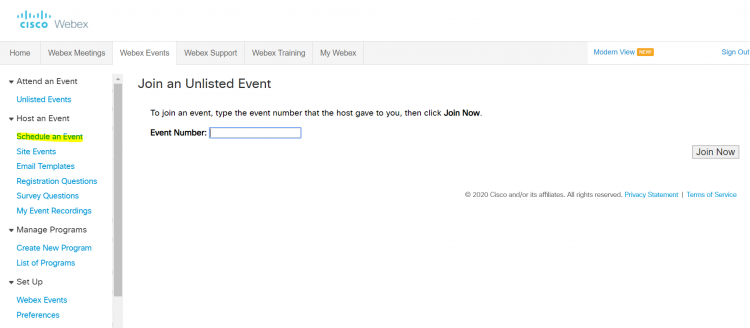
- Click "Schedule an Event." Note that whoever is hosting the event should schedule the event.
- Fill out all required sections.
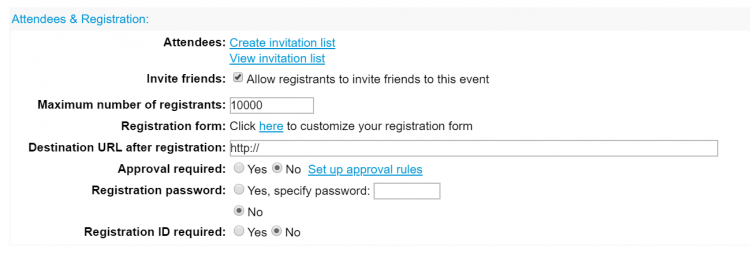
- Under "Attendees & Registration" click "Create an invitation list" to invite attendees. This group would be the audience.
- Under Presenters & Presentations, click "Create invitation list" for Presenters and Panelists.
- Once everything is correct, click "Schedule This Event."
- Send email invitations and they will now show up in Outlook Calendars.
Useful tools
We recommend testing Webex meetings and events if you have never used it before. Please see this Webex Help Center. https://help.webex.com/en-us/
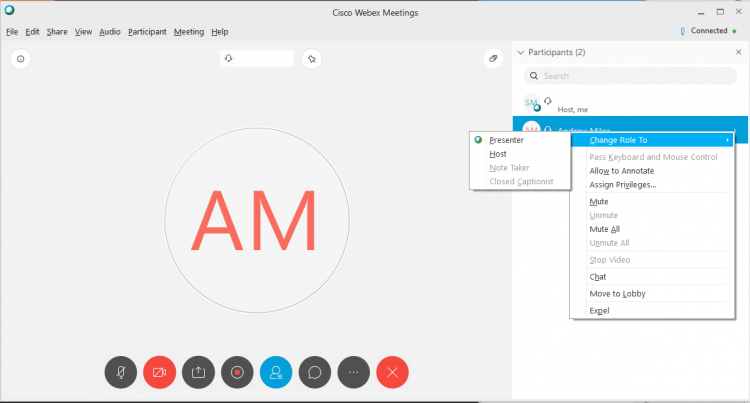
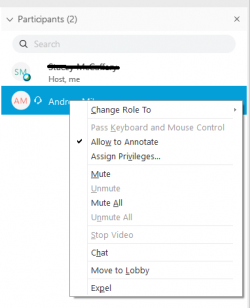
- By default, whoever creates the meeting is the Host. You can change role by right-clicking on the participant.
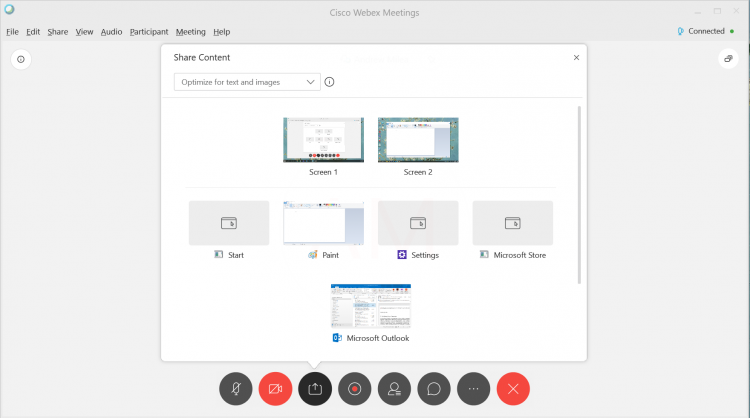
- Screen sharing can be done by clicking the share button.
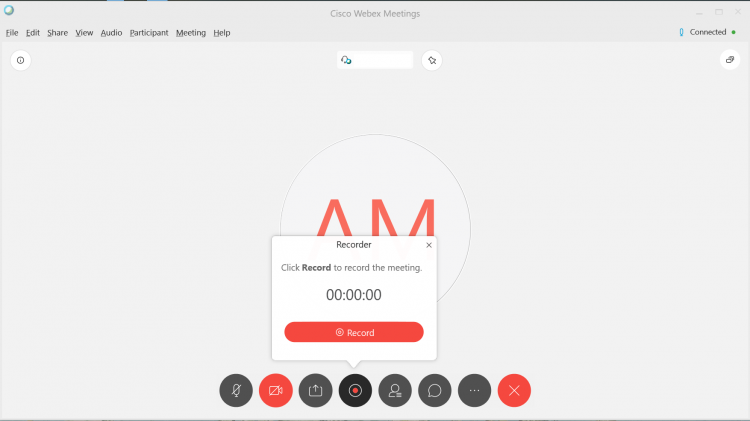
- Record your meeting using the record button.
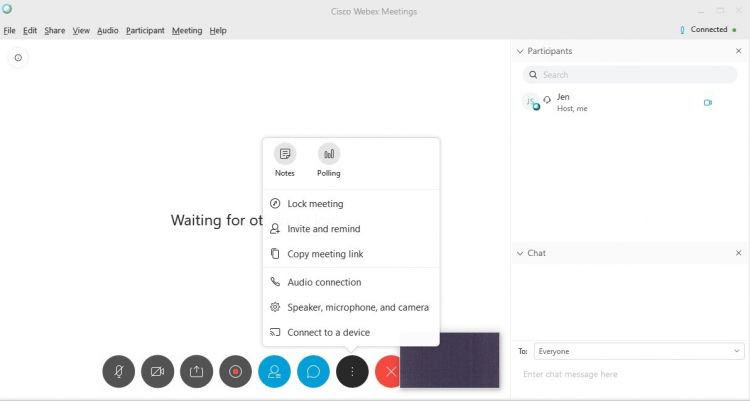
- Invite more attendees and other options by clicking the 3 vertical dots.
- Ensure participants are on mute as soon as they enter the meeting so that the main presenter can be uninterrupted upfront. If necessary, the user can unmute themselves at a later time or the meeting host can unmute them.
- Avoid unauthorized screen/application sharing by unchecking “Anyone can share”. If necessary, the host can designate specific users as presenters in the course of the meeting.
- Once all the participants are in the meeting, the host can lock the meeting. Anyone trying to join after the meeting room has been locked will be placed in the lobby and will require authorization to enter the meeting.
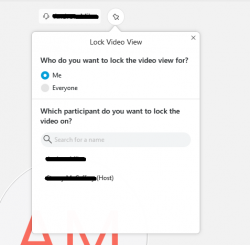
- To avoid users being distracted by other participants, pin the video of the presenter for everyone in the meeting.
- In the event a participant is disruptive there are several actions the host can take. These are available by right clicking on the user in the participant panel. The key ones are Mute, Stop Video, and in extreme cases Expel the participant. If the room is locked, the user will not be able to return, unless authorized by the host.
Phone App
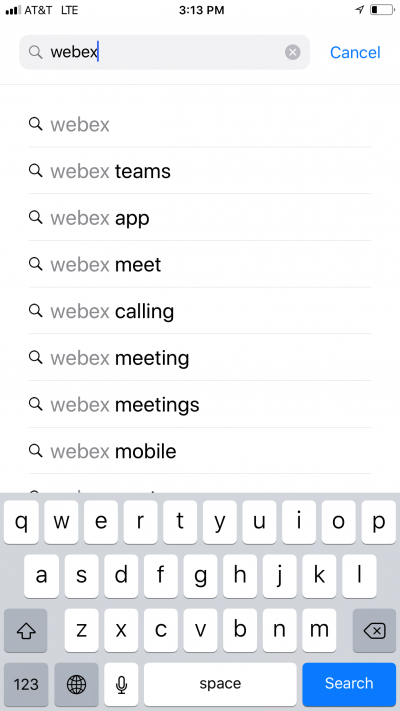
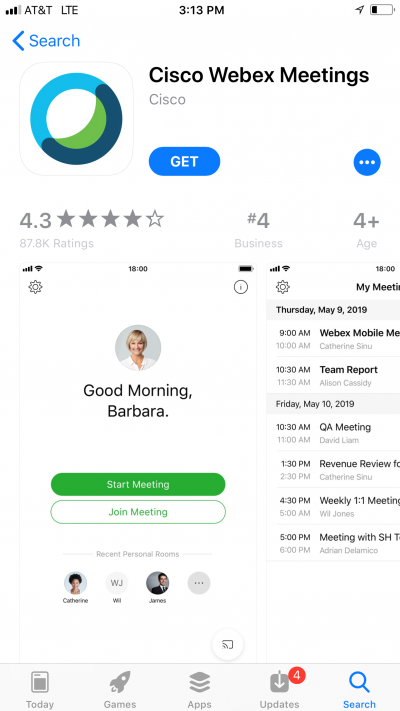
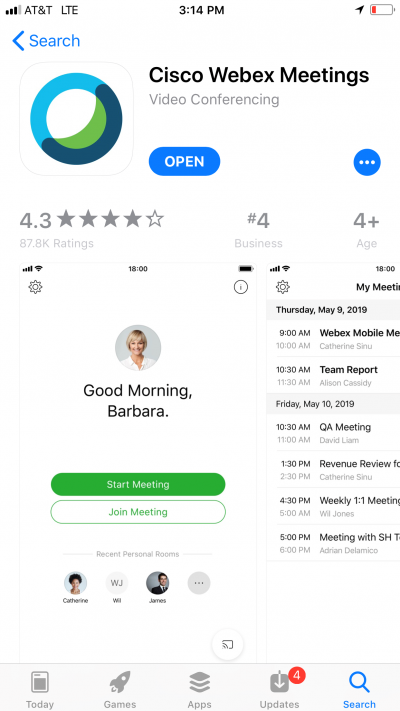
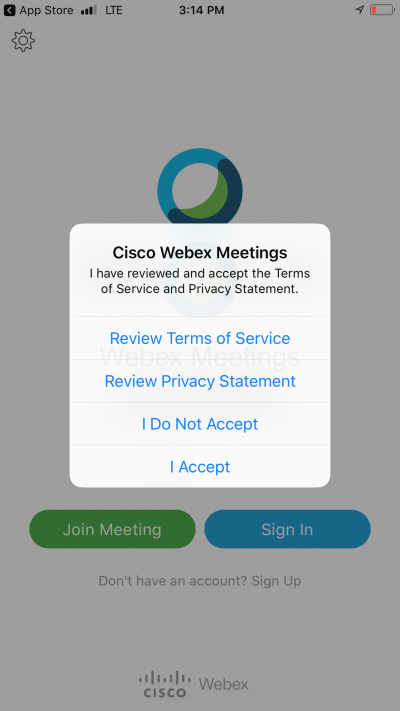
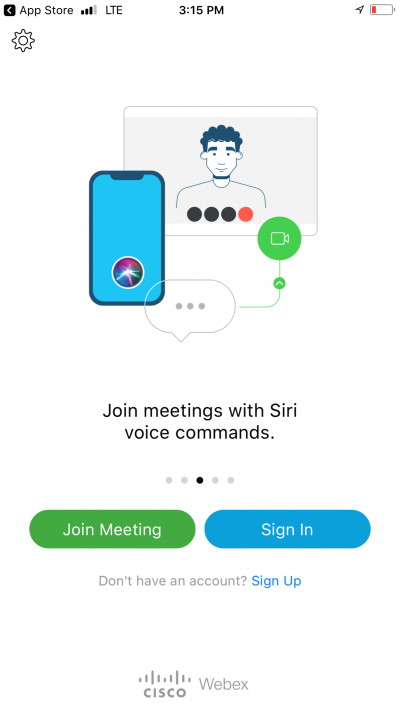
You can download the Cisco Webex on your Phone. Please note these screencaps are on an iPhone and will be slightly different for other phones and operating systems.
- Search for WebEx.
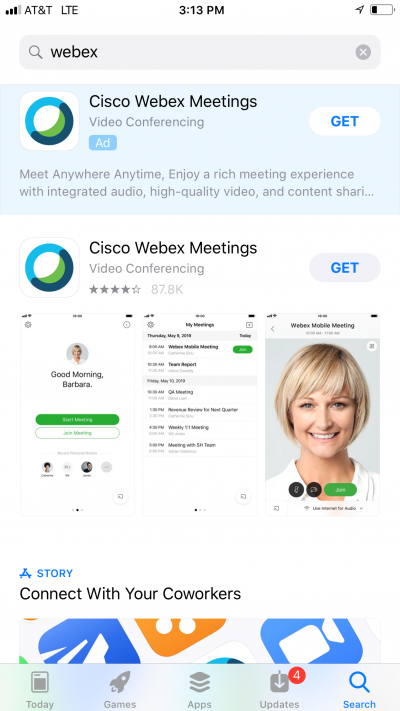
- Click "GET"
- Click "GET" again.
- Open App.
- Click "I Accept"
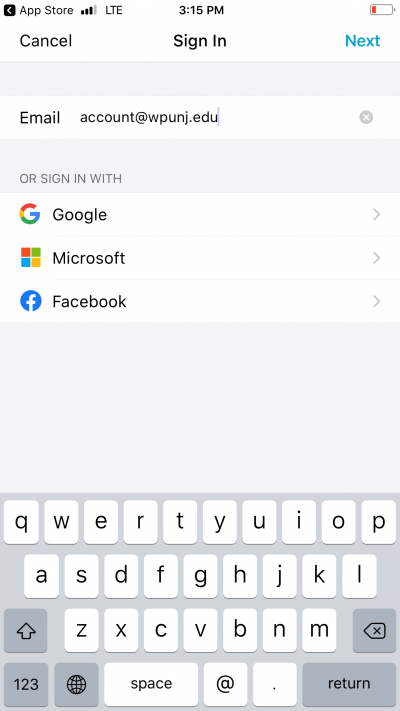
- Click "Sign in"
- Sign in with full email address.
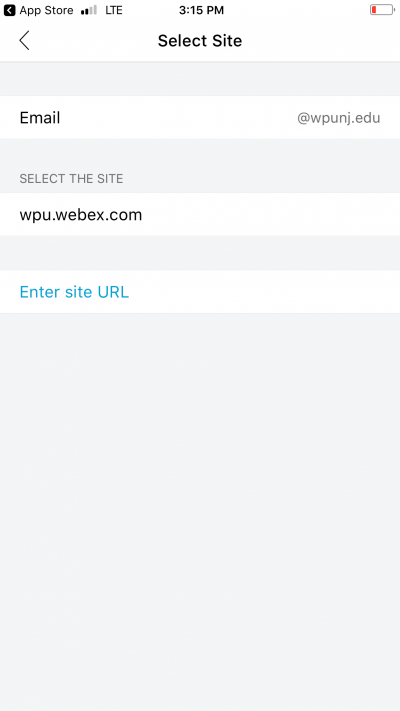
- Enter Site URL.
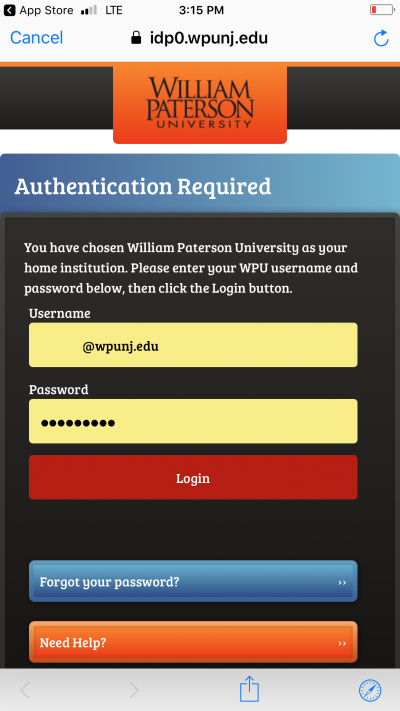
- Login with WPU Credentials.
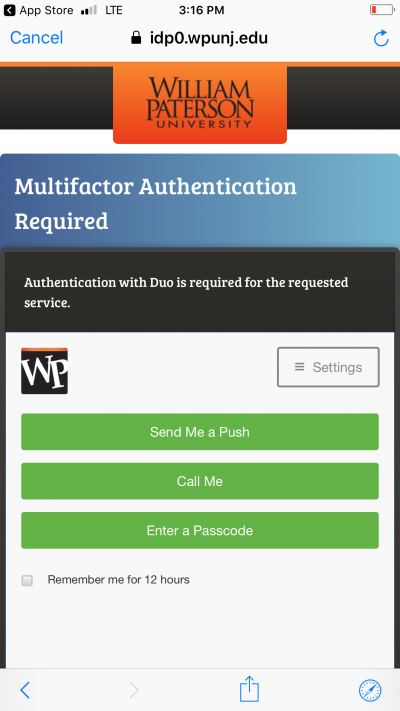
- Authenticate with Duo.
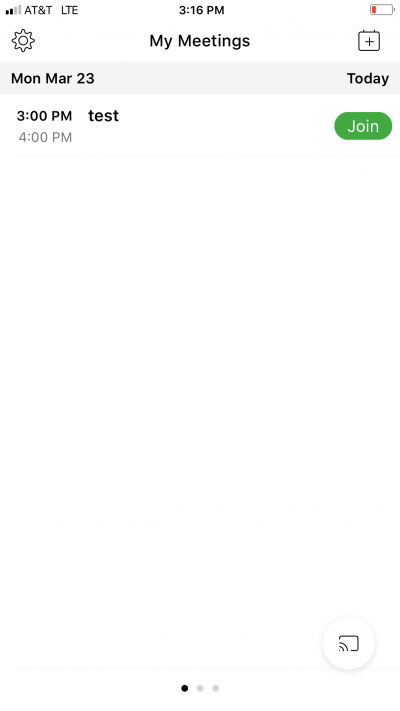
- If you have a meeting already set, you can select "Join."
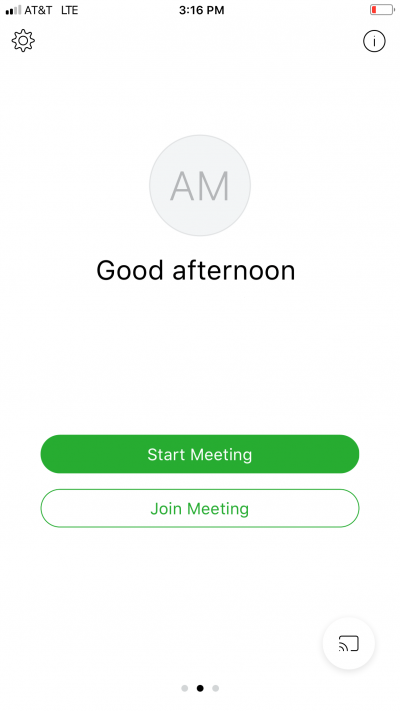
- Click "Join Meeting."
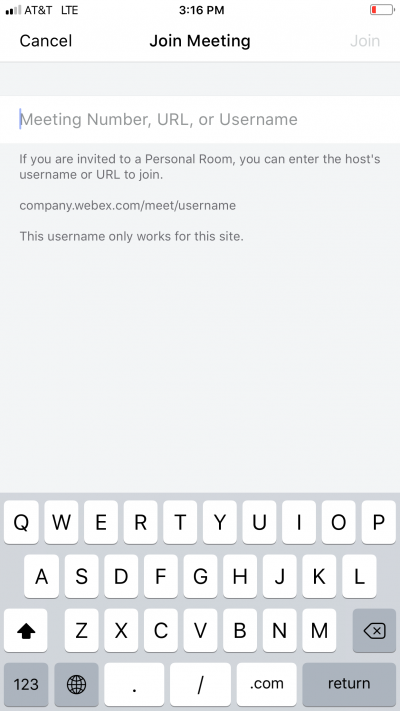
- Enter Meeting Number which can be found in your email.
